Family, friends, and food: the ultimate trifecta for Fourth of July festivities. Make your Independence Day backyard cookout the highlight of the summer with these 24 foods your guests won't want to miss! These practical, no-nonsense dishes are make-ahead-friendly, so you can join in the revelry without being glued to the kitchen.
Don't lose this article. Enter your email below, and I'll send it to you right now. Plus a little encouragement and inspiration from me, straight to your inbox.
We get it, hosting company on a big holiday is a recipe for chaos. But these foods will keep the party moving and grooving, so you can too. Let freedom ring!

Dinner is handled every Sunday
Get 5 easy family dinners, printable recipe cards, and one grocery list. Simple meals, normal ingredients, no more starting from zero at 5pm.
1) Grilled BBQ Baby Back Ribs with smoky dry rub
Ingredients
Method
- Rub ribs all over and let rest 30 minutes at room temp or up to 4 hours in fridge.
- Preheat grill to medium indirect heat (about 300°F). Place ribs bone-side down away from direct flame.
- Cook 1.5–2 hours, turning once, until meat pulls back from bones.
- Brush with BBQ sauce, move briefly to direct heat to caramelize, about 2 minutes per side. Prep time: 35 minutes | Cook time: 120 minutes | Servings: 6
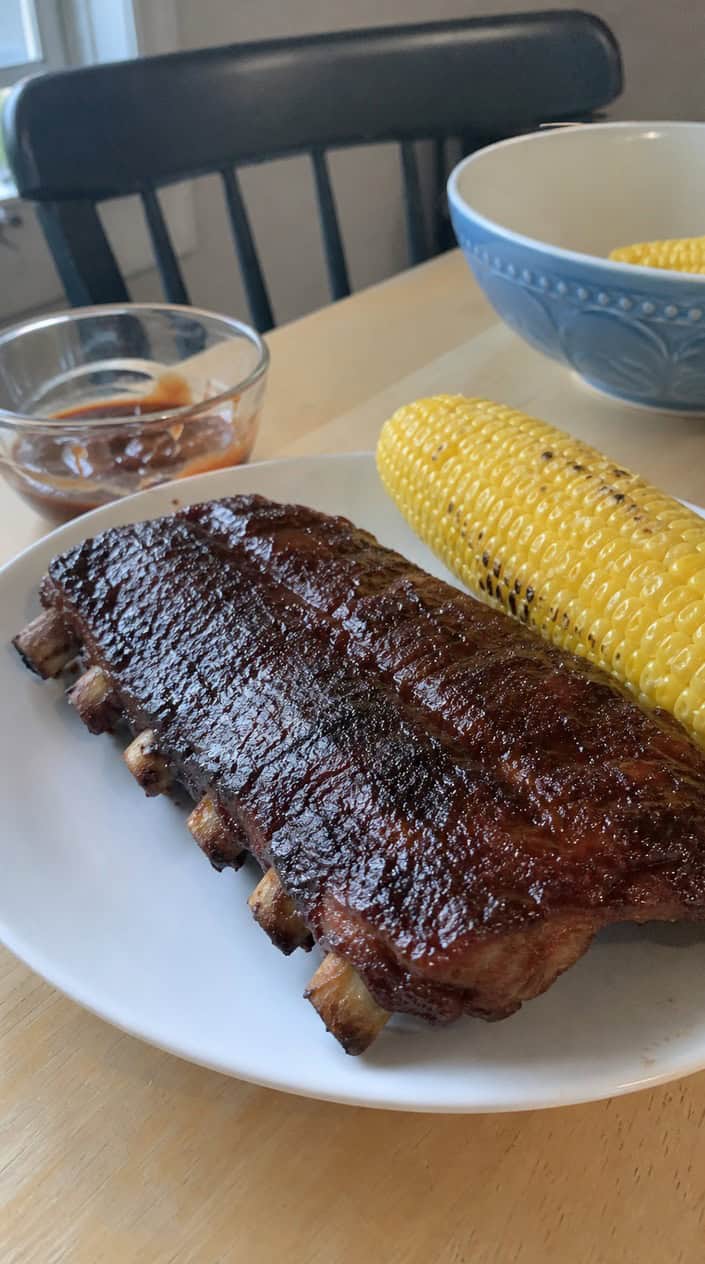
When I arrive at a barbecue, I make a beeline for the baby-back ribs. These grilled BBQ baby back ribs with a smoky dry rub are sweet-tangy perfection that your guests will go crazy over. Compared to other types of ribs, baby back ribs have less fat and a shorter cooking time (2 hours). Sugar, salt, paprika, pepper, garlic powder, and cayenne make an excellent sweet-and-spicy dry rub.
For extra-tender ribs, you could wrap them in foil about halfway through cooking, then remove the foil, brush the ribs with BBQ sauce, and move them to direct heat to caramelize. Sweet, savory, melt-in-your-mouth ribs…yum!
2) Grilled Corn on the Cob with lime-chili butter
Ingredients
Method
- Mix butter, lime zest, lime juice, chili powder, paprika, and salt in a bowl until smooth.
- Preheat grill to medium-high (around 400°F). Oil grates lightly.
- Grill corn 10–12 minutes, turning every 2–3 minutes, until charred in spots.
- Brush corn with lime-chili butter while hot. Sprinkle cilantro if using and serve.
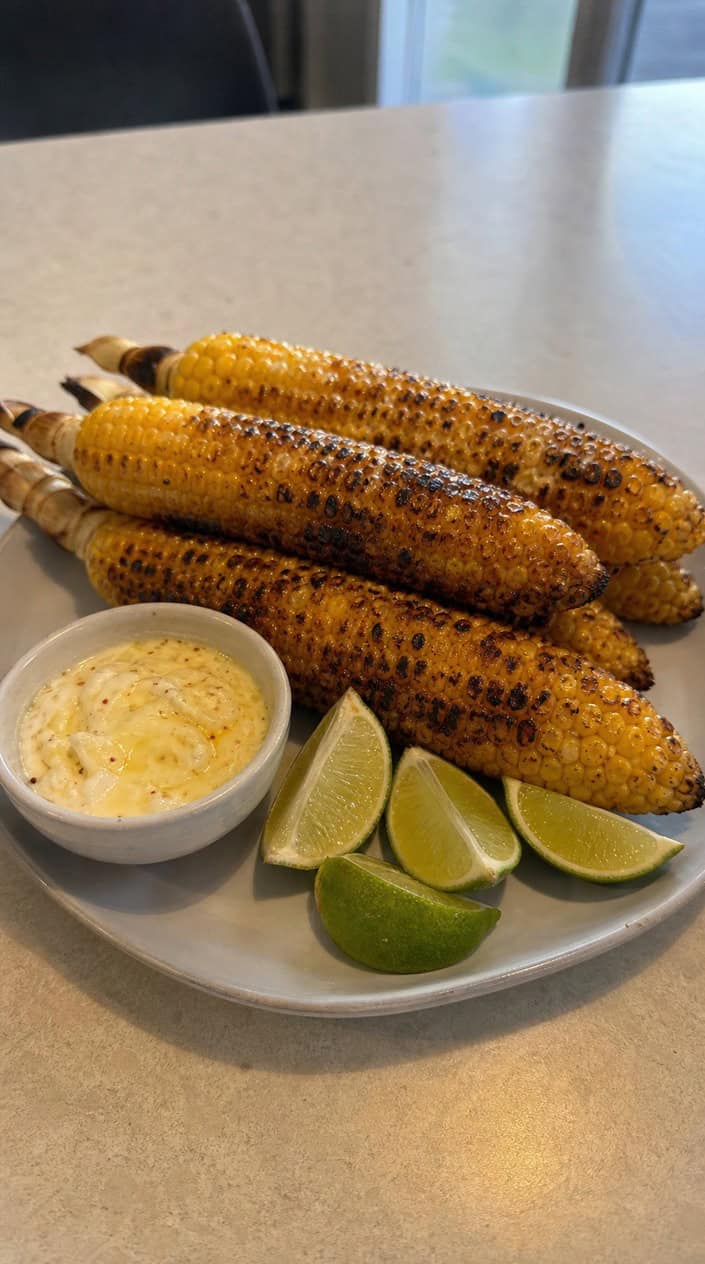
Grilled Corn on the Cob with Lime-Chili Butter
Grilled corn on the cob is a zesty take on a classic barbecue side dish. You get the richness of melted butter infused into charred kernels, balanced by the acid from the lime. You could slather the butter on the corn hot off the grill, or brush it on before grilling if charred is your vibe (which it is for me)! Serve alongside grilled fish or chicken.
3) Charred Watermelon, Feta & Mint Salad
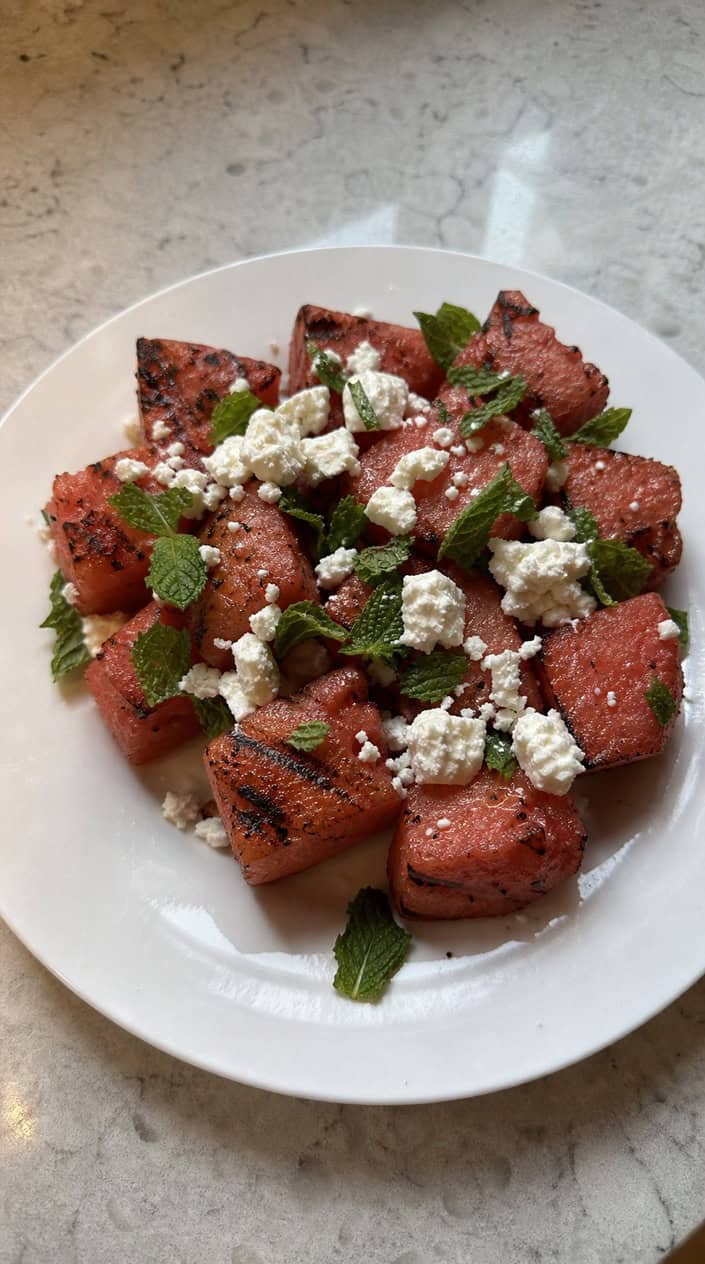
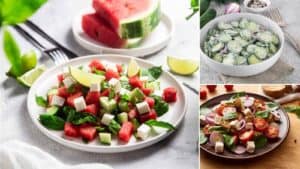
No backyard get-together is complete without watermelon. Juicy, refreshing, and delightful for kids and adults alike, level it up in this charred watermelon, feta, and mint salad. If charring watermelon is eyebrow-raising, trust me, it's worth it! The heat concentrates the sweetness and adds depth. When combined with honey, feta, mint, and lime, you've got a sweet-salty treat that cuts through the summer heat.
Watermelon is around 90 percent water and has an impressive electrolyte profile, making it excellent for hydration during the hot summer months. If you want a cheese that won't melt as fast, you could try swapping it out for crumbled halloumi. Fun fact: this dish originates from the Middle East and the Mediterranean, bringing a fun, multicultural angle to your Fourth of July celebration.
3) Charred Watermelon, Feta & Mint Salad
Ingredients
Method
- Heat a clean grill to medium-high.
- Brush the watermelon wedges lightly with olive oil.
- Grill the watermelon 2-3 minutes per side, just until light char marks appear.
- Move the watermelon to a platter and let it cool for a few minutes.
- Sprinkle feta, mint, and red onion over the wedges.
- Whisk lime juice, honey, and salt in a small bowl.
- Drizzle the dressing over the salad and serve right away.
4) Classic American Potato Salad with dill and mustard
Ingredients
Method
- Boil potatoes until tender, 12–15 minutes, then drain and cool slightly.
- Whisk mayo, mustard, vinegar, salt, and pepper in a large bowl.
- Add warm potatoes so they absorb the dressing; fold gently.
- Stir in pickles, dill, eggs, and red onion; chill at least 1 hour.
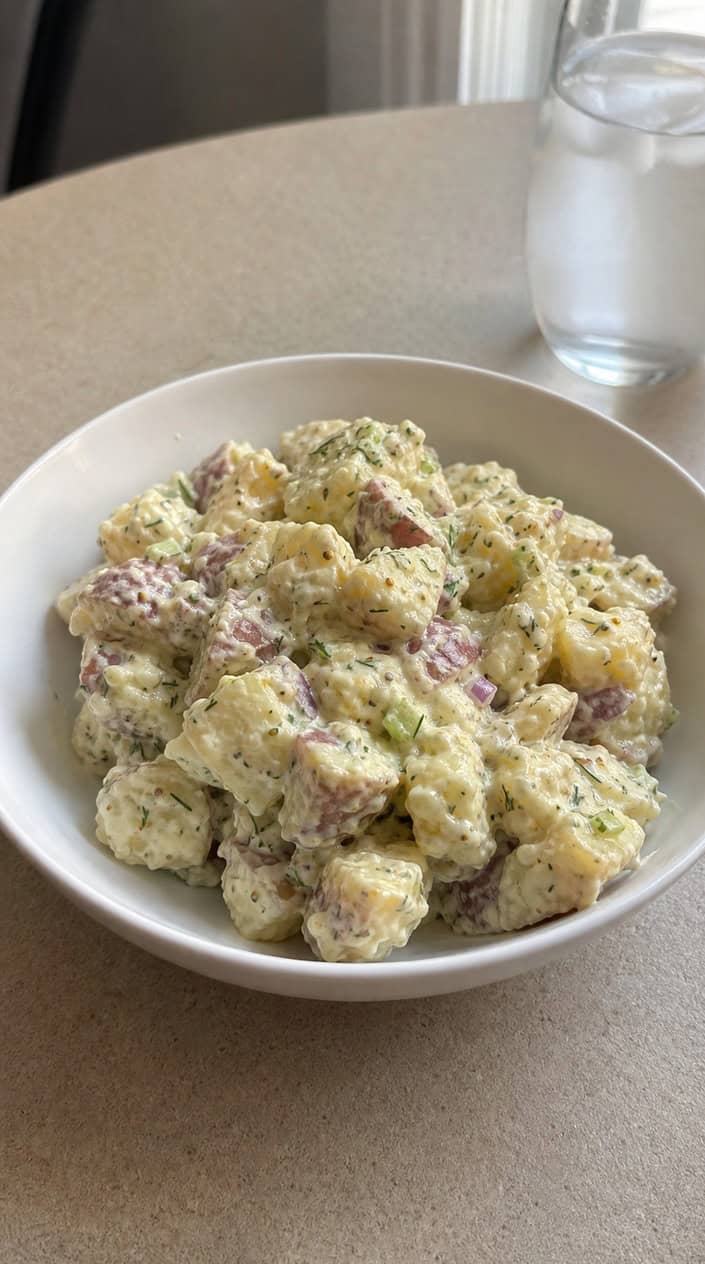
Classic American Potato Salad with Dill and Mustard
Classic American potato salad with dill and mustard is tangy, creamy, starchy goodness that's perfect for summer barbecues. The earthiness of the dill and the subtle kick of the mustard complement the mayo quite well, making it feel less heavy.
Pro tip: add the dressing while the potatoes are still warm so they absorb more flavor. If you want a more health-conscious recipe, try Greek yogurt for the creamy component. This 4th of July, you can bet that I will be going straight for the potato salad!
5) Creamy Coleslaw with apple and cider vinegar
Ingredients
Method
- Toss cabbages, carrot, and apple in a big bowl.
- Whisk mayo, yogurt, vinegar, honey, mustard, salt, and pepper until smooth.
- Pour dressing over veggies and toss until coated.
- Chill at least 30 minutes so flavors meld. Taste and adjust salt before serving.
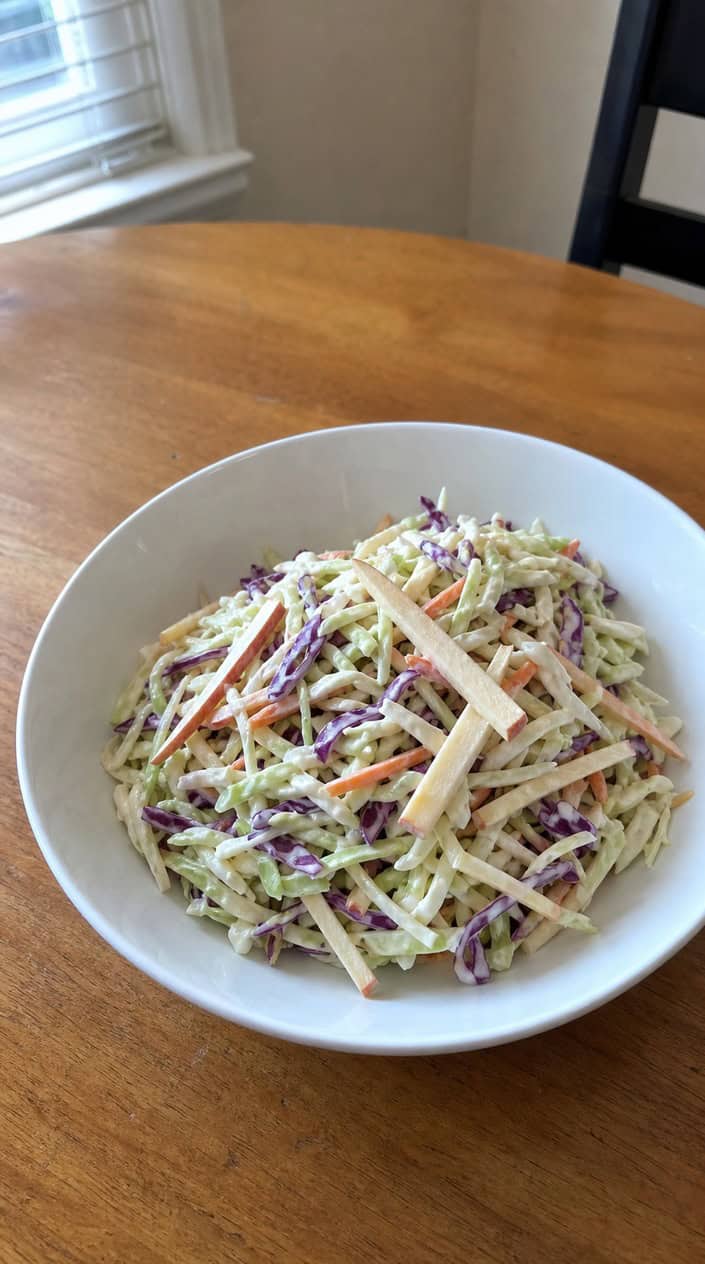
Creamy Coleslaw with Apple and Cider Vinegar
In my humble opinion, coleslaw is highly underrated. It's refreshing, respectably healthy, and cuts through the heaviness of BBQ fare. The acid from the vinegar and the natural sweetness of the apple balance the creaminess, and it pairs beautifully with heavy barbecued meats. You could swap in a Granny Smith apple for a sharper bite, or let it sit overnight to release full flavor.
6) Smoked Brisket Burnt Ends
Ingredients
Method
- Trim fat, cube brisket into 1–1.5 inch pieces. Season with salt, pepper, and garlic powder.
- Smoke at 250°F for 3 hours until internal temp ~190°F.
- Toss cubes with broth, barbecue sauce, brown sugar, and Worcestershire.
- Return to smoker in foil pan at 275°F for 1–1.5 hours until sticky and browned.
- Let rest 10 minutes, then serve with napkins.
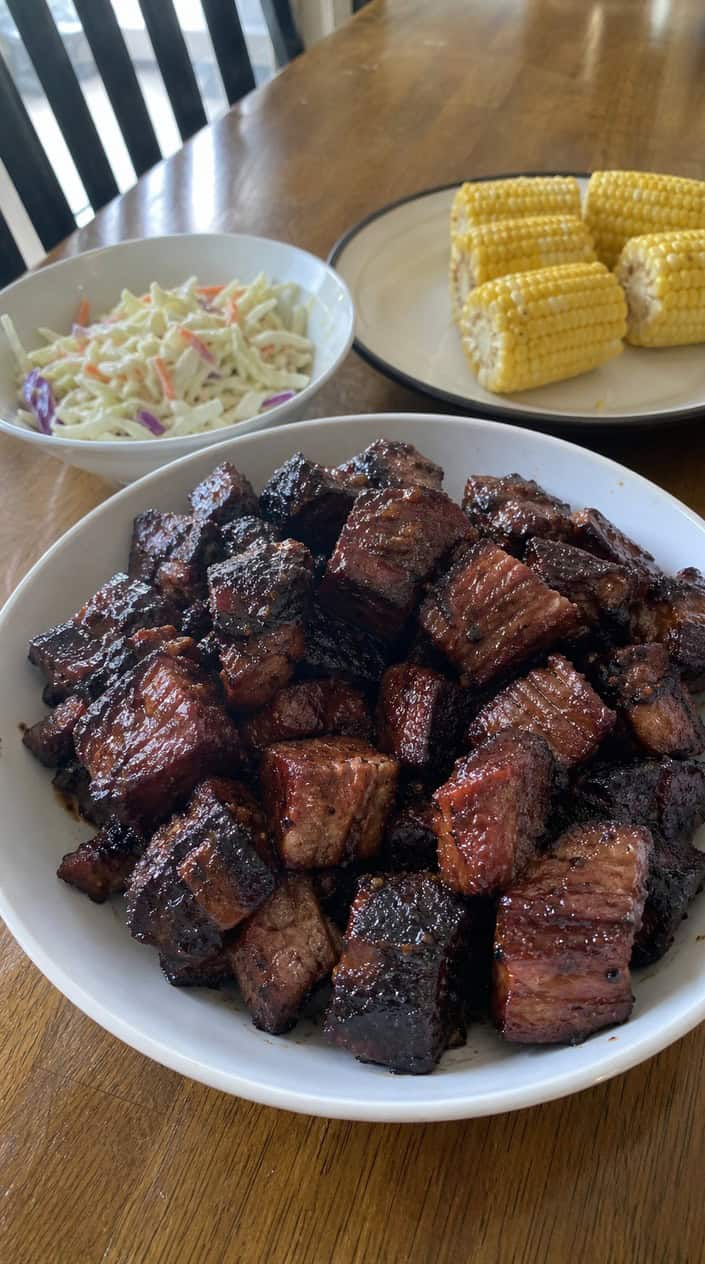
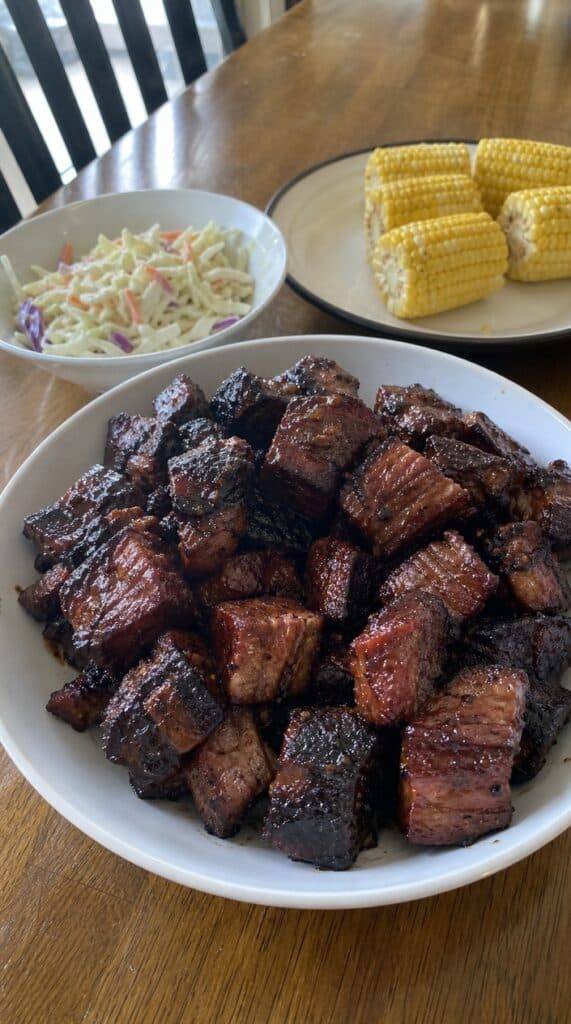
If meat were a treat, it would be smoked brisket burnt ends. These crispy, caramelized cubes are cut from the point of a smoked brisket, coated in a sticky glaze, and finished in the oven.
Burnt ends are highly marbled and re-seasoned and smoked a second time to develop a bark coating while keeping the interior tender. Essentially, you end up with barbecue candy. Seriously, why isn't this an ice cream flavor already?
7) Honey-Sriracha Glazed Drumsticks
Ingredients
Method
- Preheat oven to 400°F and line a baking sheet with foil. I always use a rack so skin crisps.
- Whisk honey, sriracha, soy, vinegar, garlic, paprika, salt, and pepper.
- Toss drumsticks with oil and half the glaze. Arrange on rack.
- Bake 25 minutes, brush with remaining glaze, then bake 10–12 more until internal temp is 165°F.
- Let rest 5 minutes. I warn the kids: hot glaze first bite.
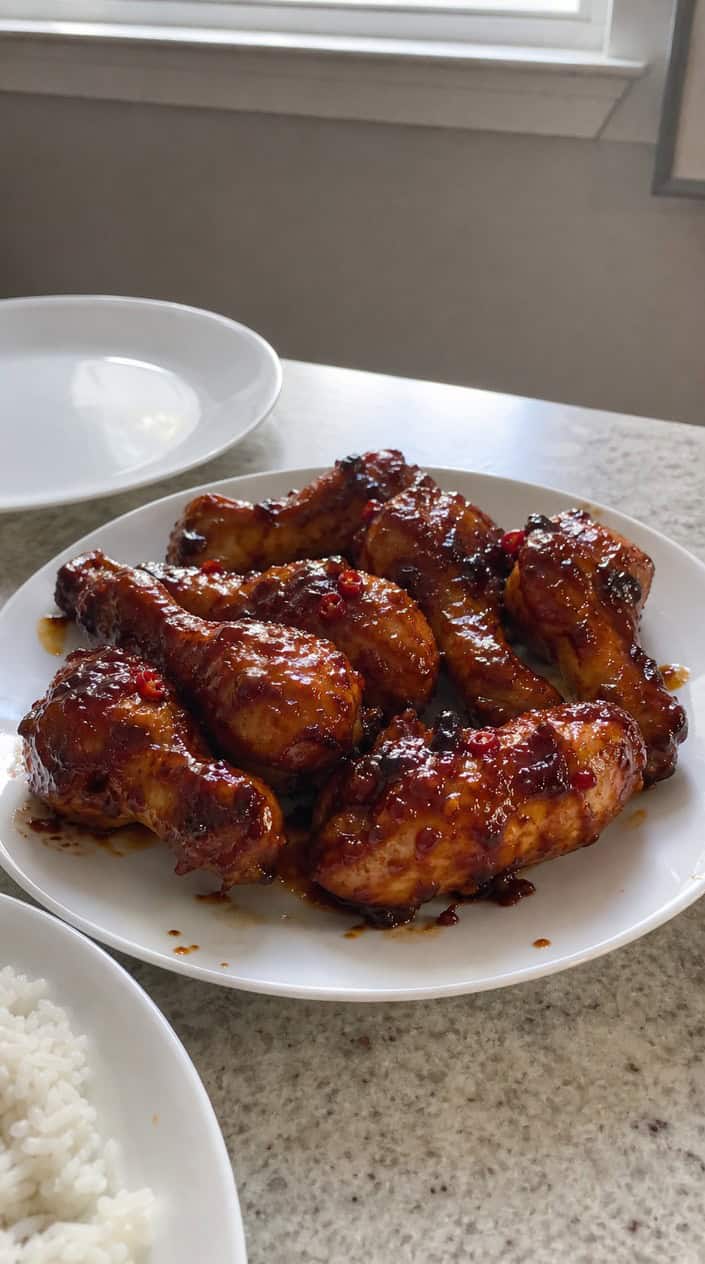
Level up your drumsticks with a spicy-sweet glaze made from honey and sriracha that caramelizes beautifully in the oven. The heat from the sriracha balances well with the sweetness so that neither one overpowers the other.
If sriracha isn't your thing, you could swap in a different hot sauce. For an extra glossy glaze, brush it on the chicken halfway through cooking. Pair with Cool Ranch or a citrusy coleslaw (see the recipe for creamy coleslaw with apple cider vinegar) to cut through the richness.
8) All-American Cheeseburger Sliders
Ingredients
Method
- Heat grill or skillet over medium-high and oil the grates or pan.
- Divide beef into 12 equal patties, season with salt and pepper.
- Cook the patties for 2 to 3 minutes per side, until their centers reach 160°F (71°C); top with cheese and let it melt.
- Toast buns briefly with butter, then assemble: bun, patty, onion, pickle, ketchup, mustard.
- Serve on a platter so folks can grab and go.
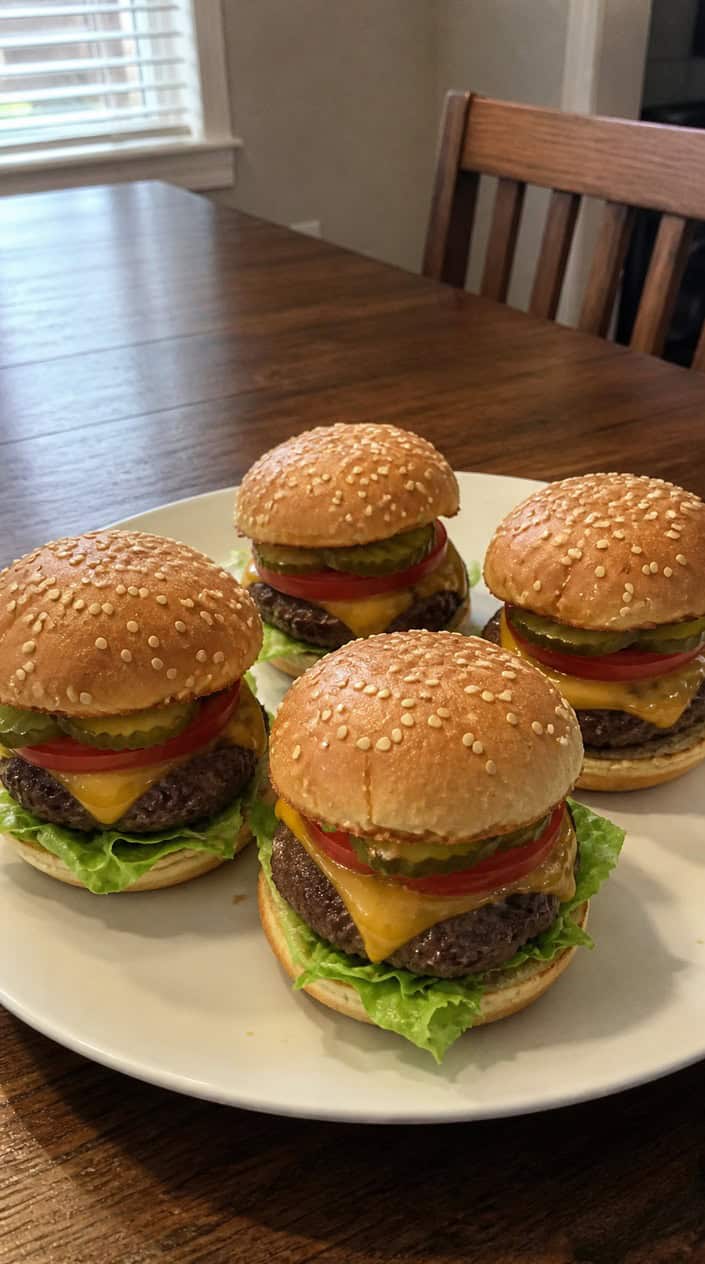
Miniature cheeseburger magnificence. Grab a 12-pack of slider buns and 1 lb of ground beef with an 80/20 fat ratio, add cheddar cheese, onion, dill pickle slices, and, of course, ketchup and mustard, and you've got a tasty appetizer or entree that kids and adults will go absolutely nuts for.
9) Grilled Lemon-Herb Chicken Thighs
Ingredients
Method
- Whisk olive oil, lemon juice, parsley, rosemary, garlic, salt, pepper, and red pepper flakes in a bowl.
- Add chicken, toss to coat, and marinate in fridge for 30–60 minutes.
- Preheat grill to medium-high (about 400°F) and oil the grates.
- Place thighs skin-side down and grill 6–7 minutes, then flip and grill 6–8 more minutes until internal temp is 165°F.
- Let rest 5 minutes before serving.
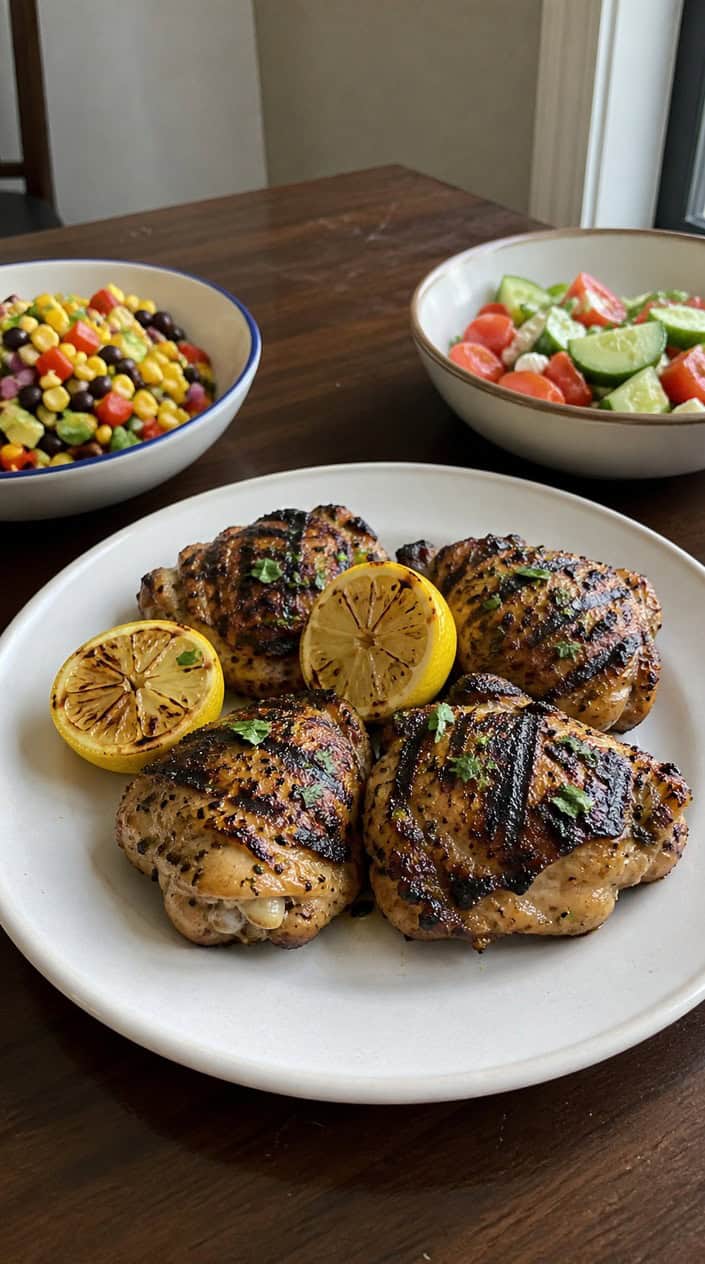
Grilled lemon-herb chicken thighs are bright, herbaceous, and charred to grilled perfection. Their bone-in size makes for a full-flavor experience. Olive oil, lemon juice, parsley, rosemary, and other herbs make a delicious coating for this chicken.
Marinate in the fridge for 30 to 60 minutes and then grill on medium-high at about 400° Fahrenheit. After grilling for just a few minutes on each side, let cool for 5 minutes, then serve. This chicken is juicy, irresistible, and easy to prep, making it an absolute win for your backyard cookout.
10) Black Bean & Corn Salsa with tortilla chips
Ingredients
Method
- Mix beans, corn, tomato, onion, cilantro, and jalapeño in a large bowl.
- Whisk lime juice, olive oil, cumin, salt, and pepper; pour over salad and toss.
- Taste and adjust salt or lime. Chill 15 minutes if you can; it tastes better cold.
- Serve with tortilla chips and watch people hover.
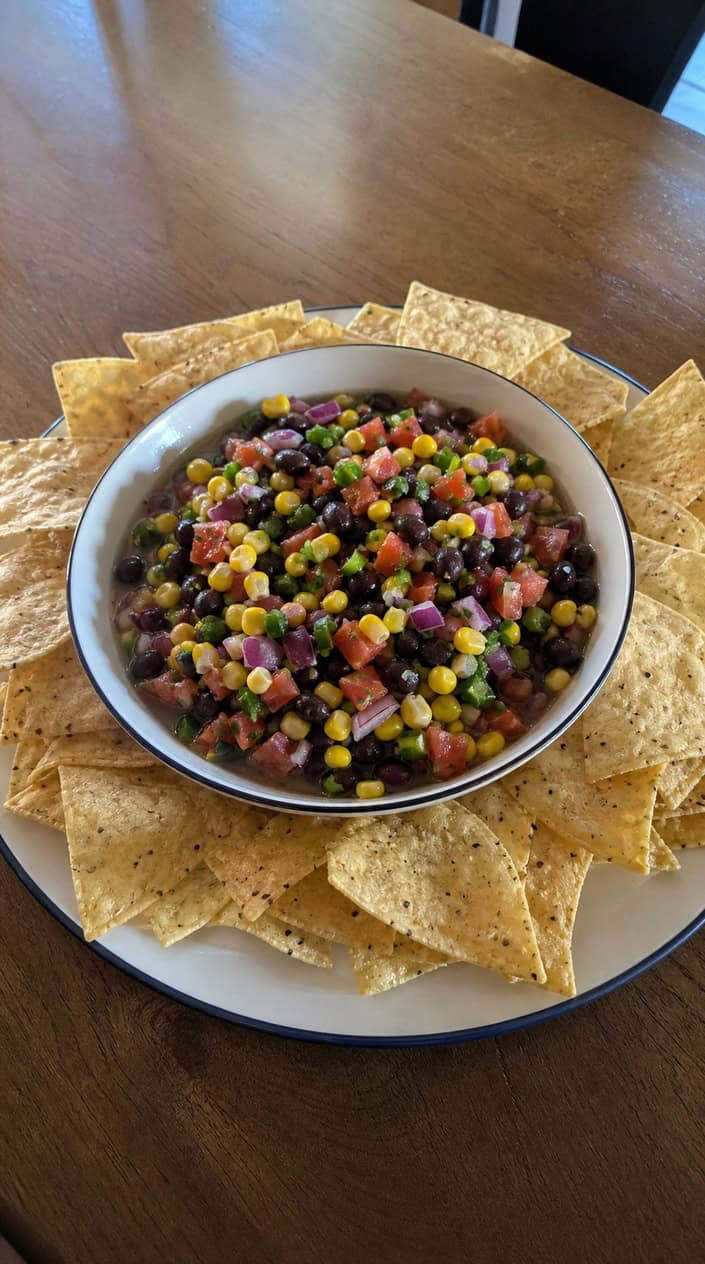
Black Bean & Corn Salsa with Tortilla Chips
Black beans and corn are zesty besties in this black bean and corn salsa with tortilla chips! If you're looking for a fresh, bright side dish, this is a terrific option, and it's also a great dish for plant-based folks.
To unlock the full flavor, you could prep it the night before. You also have the option to swap in different beans or add jalapeños for heat. Eat it as a simple side with tortilla chips or use it as a topping for grilled chicken or fish.
11) Texas-Style Pulled Pork Sandwiches
Ingredients
Method
- Rub pork with salt, sugar, paprika, pepper, and garlic powder. Let rest 30 minutes.
- Place pork in slow cooker with vinegar and water. Cook low 8–9 hours or high 5–6 until fork-tender.
- Shred pork with two forks and stir in barbecue sauce. Keep warm.
- Toast buns if desired, pile on pork, and top with coleslaw.
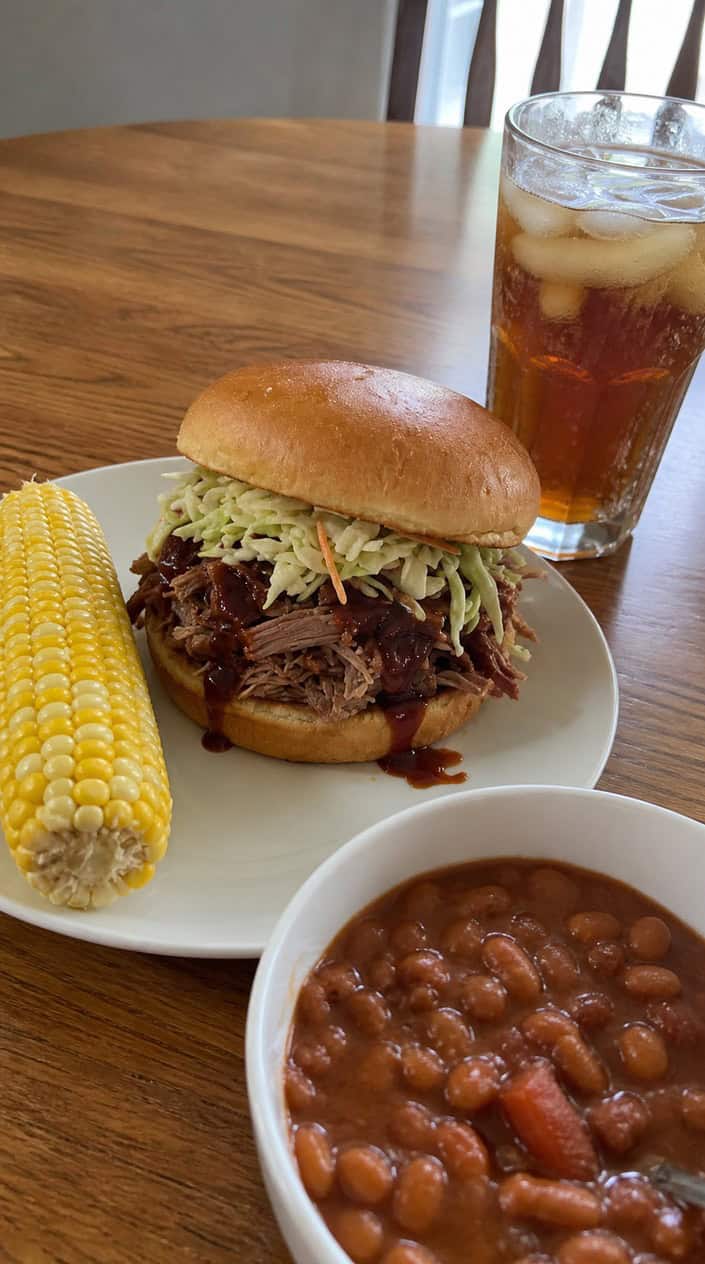
"She's from Texas, I can tell." Was Ella Langley talking about a sandwich? Pulled pork is a Texas belle of the ball, served on a bun with pickles and onions.
Cut from pork shoulder or butt, this meat is rich in fat and collagen, which break down during the long, slow cooking and bastes itself. With pulled pork, you get a lot of bang for your buck, and it yields a massive amount of meat, making it great for feeding crowds.
12) Grilled Peach Caprese skewers with balsamic
Ingredients
Method
- Heat a grill or grill pan to medium-high and brush peach halves with olive oil.
- Grill peaches cut-side down 3–4 minutes until char marks appear; cool and cut into wedges.
- Thread peach wedge, basil, mozzarella, and tomato onto each skewer.
- Whisk balsamic glaze with vinegar, salt, and pepper; drizzle over skewers just before serving.
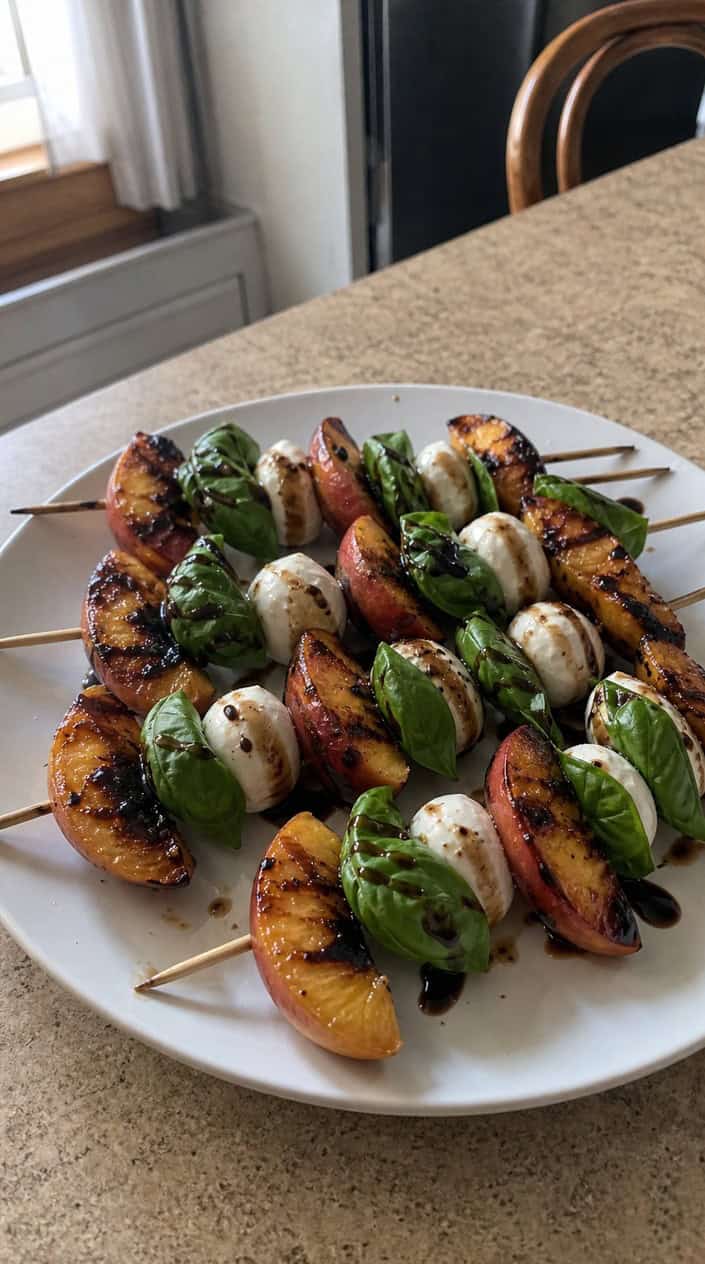
Grilled Peach Caprese Skewers with Balsamic
Easy, breezy Caprese! These grilled peach caprese skewers with balsamic offer a sweet, summery twist on classic Italian fare. Grilling the peaches caramelizes their natural sugars, creating a natural contrast with the mozzarella. Swap in burrata for extra richness, or make it an elegant treat with aged balsamic reduction.
13) Firecracker Shrimp Skewers
Ingredients
Method
- Mix olive oil, soy sauce, honey, Sriracha, paprika, garlic powder, salt, and pepper in a bowl.
- Toss shrimp in the marinade and let sit 10 minutes while you heat the grill to medium-high.
- Thread 4-6 shrimp per skewer, leaving small gaps so they cook evenly.
- Grill 2-3 minutes per side until pink and slightly charred; don’t overcook.
- Serve with lemon wedges and napkins. The kids will ask for more.
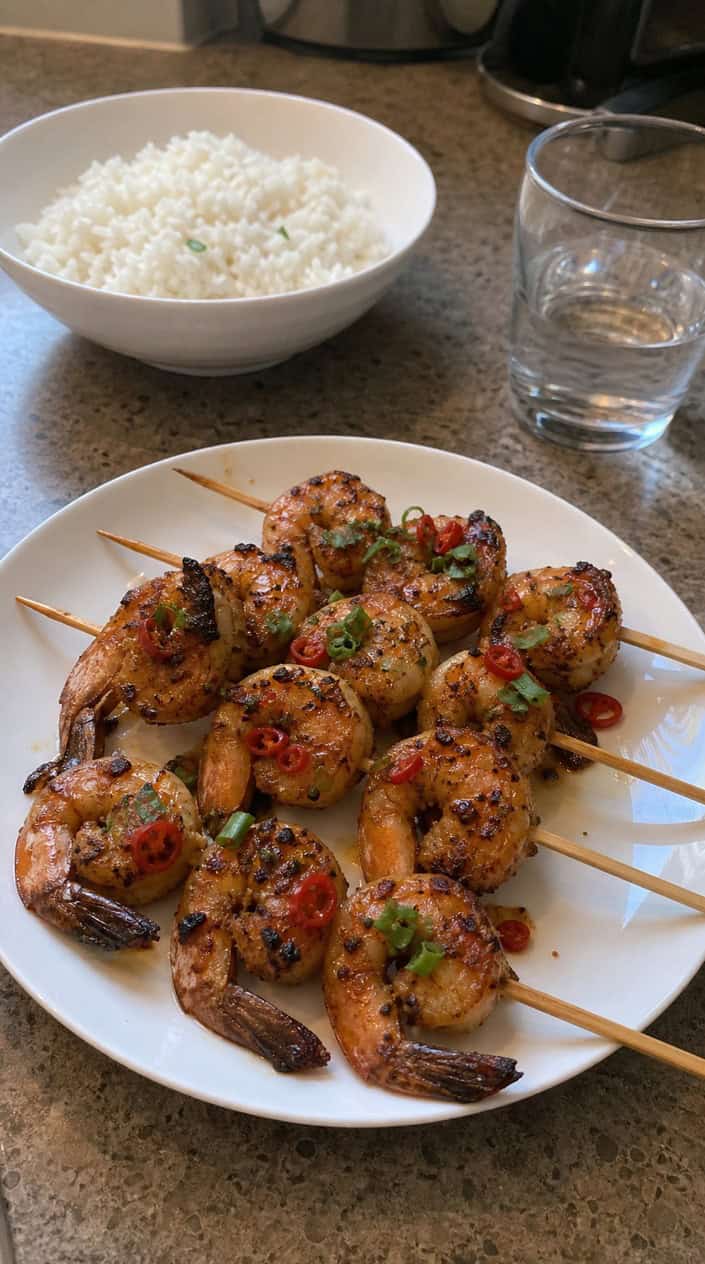
Nothing evokes the festivities of the Fourth like setting off firecrackers in the driveway. This exciting tradition finds its snack equivalent in firecracker shrimp skewers. Begin with an olive oil-honey-sriracha marinade, then toss these bad boys on the grill for 10 minutes over medium-high heat.
Char to perfection and serve with lemon wedges for a delicious acid balance. Trust me, your guests won't be able to resist!
Don't lose this article. Enter your email below, and I'll send it to you right now. Plus a little encouragement and inspiration from me, straight to your inbox.
14) Grilled Veggie Platter with balsamic glaze
Ingredients
Method
- Heat grill to medium-high and oil grates lightly.
- Toss sliced veggies with olive oil, salt, and pepper.
- Grill zucchini, peppers, onions, and mushrooms until charred and tender, 3–5 minutes per side; skewer tomatoes and grill 2–3 minutes.
- Simmer balsamic and brown sugar in a small pan until syrupy, about 5 minutes, then brush over vegetables.
- Arrange on a platter and drizzle any extra glaze before serving.
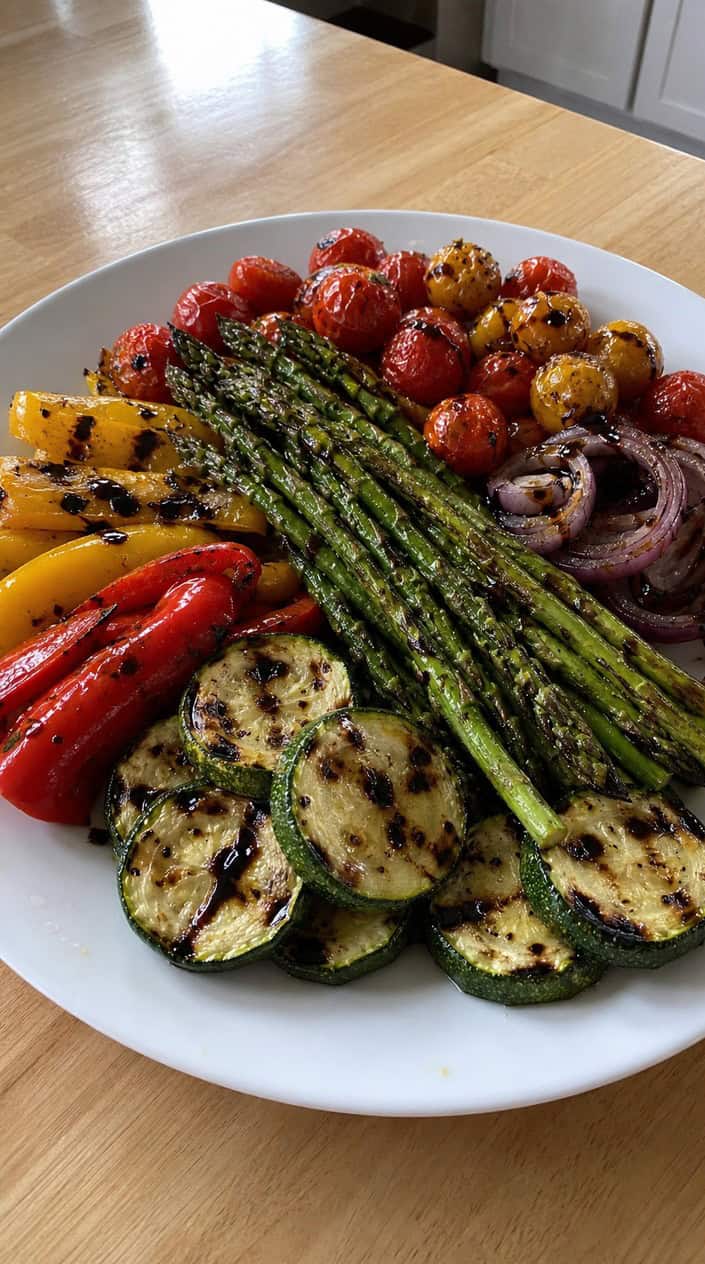
Getting in your veggies for the day has never been more exciting. Grilling the zucchini, peppers, onions, and mushrooms deepens their flavor and releases their natural sugars; combined with the balsamic, these vegetables are a real treat.
Cut the veggies thick, about half an inch, because cooking them reduces their water content and shrinks them. Cook about 3 to 5 minutes per side, then skewer the tomatoes and grill for just a few minutes. Your guests will keep coming back for more!
15) Cold Soba Noodle Salad with sesame dressing
Ingredients
Method
- Cook soba noodles per package, drain, rinse under cold water, and chill briefly.
- Whisk sesame oil, soy sauce, rice vinegar, honey, ginger, and garlic in a bowl.
- Toss noodles with cucumber, carrot, green onions, and cilantro.
- Pour dressing over salad and mix until coated.
- Sprinkle sesame seeds, taste for salt, and refrigerate at least 20 minutes before serving.
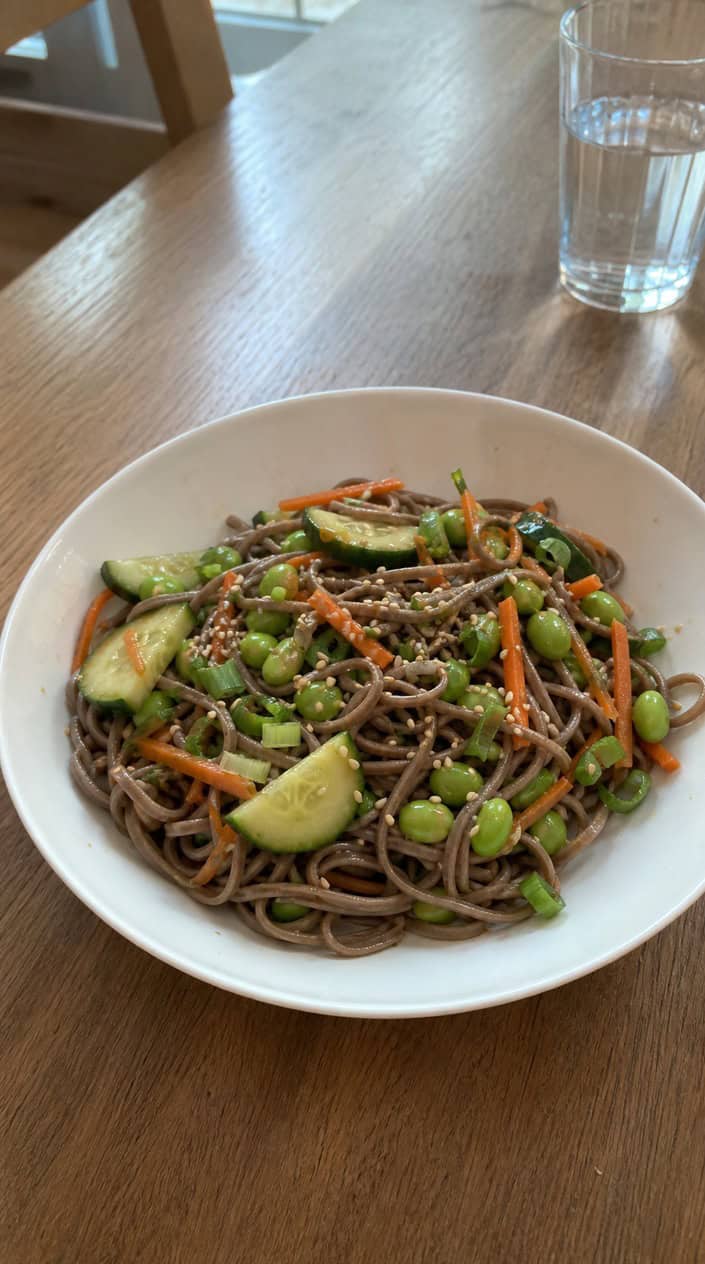
Cold Soba Noodle Salad with Sesame Dressing
This refreshingly sweet-tangy cold soba noodle salad is a Japanese-inspired dish served with a nutty sesame dressing. Bright and fresh, it's perfect for warm weather. It also works great as a make-ahead meal; if you prep it the day before and let it sit in the fridge overnight, the flavors meld together beautifully.
This dish is ingredient-versatile, so you can easily swap in in-season vegetables. Serve it as a noodle and veggie-based side dish, or add a soft-boiled egg or grilled chicken to transform it into a full meal. Toss in a quarter cup of cilantro to really brighten it up, or add crushed peanuts for a hint of nutty richness.
16) Campfire Mac ’n’ Cheese in cast-iron
Ingredients
Method
- Boil pasta 1 minute shy of package directions; drain and set aside.
- Melt butter in a 10- or 12-inch cast-iron skillet over medium heat; whisk in flour 1 minute.
- Slowly whisk in milk until thickened, 4–5 minutes; add mustard powder, paprika, salt, and pepper.
- Stir in cheeses until smooth, then fold in pasta.
- Mix panko with olive oil and sprinkle on top.
- Place skillet over medium-low campfire heat or on grill grate; cook 8–12 minutes until bubbly and crunchy on top. Watch it—I’ve scorched it before.
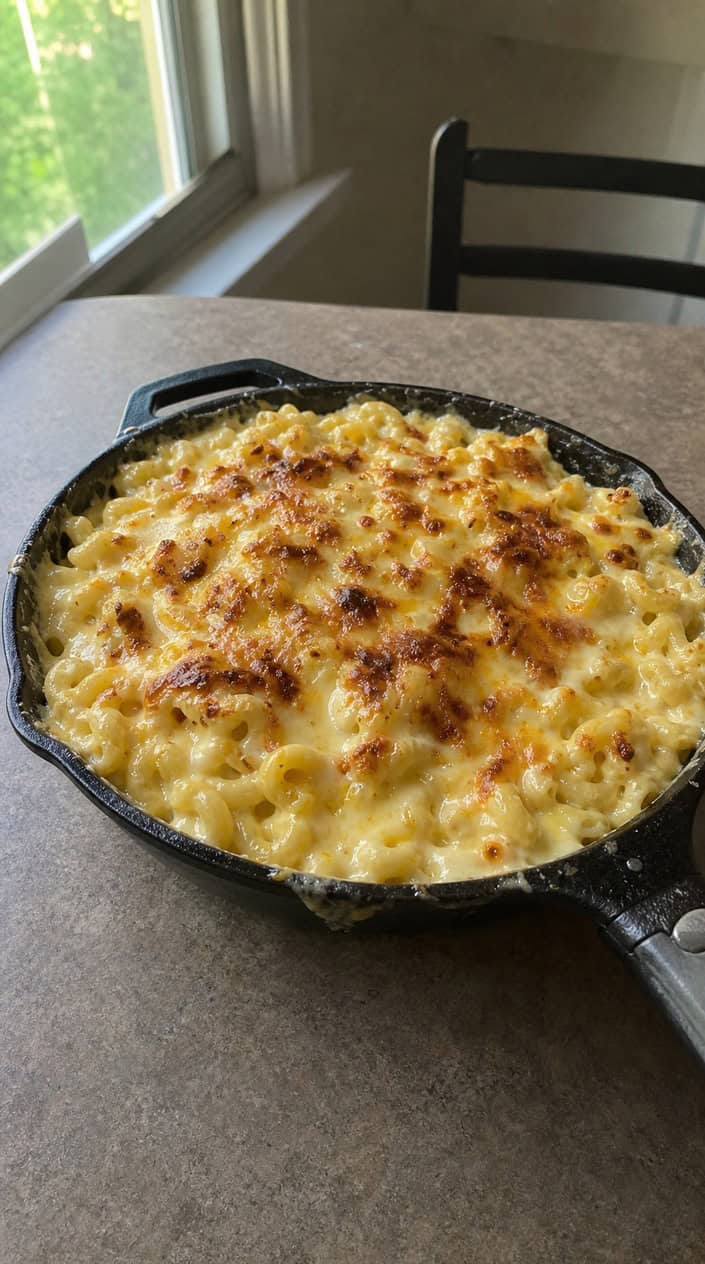
Campfire Mac 'n' Cheese in Cast-Iron
I have to come clean: my whole life I have not been a fan of mac and cheese. Then a dive bar in Salt Lake City completely changed my paradigm. I tried mac and cheese in cast iron and holy moly, what an experience. Campfire mac and cheese in cast iron is creamy and satisfying with a smoky-cheesy crust on top. It takes the gold medal in the mac-and-cheese Olympics.
Cast iron retains heat, making it easier to manage temperature over flames. Cooking over embers rather than open flames is a great way to prevent the bottom from burning. For an extra smoky depth, swap in smoked cheese, or serve straight from the skillet for a rustic chuck wagon vibe.
17) Tomato-Basil Panzanella Salad
Ingredients
Method
- Toss bread with 2 tablespoons olive oil and toast in a 400°F oven 8–10 minutes until golden. Watch it; I once burned half a loaf while folding laundry.
- Whisk remaining oil, vinegar, mustard, salt, and pepper in a bowl.
- Combine tomatoes, cucumber, onion, basil, and mozzarella in a large bowl.
- Add toasted bread and dressing. Toss gently and let sit 10 minutes so bread soaks up juices.
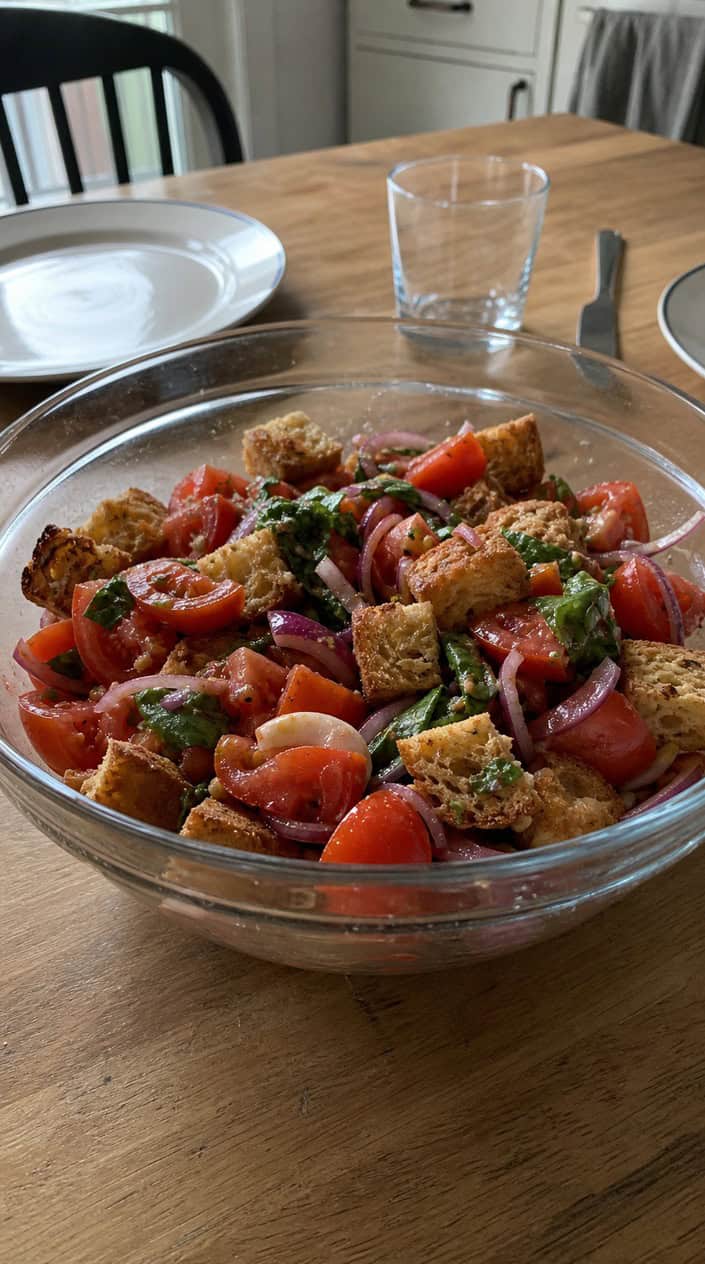
It's time to toss out that stale bread. This tomato-basil panzanella salad combines stale bread, tomatoes, basil, and vinaigrette. The stale bread is a real powerhouse here because it soaks up the dressing without falling apart.
Use day-old ciabatta or focaccia, and choose tomatoes with vibrant color that have a slight give when you press them. The salad strikes a beautiful balance among the acid from the tomatoes, the earthiness of the basil, and the acid and fat of the vinaigrette, making it a not-your-average side salad experience.
18) Classic Deviled Eggs with smoked paprika
Ingredients
Method
- Place eggs in a pot, cover with cold water by 1 inch, bring to boil, then turn off and cover; let sit 12 minutes.
- Drain and cool in ice water 10 minutes, then peel.
- Halve eggs lengthwise and remove yolks to a bowl. Mash yolks with mayo, mustard, vinegar, salt, pepper, and smoked paprika until smooth.
- Spoon or pipe mixture back into whites. Sprinkle extra smoked paprika and chives on top.
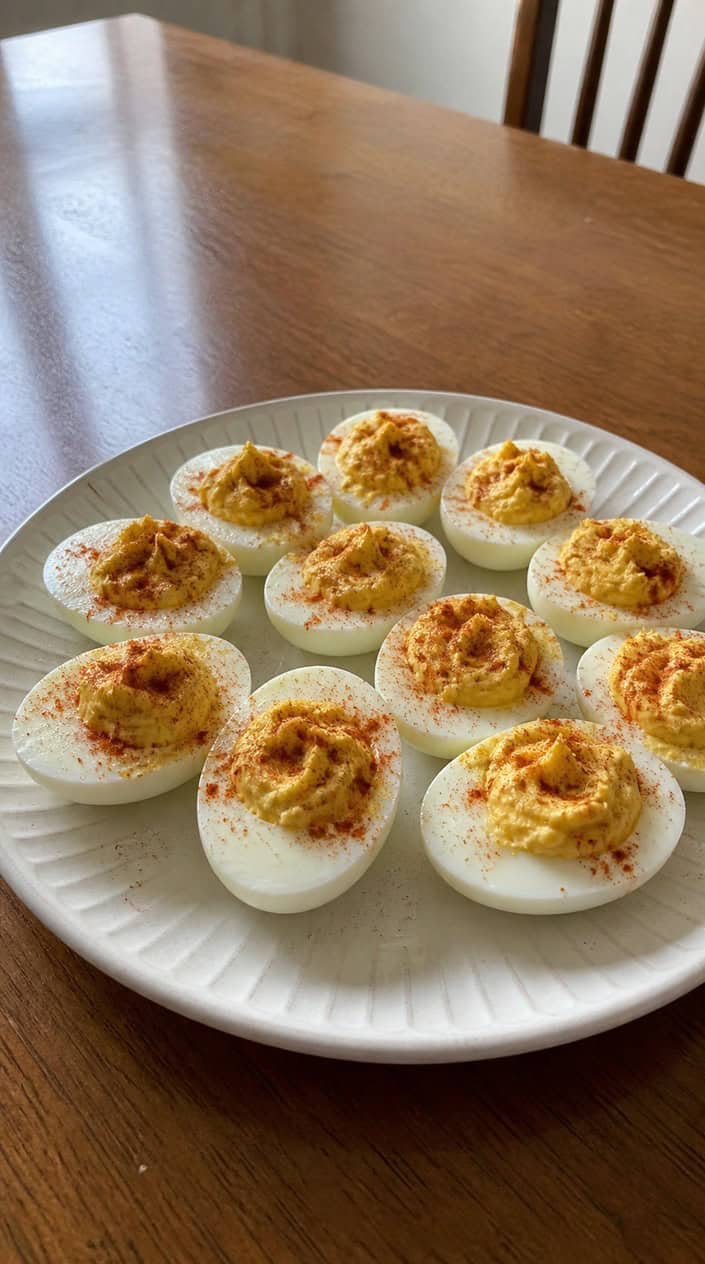
Classic Deviled Eggs with Smoked Paprika
Going to a backyard barbecue and nabbing a deviled egg or two, or three, or too many to count. They're just so irresistible. This classic deviled egg recipe is a timeless appetizer that calls for smoked paprika for depth.
No shade to regular paprika, but smoked paprika is really going to take these deviled eggs to the next level, providing bold, savory, smoky depth that will keep you coming back for more. Make them even more exciting by topping with crispy bacon bits or fresh herbs like dill, cilantro, or parsley.
19) Grilled Pineapple with cinnamon-honey drizzle
Ingredients
Method
- Preheat grill to medium-high (about 400°F). I brush grates clean so rings don’t stick.
- Toss pineapple rings with melted butter and a pinch of salt.
- Grill 2–3 minutes per side until grill marks appear and pineapple is slightly softened.
- Mix honey and cinnamon in a small bowl. Drizzle over warm pineapple just before serving.
- Serve with lime wedges for squeezing, because kids like to squirt things.
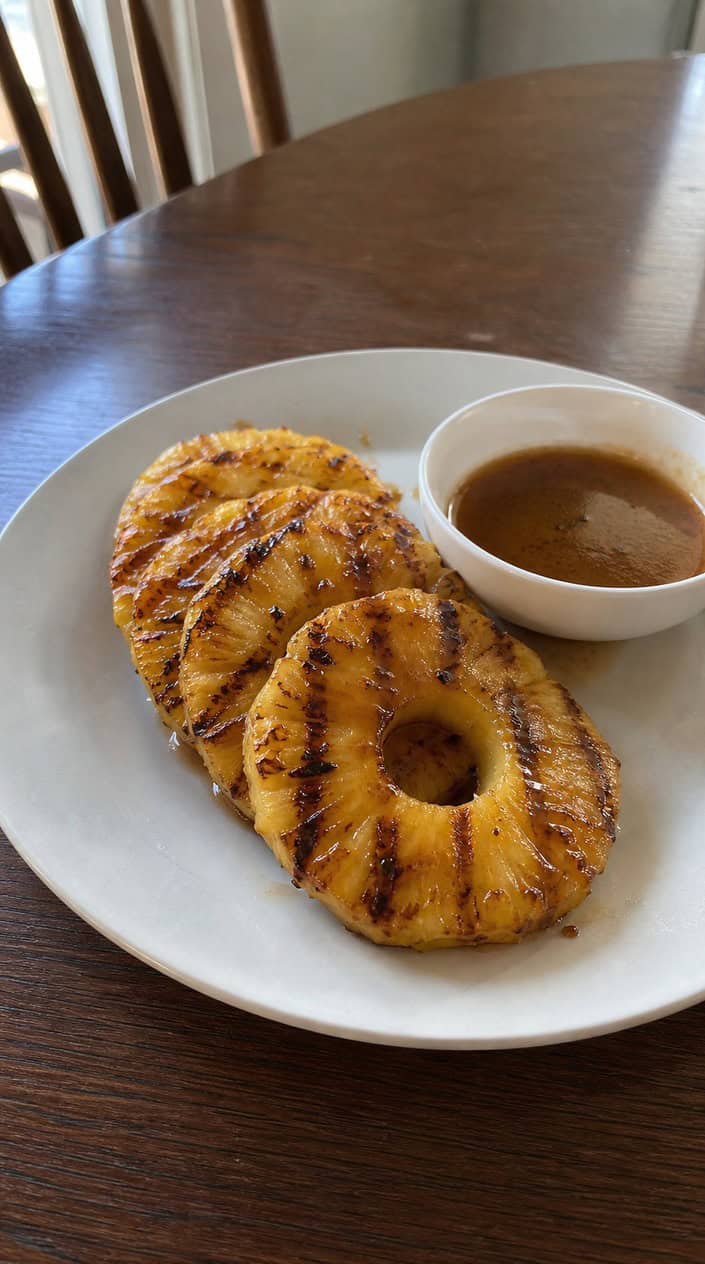
Grilled Pineapple with Cinnamon-Honey Drizzle
Grilled pineapple with cinnamon-honey drizzle is a caramelization sensation. This is a simple, elegant dessert with sweetness that intensifies on the grill. When choosing a pineapple, pick a firm fruit with a sweet aroma.
Avoid picking a pineapple that is soft, as it will turn mushy on the grill. If you want even deeper caramelization, swap out the honey for brown sugar. For the ultimate dessert experience, serve it with vanilla ice cream or coconut whipped cream.
20) Blueberry-Lemon Cobbler (skillet)
Ingredients
Method
- Preheat oven to 375°F. Toss blueberries with 1/2 cup sugar, lemon zest, lemon juice, and cornstarch; set aside.
- Whisk flour, 1/2 cup sugar, baking powder, and salt. Stir in milk, melted butter, and vanilla until just combined.
- Pour batter into a 10-inch oven-safe skillet. Spoon blueberry mix evenly on top; do not stir.
- Sprinkle coarse sugar if using. Bake 30–35 minutes until golden and bubbling. Cool 10 minutes before serving.
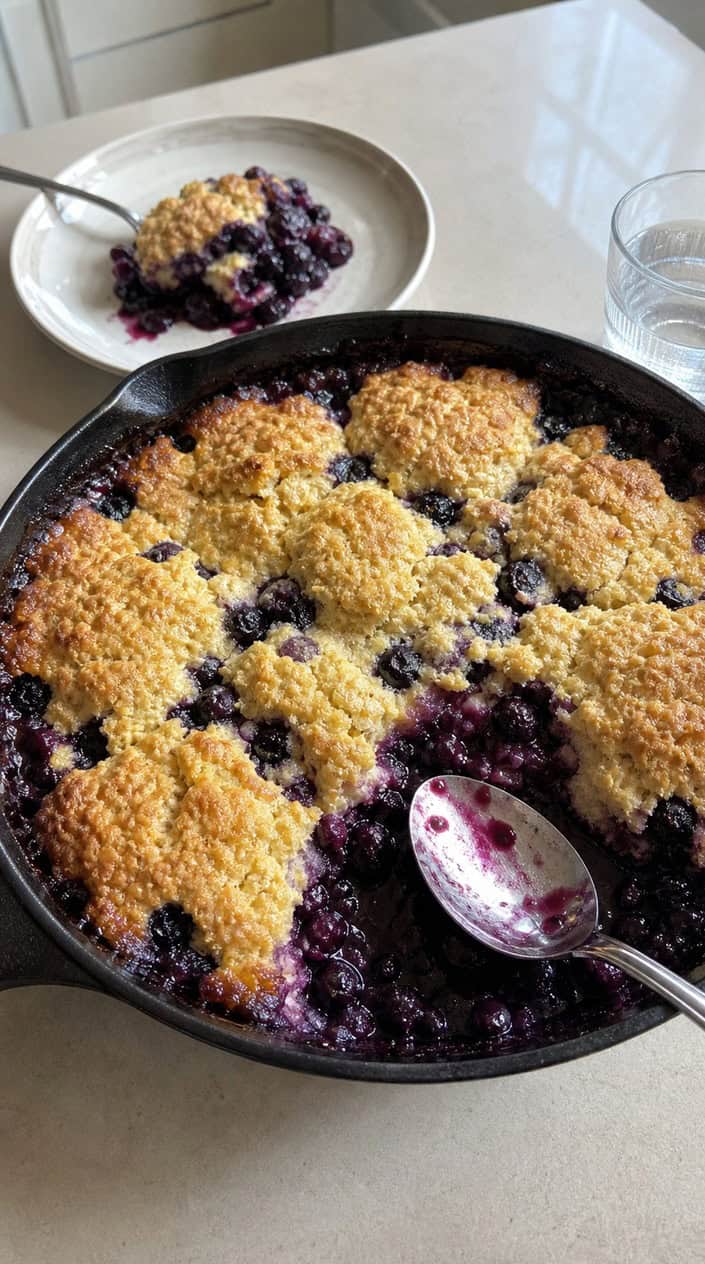
Blueberry-Lemon Cobbler (Skillet)
Dessert is calling your name, and this blueberry-lemon cobbler will not disappoint. This simple skillet cobbler combines tart lemon with sweet blueberries and is finished off with a buttery biscuit topping. The cast iron really helps create that buttery crust and bubbles the fruit, and the rustic presentation is a nice touch too.
You can swap in blackberries or raspberries if blueberries aren't in season. Serve warm with vanilla ice cream or whipped cream. Is your mouth watering yet?
21) Smoked Gouda Potato Gratin
Ingredients
Method
- Preheat oven to 375°F and butter a 9×13-inch baking dish.
- Whisk cream, milk, garlic, salt, pepper, and nutmeg in a bowl.
- Layer half the potatoes in the dish, sprinkle half the Gouda, then pour half the cream mixture.
- Repeat layers, pressing gently so liquid covers potatoes.
- Cover with foil and bake 45 minutes, then remove foil and bake 20 more until bubbly and golden.
- Let rest 10 minutes, sprinkle chives, then serve.
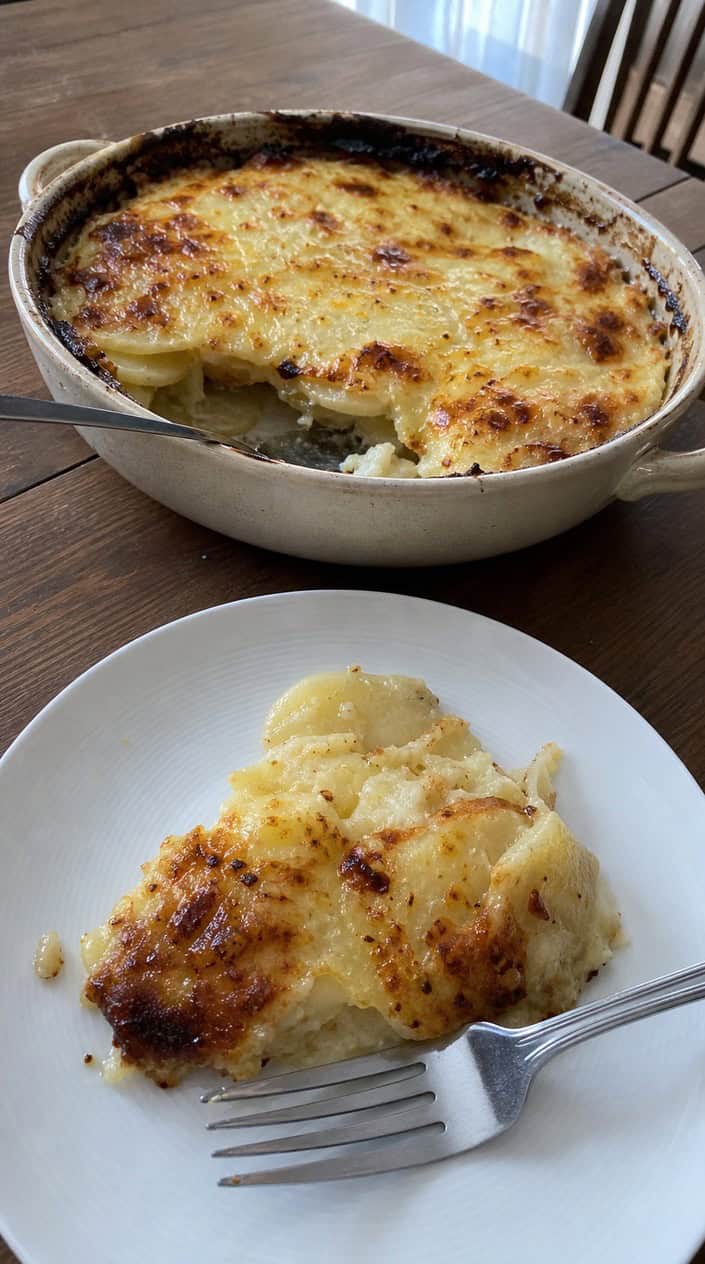
The humble potato gets a level-up in this indulgence: smoked Gouda potato gratin. The smoked gouda flavor adds an earthy depth that works well with the potatoes and cream. Cut the potatoes to about 1/8-inch thick so they cook evenly and don't turn to mush.
This is a great make-ahead dish, as chilling overnight allows the smoky gouda to infuse the potatoes for a full flavor experience. Pair with a simple grain salad to balance the richness.
22) Buttermilk Pancake Breakfast for post-fireworks
Ingredients
Method
- Whisk flour, sugar, baking powder, baking soda, and salt in a large bowl.
- In another bowl, beat buttermilk, eggs, melted butter, and vanilla until combined.
- Pour wet into dry and stir until just mixed; small lumps are fine.
- Heat griddle over medium and brush with butter. Scoop 1/4 cup batter per pancake.
- Cook until bubbles form, flip, and cook 1–2 minutes more. Keep warm on a sheet in a low oven.
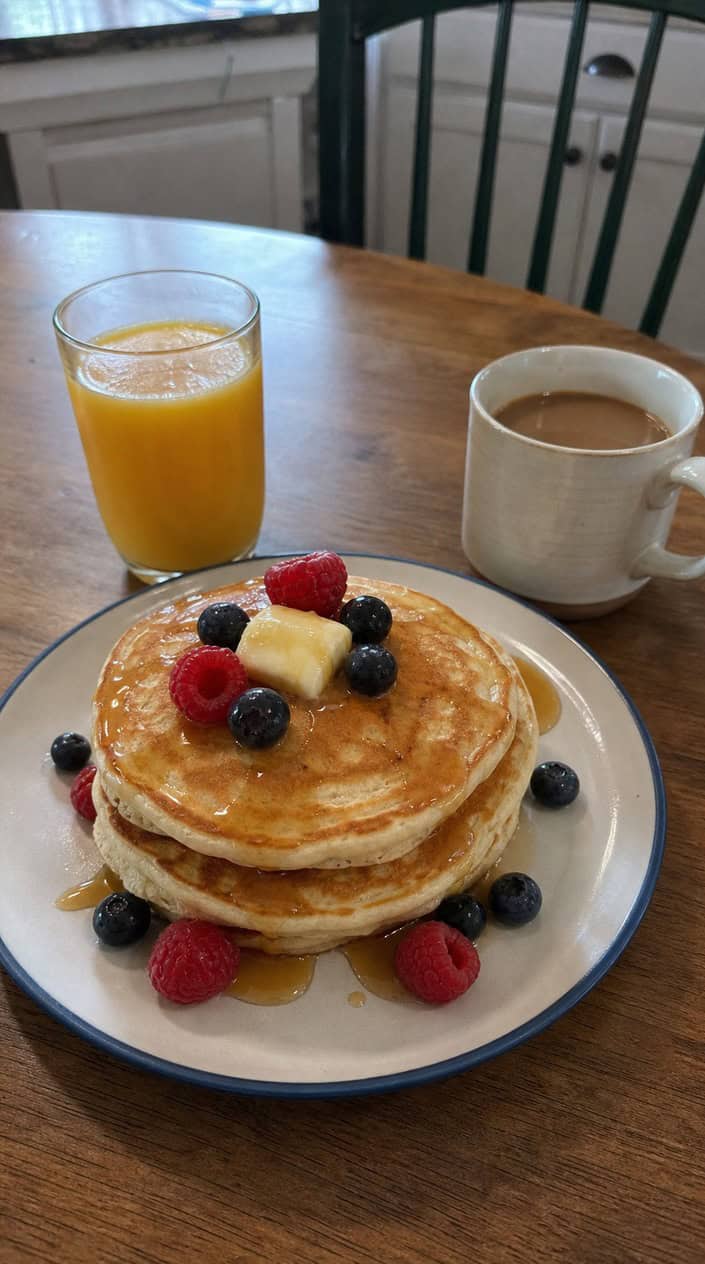
Buttermilk Pancake Breakfast for Post-Fireworks
Yes please. This is a hearty, comforting way to start a relaxed morning after celebrating the 4th. Buttermilk contains acid, and when combined with baking powder, gives the pancakes a boost of carbon dioxide bubbles.
Topping with fresh blueberries will give your pancakes a fun patriotic twist and will pair well with the tanginess of the buttermilk. Your guests will go crazy for these pancakes, so be sure to prepare a big batch so you're not cooking while they arrive!
23) Grilled Sausage & Peppers on hoagie rolls
Ingredients
Method
- Preheat grill to medium-high. Toss peppers and onion with olive oil, salt, and pepper.
- Grill sausages 12–15 minutes, turning until internal temp 160°F and nicely charred.
- Grill peppers and onions in a grill basket 8–10 minutes until softened.
- Split rolls and toast lightly on grill 1–2 minutes.
- Slice sausages lengthwise or whole, pile on rolls, top with peppers, onions, and cheese.
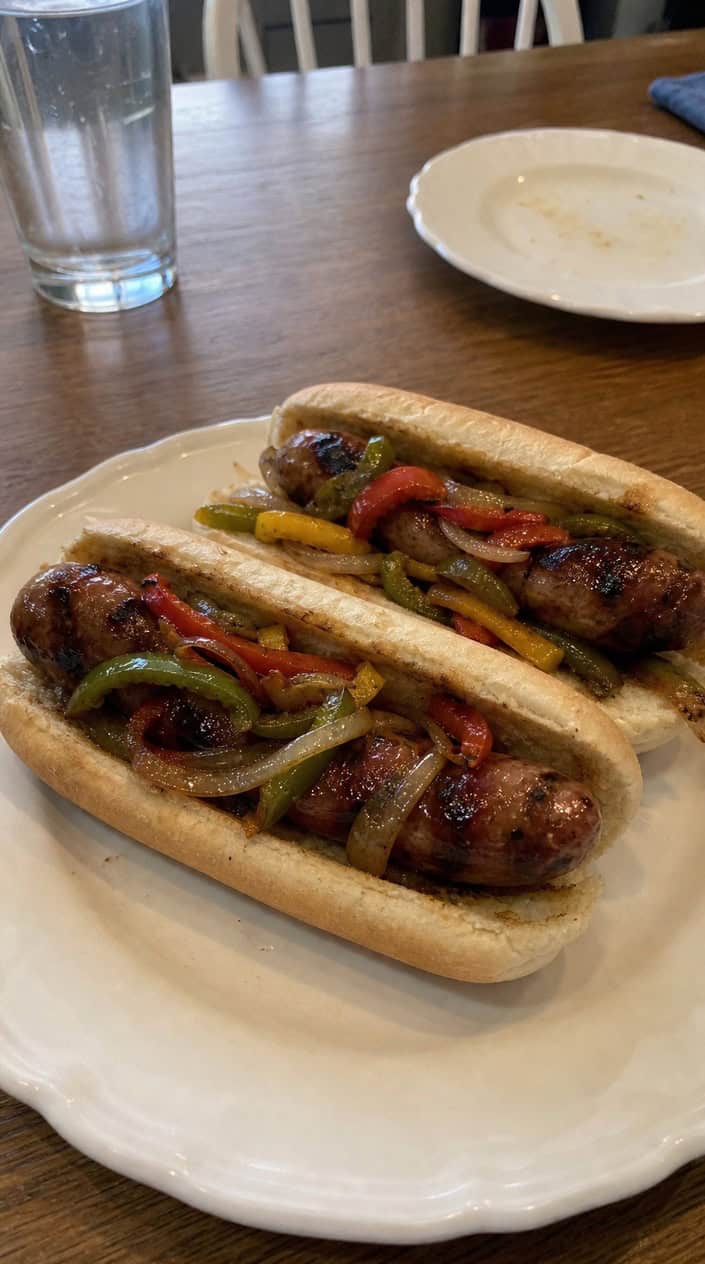
Grilled Sausage & Peppers on Hoagie Rolls
Sausage and peppers on hoagie rolls are hearty, satisfying, and easy to put together for a crowd. To prevent the sausages from overcooking, you could use the poach-and-sear method: first simmer the sausages in liquid to ensure they're cooked through, then toss them over high heat to char the outside. Cooking the peppers and sausage separately will ensure they're both cooked thoroughly without overcooking. Sausages need longer cook times, and peppers will get mushy if you cook them too long.
Top with caramelized onions or an adventurous cheese like smoked gouda or gorgonzola. This dish comes together fast and will be a hit with your barbecue guests!
24) Cornbread with jalapeño butter
Ingredients
Method
- Preheat oven to 400°F and grease an 8-inch cast-iron skillet.
- Whisk cornmeal, flour, sugar, baking powder, and salt in a bowl.
- Whisk buttermilk, eggs, melted butter, and oil in another bowl; stir into dry mix until just combined.
- Fold in chopped jalapeños, pour batter into skillet, and bake 18–22 minutes until golden.
- For jalapeño butter, mash room-temperature butter with chopped jalapeños and 1/4 tsp salt.
- Slice warm cornbread and spread jalapeño butter before serving.
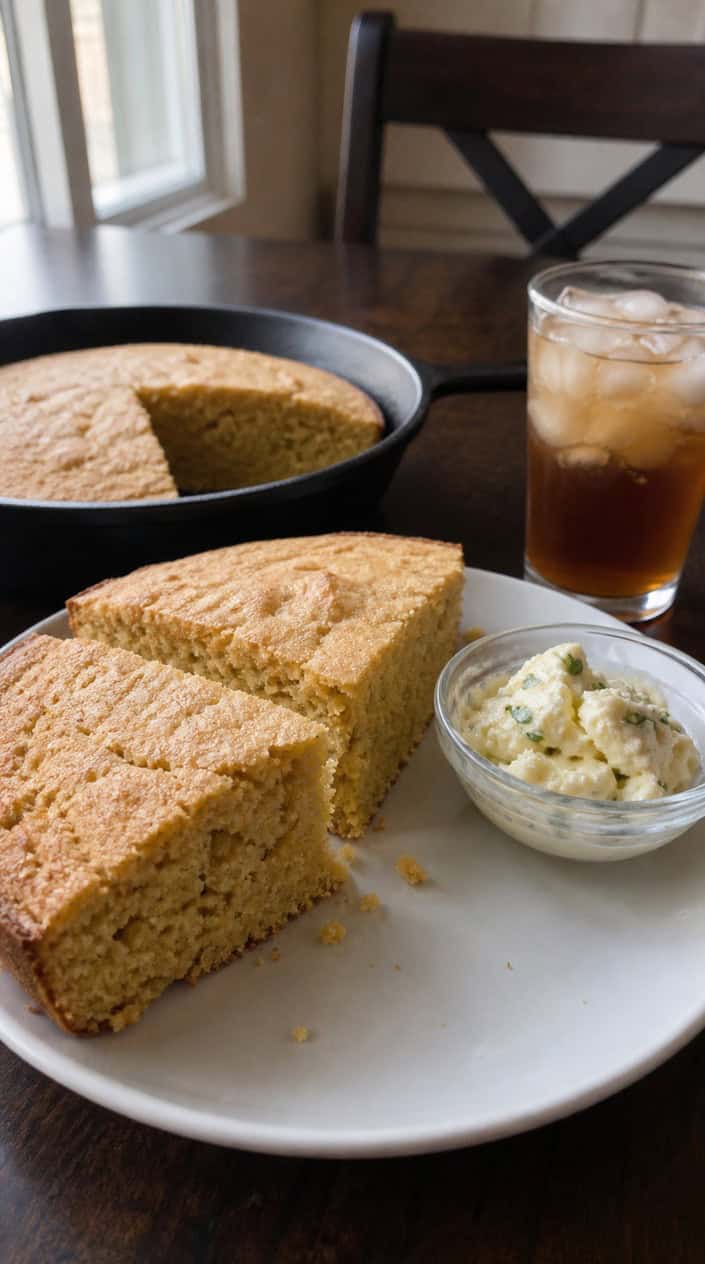
Cornbread with Jalapeño Butter
Cornbread with jalapeño butter is an unexpected, exciting take on a classic cowboy food. The subtle sweetness of the cornbread pairs beautifully with the spicy kick from the jalapeño butter. To tone down the heat, remove the seeds and membranes from the jalapeños, or leave them in for the full spice experience.
You could also swap in serranos if you really want to turn up the heat. Serve warm so the butter melts into the cornbread for a creamy, spicy treat that your guests will love.