

I'll be honest: I feel a bit of a fraud doing this because my friends generally think I make everything from scratch. I am a trained chef, after all. But everyone likes a shortcut, and nobody needs to know how little effort actually went into the delicious dishes you set on the table. These are 22 potluck hacks that look like hours of work and take about 15 minutes to make.
Don't lose this article. Enter your email below, and I'll send it to you right now. Plus a little encouragement and inspiration from me, straight to your inbox.
1) Kirkland Signature Mini Chicken & Waffles skewers


Dinner is handled every Sunday
Get 5 easy family dinners, printable recipe cards, and one grocery list. Simple meals, normal ingredients, no more starting from zero at 5pm.
Ingredients
Method
- Preheat oven per package directions and arrange mini chicken & waffles on a baking sheet.
- Bake until crisp and heated through, following package time, usually 15–20 minutes.
- Let cool 2 minutes, then thread one waffle and one chicken piece onto each skewer.
- Drizzle with maple syrup or serve syrup and hot honey on the side.
- Garnish with chopped parsley if you want a little color.
Kirkland Signature Mini Chicken & Waffles Skewers
These look well thought out, and they're just three ingredients from a box. I think the skewer's visual work is all there. The same chicken and waffles on its own just looks like leftovers, but the stick gives the plate an intentional look.
Make sure you crisp up the chicken and waffles in the oven (I always use an air fryer before assembling). Avoid preheating, as they will go soft and limp. I always add just a little maple syrup right before serving, but not too early, because it goes everywhere and the waffle gets soggy.
Make sure to provide some hot sauce on the side for anyone who wants it. This just keeps it from being one-note. Always assemble these closer to the time because they don't hold up sitting around. Once they're put together, I like to present them with some fresh chives or micro herbs.
2) Heat-and-serve Costco Spinach Artichoke Dip with crostini

Ingredients
Method
- Preheat oven to 375°F (190°C). Line a baking sheet with foil.
- Toss baguette slices with olive oil and garlic powder; arrange in a single layer.
- Bake crostini 8–10 minutes until golden and crisp, flipping once.
- Heat dip according to package directions, usually 20–25 minutes in the oven or 10–12 minutes in the microwave, stirring halfway.
- Transfer dip to a shallow serving bowl and sprinkle crushed red pepper if using. Serve immediately with crostini.
You'll find the spinach and artichoke dip in the refrigerated section of Costco, typically sold in large tubs in the deli section. It consists of cream cheese, sour cream or mayo, chopped spinach, artichoke hearts, and Parmesan.
Bake it rather than microwave it if you can, because the top goes slightly golden and it looks like you've made an effort. I like to sprinkle some fresh parmesan or extra cheese on top before it goes in the oven. It gives it that finished look, that more made-at-home feel. I also decant it into a ceramic dish I have at home.
It's easy to make the crostini yourself. Just grab a baguette from Costco, slice it, brush the slices with some olive oil, and toast them in the air fryer. This takes about 10 minutes. You can also rub fresh garlic on the crostini before putting them in.
Serve it with fresh herbs on top, and keep it in the oven at low heat, since it thickens and becomes unappetizing once it cools. It's great for a crowd, and there's nothing better than a warm spinach dip with crostini.
3) DIY Costco Shrimp Cocktail with tails-on shrimp and zesty sauce

Ingredients
Method
- Drain and pat shrimp dry with paper towels; keep chilled until serving.
- Whisk ketchup, horseradish, lemon juice, Worcestershire, and hot sauce in a bowl; taste and adjust heat.
- Arrange shrimp on a platter over ice or a chilled tray; place sauce in a bowl in the center.
- Garnish with lemon wedges and parsley; encourage guests to peel or eat tails-on.
The shrimp from Costco is really good quality, and this hack is entirely about the source, not the seafood.
Making proper cocktail sauce takes a few minutes. I like to use horseradish, ketchup, lemon, and a dash of Worcestershire sauce; they come together and are already better than store-bought. Use the zest from the lemon, not just the juice, because it adds a brightness that cuts through the richness of the sauce.
I like to leave the tails on the shrimp because the guests can use them as handles. Shrimp shouldn't be served warm. Chill it to about 35 to 45 degrees Fahrenheit (an ice bed on a platter keeps them great).
It's the presentation that makes a whole lot more of it here. Sprinkle with some fresh herbs and, of course, big wedges of fresh lemon.
4) Sheet-pan Costco Meatballs tossed in grape jelly and chili sauce

Ingredients
Method
- Preheat oven to 400°F (200°C). Line a sheet pan with foil and lightly oil.
- Arrange frozen meatballs in a single layer and roast 18–22 minutes until heated through and slightly browned.
- While meatballs roast, stir together grape jelly, chili sauce, soy sauce, and vinegar in a small saucepan. Warm gently until smooth.
- Transfer hot meatballs to a large bowl, pour sauce over, and toss to coat evenly.
- Return to the sheet pan and bake 3–5 more minutes so sauce clings. Garnish if desired and serve warm.
This sounds like an odd combination until you've tasted it. The grape jelly melts, and the chili sauce adds heat, giving them a sweet, tangy glaze that coats every meatball evenly. I bake the meatballs on a sheet pan first to crisp the outside before they go into the sauce. They'll go soft if you put them straight into a slow cooker sauce. Simmer the sauce and maple together, because that's what lets the glaze cling.
Tossing meatballs into grape jelly and silly sauce has been a party classic for generations, and it keeps getting revived. I like to serve them with toothpicks stuck in rather than a serving spoon because it's finger food.
Don't overcrowd the pan. If you do, the meatballs steam instead of roast, so make sure you keep them in a single layer. Pick the Kirkland brand, which is fully cooked. I've found those are the best.
5) Kirkland Bacon-Wrapped Scallops, broiled till crisp

Ingredients
Method
- Preheat broiler to high and line a rimmed baking sheet with foil; brush with olive oil.
- Pat scallops dry; season with pepper and smoked paprika.
- Wrap each scallop with a half slice of bacon and secure with a toothpick.
- Arrange on the sheet, seam-side down, and broil 4–6 minutes per side until bacon is crisp and scallops are opaque.
- Let rest 2 minutes before serving to avoid splatter and to let juices redistribute.
Kirkland Bacon-Wrapped Scallops, Broiled Till Crisp
Costco's house brand generally has a good quality-to-price ratio. Broil the scallops if you want them crispy. Baking alone tends to leave the bacon soft and underdone. Make sure you've thawed the scallops and patted them dry before they go under the heat. If you don't, the moisture prevents the bacon from crisping properly, which defeats the whole point of the dish. Make sure you watch them closely under the broiler. The line between perfectly crisp and burned is extremely thin.
I like to add a squeeze of lemon right before serving. It just cuts through the richness of the bacon and lifts the whole bite. These need to be served hot straight from the broiler because they lose their appeal as they cool. The combination of scallops and bacon together is just bliss.
6) Costco Hot Honey Sausage Bites on toothpicks
Ingredients
Method
- Preheat oven to 400°F (200°C). Line a large baking sheet with foil and spray lightly.
- Whisk honey, brown sugar, vinegar, soy sauce, and garlic powder in a bowl.
- Toss sausages with half the sauce, spread on the sheet, and bake 12–15 minutes until browned.
- Heat remaining sauce in a small pan to thicken, then toss baked sausages to glaze.
- Spear each sausage with a toothpick and sprinkle with sesame or parsley if using.
Costco Hot Honey Sausage Bites on Toothpicks
These are great little morsels of heaven, just found in the Costco deli prep food area. I always go with the Kirkland brand because it's good on bulk and value. Make sure you toss the sausage bites in the hot honey while they're still hot from the oven; that's what lets the glaze cling properly instead of sliding off. I always make sure these are on a sheet pan in a hot oven because it crisps the outside of the sausage far better than reheating in a pan, and the texture really matters with these.
The iron fuse of chili with the honey is the whole point. It's easy enough to make at home if you can't find it in a bottle, and a squeeze of lemon cuts through the sweetness so the whole thing doesn't taste like a one-note bite. Keep them warm in a low oven or slow cooker if people are taking their time, because the glaze firms up and the magic disappears once it cools completely. These are proper grab-and-go party food, which is exactly what a party appetizer should be: sweet, spicy, and irresistible.
7) Mini Costco Quiche trio warmed and served with mustard

Ingredients
Method
- Preheat oven to 375°F (190°C). Line a baking sheet with foil.
- Arrange frozen quiches in a single layer; brush tops lightly with oil or butter.
- Bake 12–16 minutes until heated through and edges are golden.
- Let rest 2 minutes, then transfer to a platter. Offer mustard in a small bowl for dipping.
- Garnish with parsley and provide toothpicks for easy grab-and-go.
You'll find these mini wonders in a big pack at Costco. They typically come in a trio of flavors: the classics, a Lorraine, a Florentine, and cheese with veg. Basically, heat them from frozen in an oven at about 375°F for about 12 to 15 minutes for an absolutely crispy pastry. Don't microwave, as this makes them soggy and sad.
I love pairing these with mustard, Dijon, or whole grain. It cuts through the richness of the egg-and-cream filling. This is a classic Winchester pairing. Serving mustard with quiche is more of a European tradition than common in North America.
Don't serve these straight from the fridge, as they can get cold in the center. They must go from the freezer to the oven. When serving, I always arrange the trio together on the platter; it makes the plate look more intentional. Then a sprinkle of fresh herbs across the platter just ties everything in. You can also add small flags or labels identifying which is which.
8) Kirkland Signature Brie wheel warmed with jam and crackers

Ingredients
Method
- Preheat oven to 350°F (175°C). Line a small baking dish with parchment and set Brie in the middle.
- Spread jam over the top of the Brie and drizzle honey if using. Sprinkle nuts on top for crunch.
- Bake 10–12 minutes until cheese is soft but not completely collapsed. Watch closely after 8 minutes.
- Transfer to a serving plate, garnish with herbs, and serve warm with baguette slices or crackers.
I make this at home, but I push whole cloves of garlic into the cheese and lay a sprig of rosemary on top, which infuses the cheese as it bakes in the oven. Sometimes I use honey instead of jam. I always score the top of the brie before it goes in the oven so all those flavors can infuse nicely.
Brie often becomes spreadable when warmed, so leave it in for about 5 to 10 minutes at 350°F. Classic pairings are fig jam, honey, or apricot preserves, with crackers like water crackers or crostini as your base. If you don't feel like making crostini, use sliced sourdough toast.
A huge concern with baked brie is overheating the cheese. This is something you absolutely don't want to do because it turns oily and grainy instead of creamy. Kirkland's brie is notably affordable compared to the French-imported wheels you get at specialty stores, and it does just as good a job as the French ones.
9) Costco Mandarin Orange & Almond Asian slaw cups

Ingredients
Method
- Drain any excess liquid from the slaw container so cups don’t get soggy.
- Toss slaw with shredded chicken if using, green onions, and almonds.
- Spoon 1–2 tablespoons into each lettuce leaf and sprinkle with sesame seeds.
- Arrange cups on a platter with lime wedges for squeezing just before eating.
Costco Mandarin Orange & Almond Asian Slaw Cups
This is such a good one. You'll find it in Costco's ready-to-eat refrigerated section, typically sold in multipacks. All you have to do is open up the pack and assemble them into little Asian slaw cups. Add some Mandarin oranges, either canned or fresh, some sliced toasted almonds, and a sesame ginger or similar dressing. The almonds add a crunch and protein, and the Mandarin orange brings a sweetness and brightness.
I definitely only put the dressing on right before serving, as it makes the cups go soggy really fast. Costco's sizing and value are a big part of why these are great for meal prep, and I find the price per serving is typically lower than restaurant or deli alternatives. They finish really well for something like a Korean spread, and it looks like you spent hours doing this.
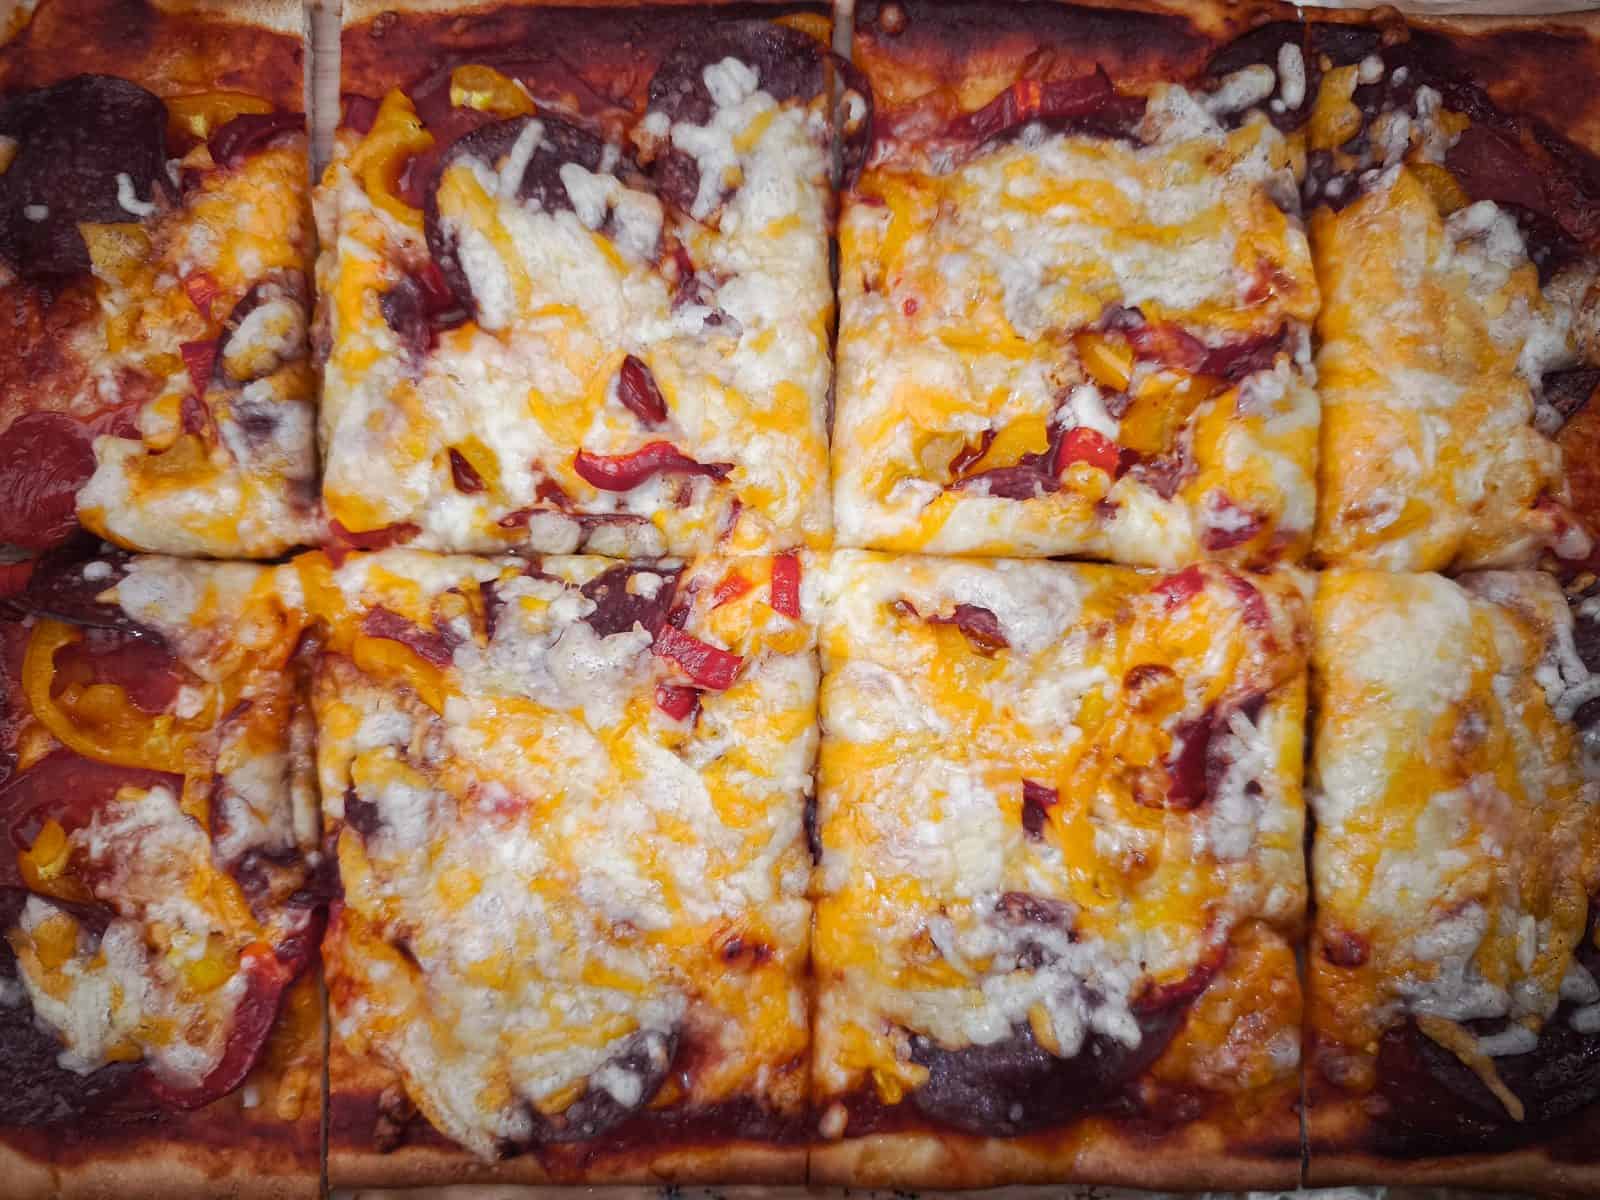
10) Kirkland Frozen Pizza squares cut into party bites
Ingredients
Method
- Preheat oven to 400°F (205°C). Line a baking sheet with foil or parchment.
- Place frozen pizza squares on the sheet. Brush tops lightly with olive oil or butter.
- Sprinkle Italian seasoning, extra cheese, and meat if using. Bake 12–15 minutes or until crust is golden and cheese melts.
- Let cool 3–4 minutes. Cut each square into 4–6 bite-sized pieces with a sharp knife or pizza cutter.
- Garnish with Parmesan and herbs. Serve warm on a platter with toothpicks.
Kirkland Frozen Pizza Squares Cut Into Party Bites
These pizza party bites are at least easy. These guys are large pizzas designed for value and volume, and all you have to do is turn them into party bites by cutting the squares into smaller pieces for finger-food serving. A typical Kirkland frozen pizza feeds about four to six as a meal, so if you cut it into bite-size pieces, you could stretch that to around 30 pieces for a crowd. Absolute winner.
A huge mistake here is pre-cutting before baking. Cut after baking for clean edges on frozen pizza. I like to scatter fresh basil over the top after baking. Then I'd serve it on a beautiful wooden board with a few varieties and flavors, so everyone can try a bit of everything without committing to one flavor.
11) Costco Street Taco-Style Carnitas on mini tortillas

Ingredients
Method
- Heat a large skillet over medium-high and add 1 tbsp oil. Break carnitas into bite-sized pieces and sear 4–5 minutes until edges crisp.
- Warm mini tortillas on a dry skillet or in a 200°F oven for 5–7 minutes wrapped in foil.
- Plate tortillas and spoon carnitas onto each. Top with onion, cilantro, salsa, cheese if using, and a squeeze of lime.
- Offer extra salsa and lime wedges and let guests assemble their own.
Basically, all you have to do is assemble these because everything's already store-bought. Costco sells pre-cooked carnitas, which is pork shoulder slowly braised, and it comes in refrigerated packs. All you have to do is heat and serve. Then you buy the small, street-taco-style corn tortillas and just assemble them. I like to have some onion, cilantro, lime, and salsa on the side, with avocado or guacamole, so people can help themselves.
Carnitas literally means "little meats." Something that really picks them up nicely is to quickly sear them in a dry skillet or broil them until the meat is crisp before serving. With this, you can avoid that soggy, horrible texture. Don't overload the toppings. Street tacos are intentionally simple to let the pork shine.
Make sure you warm the mini tortillas through properly before serving, because cold tortillas will crack and fall apart the moment you fold them. I like to assemble these as close to serving time as possible. A tray of pre-assembled tacos sitting out goes soft and unappealing really fast.
Room-temperature butter and eggs make every single one of these recipes turn out better. Set them out an hour before you start. That tiny step is the difference between bakery quality and just-okay.
12) Kirkland Stuffed Grape Leaves plated with lemon wedges

Ingredients
Method
- Chill the grape leaves in the fridge until serving time, or warm gently in a microwave-safe dish for 30–45 seconds if you prefer them warm.
- Arrange leaves on a serving platter in neat rows or a circular pattern.
- Tuck lemon wedges around the edges and drizzle olive oil lightly over the top.
- Place a small bowl of Greek yogurt or tzatziki in the center and garnish with dill or parsley.
You'll find these stuffed grape leaves, which are traditionally called dolmades, in large tins at Costco. Grape leaves originate across Mediterranean and Middle Eastern cuisines, and they're stuffed with rice and herbs, and sometimes meat inside. Lemon juice is traditional here because it cuts through the richness and brightens the briny wrapper.
Don't lose this article. Enter your email below, and I'll send it to you right now. Plus a little encouragement and inspiration from me, straight to your inbox.
Don't serve them cold straight from the tin. Make sure to warm them, as this improves the texture and flavor significantly. Kirkland's version is rice only, which is vegetarian, and packed to run. They're much more affordable, with a higher value per unit, than the deli or restaurant versions.
Squeezing a dash of fresh lemon over the top before serving lifts them up nicely, even though they're already really well-seasoned. A small bowl of plain yogurt or tzatziki on the side gives people something to dip them in, which really brings the whole plate together. Scatter some herbs over the top, mint or parsley, and I find that finishes the presentation nicely.
13) Costco Mango Salsa with tortilla chip cups

Ingredients
Method
- If using cream cheese, spread a thin layer on each chip to help salsa stay put.
- Spoon 1–2 tablespoons of mango salsa into each chip cup.
- Top with a sprinkle of cilantro and a tiny lime squeeze if desired.
- Arrange on a platter and serve immediately to avoid soggy chips.
Costco Mango Salsa with Tortilla Chip Cups
Another easy cheat canapé from Costco. The mango salsa is a daily item there and is sold in large tubs, which is a great value compared to the shelf-stable versions. For the chips, you'll want tortilla chip cups, also called Scoops. They hold chunky salsa better than flat chips, so they're better for food presentation overall.
If the salsa is a bit watery, drain it before filling the cups, because excess liquid makes the chip scoop soggy. Fill them close to serving time, since this isn't something you can do too far in advance. I like to scatter some fresh cilantro or a squeeze of lime over the filled cups. It finishes them off just perfectly, and the canapé looks like you've put a lot of effort into it.
14) Mini charcuterie cones using Costco salami and grapes

Ingredients
Method
- Fold or roll each salami slice into a small cone shape as the wrapper base.
- Fill cones with 2–3 pieces of cheese and 2–3 grapes; add an olive or pickle if using.
- Secure with a toothpick through the top, or drizzle a little honey/balsamic for shine.
- Arrange standing in a mason jar or on a tray so they don’t topple.
Mini Charcuterie Cones Using Costco Salami and Grapes
This is always a crowd pleaser. I like to use Costco salami, either the Margherita or the Columbus brand. They always come pre-sliced, which is ideal for rolling into cones. Then use standard paper waffle cones or small parchment ones that hold three to five ingredients.
I think the grapes and the salami go so well together because the sweetness of the grapes cuts the salt. A common mistake is overfilling these cones, so use a shot glass or narrow cup standing upright for serving. I sometimes like to add a breadstick or cracker poking out the top of the cone. This finishes the look and gives people something to eat with it.
These need to be assembled close to serving time because they don't hold their shape or freshness very well. I'd also suggest mixing in a few olives, squished in next to the salami and grapes. It's fun to use different types of cubed cheeses in there too, if you'd like. It adds variety without really complicating it.
“My picky one asked for seconds, which is how I measure a recipe’s success.”
15) Kirkland Frozen Taquitos crisped and sliced for dipping

Ingredients
Method
- Preheat oven to 425°F (220°C). Line a baking sheet with foil and spray lightly with oil.
- Arrange taquitos in a single layer; brush or spray with oil if desired for extra crispness.
- Bake 12–16 minutes, turning once, until golden and crisp.
- Let cool 2 minutes, then slice each taquito into 6–8 rounds with a sharp knife.
- Transfer to a serving platter with dip and garnish.
These are such a quick and delicious cheat you can find in Costco's frozen section. They come in chicken or beef and are typically sold in large packs, around 136 per bag.
Make sure you put them in the air fryer so they can crisp up. If you put them in the microwave, they steam and defeat the whole texture point. Slashing them for dipping turns a finger food into a shareable appetizer snack board.
16) Costco Greek Yogurt dip paired with veggie crudités

Ingredients
Method
- In a bowl, whisk yogurt, mayo, lemon juice, Dijon, honey, and minced garlic until smooth.
- Stir in dill, season with salt and pepper, and taste-adjust.
- Chill at least 30 minutes so flavors meld; I sometimes skip to 10 when hungry.
- Arrange veggies on a platter and serve alongside the chilled dip.
This is simple, fresh, and the kind of thing that balances out everything heavier on the table. Costco's Kirkland sells a Greek yogurt dip in a large tub, and it's really good value per serving. Greek yogurt as a dip base is generally better than mayo or Miracle Whip because it holds its shape and carries flavor without being too heavy.
I always stir through some flat-leaf parsley and chives with some grated garlic, then let it sit before serving. Then squeeze a little lemon over the whole dip, because it stops it from tasting so flat next to the surrounding vegetables.
Cut the veggies closer to serving time. If you cut them too far ahead, they start drawing out moisture and lose their crunch at the edges. Arrange the crudités by color rather than type, which makes it look more beautiful. Just before serving, drizzle some good olive oil over the top of the dip to add a little shine.
You could also substitute the Greek yogurt dip for hummus, which is a good trade-off, since Greek yogurt is lower in calories and higher in protein.
17) Kirkland BBQ Pulled Pork sliders on potato rolls

Ingredients
Method
- Preheat oven to 325°F. Place pulled pork in an oven-safe dish, add extra BBQ sauce if you like it saucier, and cover tightly with foil.
- Warm pork 20–25 minutes until heated through; stir once. While pork warms, split rolls and brush insides with melted butter.
- Toast rolls in oven 3–5 minutes until lightly golden. Pile pork on bottoms, top with coleslaw and pickles or onions, then close and serve.
Kirkland BBQ Pulled Pork sliders on potato rolls are a great option for your next casual paper-plate party, and everything here is from Costco. Kirkland's pulled pork is solid; it comes precooked in vacuum-sealed bags, and you'll find Martin's potato rolls are the standard choice. They're slightly sweet, soft, and they hold moisture really well.
Warm the pulled pork properly in a pan rather than the microwave. I find that keeps the texture from going dry. Toasting the cut sides of the rolls briefly before assembling keeps them from going soggy and gives them a whole different dimension. Then the pork goes on.
I make a quick slaw, just shredded cabbage with a sharp vinegar dressing. Rather than drowning the pork in sauce, give your guests extra barbecue on the side so they can add as much as they want. That way each slider stays their own.
Keep these warm in a slow oven or a slow cooker if you're feeding a crowd over time, because the pork dries out fast once it's been pulled.
18) Costco Mini Cannoli dusted with powdered sugar

Ingredients
Method
- Thaw mini cannoli according to package directions on a tray at room temperature for 30–60 minutes.
- Arrange the thawed cannoli on a platter. If desired, press a few mini chocolate chips onto the exposed filling at each end.
- Dust the cannoli lightly with powdered sugar just before serving to avoid sogginess.
- Arrange on a platter and add mint leaves for color if desired.
You'll find these pretty early in the Costco bakery section, near the bulkhead. They come pre-filled, ready to go, and dusted with powdered sugar. You literally have nothing to do; just put them on a platter.
So traditionally, a cannoli is Sicilian in origin. They fry the pastry shell and then fill it with sweet ricotta, sometimes mascarpone, often with white chocolate chips or citrus. When you buy these, make sure the shells are not soggy. Keep them properly chilled right up to the last moment, because the filling softens fast at room temperature and the shell loses crispiness.
I like to add a few pistachios on top, for a bit of crunch against that smooth filling, and some fresh strawberries on the side.
Almost every recipe in this list freezes well. I double-batch on a slower Saturday, freeze half in flat zip-top bags, and pull them out on the kind of weeknight where dinner needs to happen yesterday.
19) Buffalo-style Costco Chicken Bites with ranch dip
Ingredients
Method
- Preheat oven to package temperature (usually 400°F). Arrange frozen bites on a baking sheet in a single layer.
- Bake according to package directions until crisp and cooked through, about 18–22 minutes, flipping once.
- Whisk hot sauce, melted butter, garlic powder, and pepper in a large bowl.
- Toss hot, cooked bites with sauce until evenly coated. Serve immediately with ranch and celery.
Buffalo-style Costco Chicken Bites with Ranch Dip
I love this classic combination, and it comes together faster than almost anything else on the list. Make sure you crisp the chicken bites properly in the oven or the air fryer first. That's kind of what holds up once the sauce goes on. Then toss them in the buffalo sauce while they're still hot. That's what lets the sauce cling instead of pooling at the bottom of the bowl.
I like to make a proper ranch dressing, even just from a packet, but I stir in sour cream and buttermilk. A sprinkle of chives or parsley over the top finishes the bowl without any real effort.
Serve the ranch on the side rather than over the top. This keeps the chicken crispy for longer and lets people control how much they want. This is the one plate that always empties first.
20) Kirkland Spinach & Feta Phyllo triangles baked golden

Ingredients
Method
- Preheat oven to 375°F (190°C) and line a baking sheet with parchment.
- Arrange frozen triangles on the sheet about 1 inch apart; no need to thaw.
- Lightly brush tops with melted butter or oil for extra golden color.
- Sprinkle seeds if using, then bake 18–22 minutes until deep golden and crisp.
- Let cool 3–5 minutes before serving to avoid hot-cheese burns.
Kirkland Spinach & Feta Phyllo Triangles Baked Golden
Look for Costco's in-house label Kirkland. It's known for value and bulk sizing. Always bake these straight from frozen; that's what keeps the phyllo crust from going soggy, and these are not good soggy. Make sure your oven is hot. You want that pastry to color quickly and properly rather than drying out over a long, slow bake. Space them properly on the tray, as crowding them creates steam and prevents the pastry from crisping all the way around. I like to brush some melted butter on before baking. They're already prepared, but this gives you an extra layer of color and crunch.
Serve these warm, not hot, because the filling needs a couple of minutes to settle so it doesn't burn anyone's mouth. I find that these hold up better than most big appetizers when people are grazing over a long time. The pastry stays crisp longer than you'd expect. No one needs to know this came out of a box in the freezer section.
21) Costco Chocolate-Covered Strawberries on skewers

Ingredients
Method
- Gently remove berries from their container, patting briefly with a paper towel if any condensation shows.
- Thread 2 chocolate-covered strawberries onto each skewer, leaving a little space between them so chocolate doesn’t stick together.
- Roll or dip exposed areas lightly in chopped nuts or sprinkles if using, then place skewers on parchment paper.
- Chill skewers in the fridge 10–15 minutes to set any added toppings and keep chocolate firm.
Costco Chocolate-Covered Strawberries on Skewers
You'll find these chocolate-covered strawberries on skewers in bulk packs, often 12 to 18, in the dairy or bakery section, or sometimes the seasonal fresh fruit section. They come in a darker chocolate coating, and the skewer format makes them easier to handle and serve at events. They're super popular for parties, Valentine's Day, and Mother's Day, and their prices are competitive compared to other chocolate shops.
Freshness is worth keeping in mind. These stay fresh for about 1 to 3 days when refrigerated. I let them sit at room temperature for a short while before serving. If they come straight from the fridge, the chocolate can look slightly dull, the berry inside is colder than it should be, and it forms a kind of wet layer over the chocolate.
Arrange them with the stems facing the same direction or pointing outward. Small detail, but it makes a platter look like it was done by a professional. I also like to tuck a few fresh mint leaves between them.
22) Kirkland Olive & Cheese skewers with Castelvetrano olives

Ingredients
Method
- Pat olives dry with a paper towel to remove excess brine.
- Thread one olive and one cheese cube alternately onto each skewer; aim for two to three pieces per skewer.
- Arrange on a platter; drizzle olive oil and sprinkle red pepper flakes if using.
- Keep chilled until 10 minutes before serving.
These need almost nothing done to them, just a bit of rearranging. You can find Costco's Kirkland house-brand skewers pre-made in the daily prepared foods section. Let them come to room temperature before serving. Cold cheese straight from the fridge doesn't taste as much; the flavor opens up once it warms slightly.
I arrange them fanned out on a platter rather than piled together. I think it makes it look simple but intentional. These are one of the easiest things on the table to keep stocked, so refill the platter as it empties rather than putting everything out at once.
They normally come with Castelvetrano olives, which are Sicilian, bright green, and buttery with a mild flavor. They have a very different taste from the briny canned olives most people are used to. They are low in bitterness, which comes from the early harvest and minimal curing, a common point of surprise for many skeptics.
I like to scatter some fresh herbs across the platter, like basil or fresh thyme, which I think ties the whole thing together visually. Honestly, this is the easy party platter secret from Costco.
The Whole Point
You don't need to spend the whole day in the kitchen to host. You just need to know which shortcuts to take and how to dress them up properly. Costco has already done the hard parts, so your job is just the presentation and a few small touches, and the confidence to let people believe what they want to believe. That last part is actually the hardest.
, Sara


