

After all these years of hosting, the thing I've learned is to just stop stressing and take the shortcut, because no one else is telling you they are all taking one as well. No one is making that palpation from scratch. It's from the freezer, and I mean the freezer section from a supermarket.
Don't lose this article. Enter your email below, and I'll send it to you right now. Plus a little encouragement and inspiration from me, straight to your inbox.
No one's going to notice, and no one's going to care. And so, when I'm hosting, I make sure everything is done beforehand, frozen, and easy. Basically, all I have to do is get ready, open the door, and welcome my guests. At the end of the day, it's also about having a good time without stressing about the small stuff.

Five simple dinners. One grocery list.
No recipe hunting, no messy shopping notes, no complicated chef projects. Just family dinners that fit real weeks.
So here are 23 make-ahead appetizers for the easiest hosting you will ever do. I promise you, you won't break a sweat.
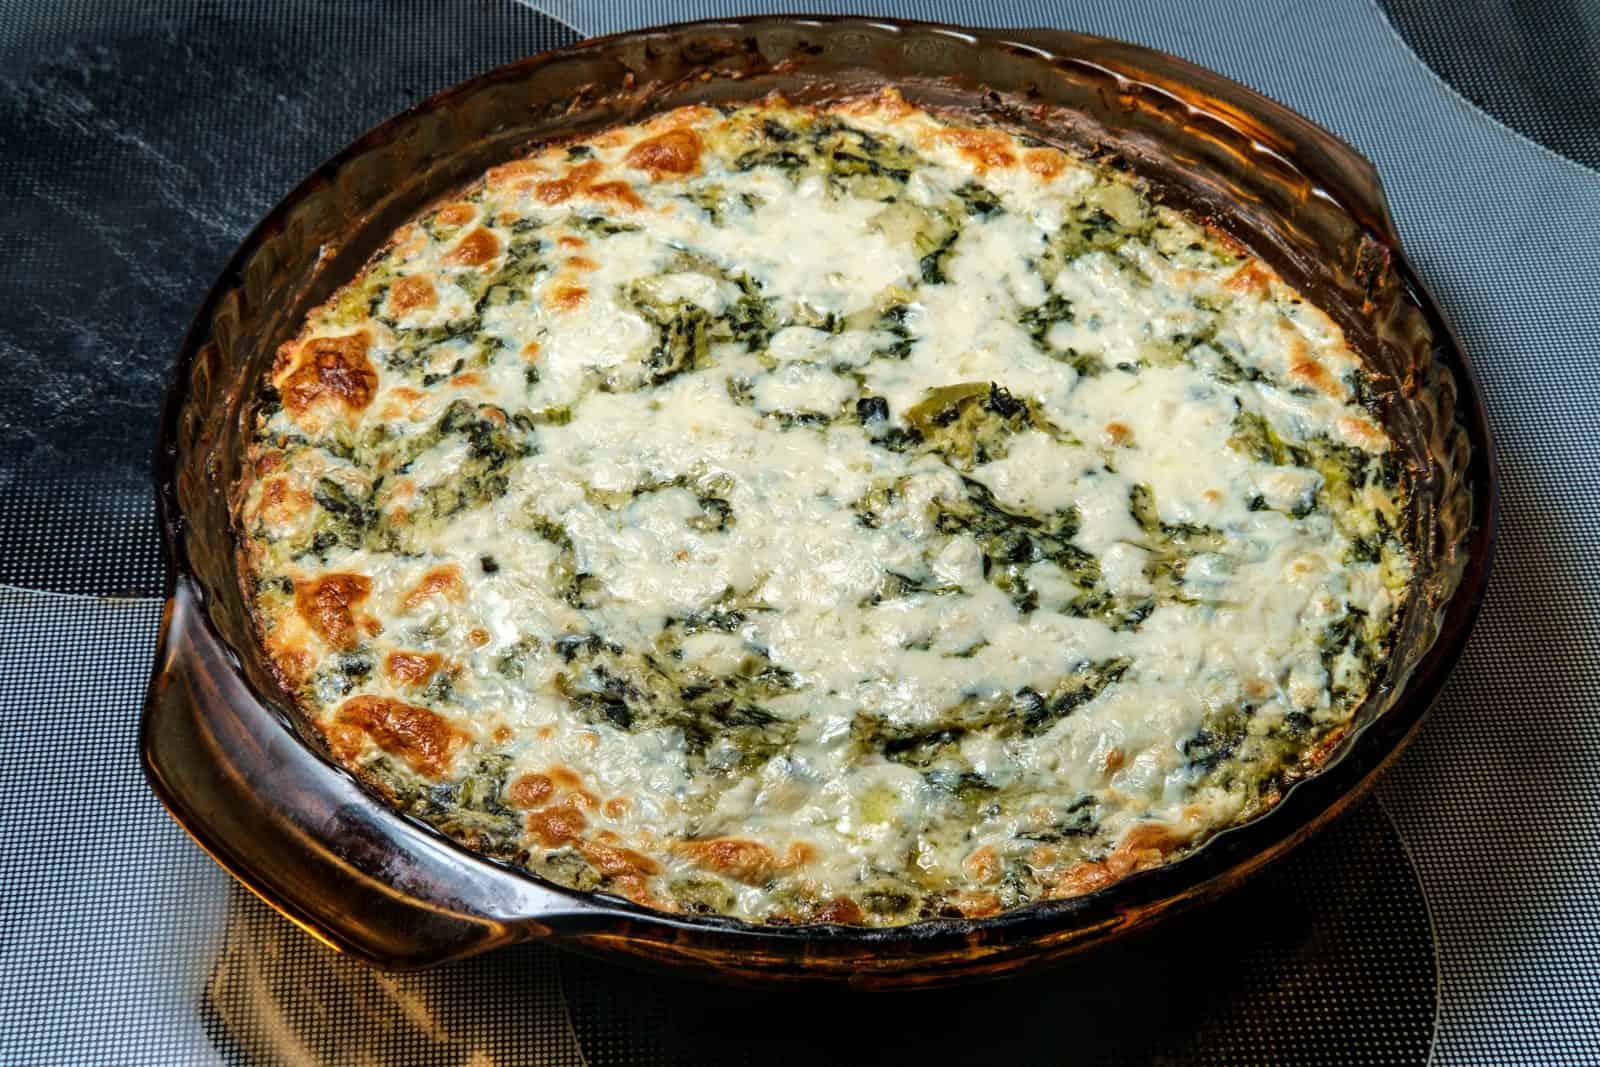
1) Make-Ahead Spinach and Artichoke Dip (bake-from-frozen)
Ingredients
Method
- Preheat oven to 375°F (or skip if freezing). Mix cream cheese, sour cream, mayo, garlic, lemon juice, salt, and pepper until smooth.
- Stir in spinach, artichokes, mozzarella, and Parmesan until evenly combined. Transfer to a 9-inch baking dish; smooth top.
- For freezing: wrap tightly with plastic and foil; freeze up to 3 months. To bake from frozen: remove foil, bake covered 30 minutes, uncover and bake 10–15 minutes until bubbly and golden. Serve with chips, baguette slices, or veggies.
I think one of my all-time favorite dips to make is the spinach and artichoke dip, because it's so easy, so delicious, and such a crowd-pleaser.
I think a lot of people assume it has to be a last-minute, stovetop, right-before-guests-arrive situation, but it really isn't. I make the whole thing, stick it straight in the freezer in the dish I'm going to bake it in, and then the day of, it goes from the freezer to the oven.
I think it's one of the easiest: no assembly, no chopping, nothing happening while people are already in the house. Just bake it, put it on the table with some bread and crackers, and it's gone in about 10 minutes anyway.
And if you really want to finish this off officially, grate some parmesan over it, then broil it for a little bit, and it gets delicious.
2) Mini Caprese Skewers with Balsamic Glaze (assemble ahead)
Ingredients
Method
- Thread a tomato, a basil leaf (folded if large), and a mozzarella ball onto each skewer.
- Arrange skewers in a single layer in an airtight container lined with paper towels to absorb moisture.
- Whisk olive oil with a little salt and pepper; drizzle lightly over skewers if serving within a few hours.
- Store covered in the fridge up to 24 hours; keep glaze separate.
- Just before serving, drizzle with balsamic glaze or warm reduced balsamic for a glossy finish.
These beautiful mini caprese skewers are my secret weapon when I want something that looks impressive without spending hours in the kitchen. What's really cool about these is that you can prep them ahead of time, so the juicy cherry tomatoes, creamy mozzarella, and fresh basil are ready to go; all you have to do is drizzle a little balsamic glaze and olive oil.
They're so colorful, fresh, and I find completely fuss-free, which means you get to actually get to enjoy your guests instead of disappear into the kitchen all the time. I think it's a kind of easy little appetizer that looks like you've made an effort when you've really barely broken a sweat.
3) Sausage-Stuffed Mushrooms (prep-night-before)

Ingredients
Method
- Preheat oven to 375°F (190°C). Lightly oil a baking sheet.
- Sauté shallot and garlic in 2 tbsp olive oil until softened, then add sausage and cook through. Break up pieces and drain excess fat.
- Stir in panko, Parmesan, parsley, and seasonings; remove from heat and let cool.
- Fill mushroom caps with sausage mixture, place on sheet, brush tops lightly with oil.
- Cover tightly and refrigerate overnight. Next day bake 18–22 minutes until mushrooms are tender and filling is golden.
These are delicious, joyful, and also really easy. Make these guys the night before, cover them up, and put them in your fridge. Just before your guests arrive, preheat the oven and let them warm up. I like to use chicken sausage here too because a lot of my friends don't eat red meat.
And these are also delicious with some grated parmesan on them and a mature cheddar. Serve this on a plate with fresh rocket and a little mini fork, and they go down a treat.
4) Smoked Salmon and Dill Cream Cheese Cucumber Bites

Ingredients
Method
- Mix cream cheese, sour cream, dill, lemon juice, salt, and pepper until smooth.
- Pat cucumber slices dry with paper towel to prevent sogginess.
- Pipe or spoon a small dollop of the dill cream cheese onto each cucumber round.
- Top each with a piece of smoked salmon and, if using, a few capers or a sliver of red onion.
- Chill on a tray covered with plastic wrap for 30 minutes to let flavors meld.
I don't know anyone who can resist a smoked salmon and cream cheese combination, especially with cucumber. Plus, they're super low-carb and absolutely delicious.
These are very easy to make and don't require a lot of thinking on the day. Okay, so chop up some cucumber, pat it dry because they do like a little bit of water, make a cream cheese mixture, and then assemble just before guests arrive. I'd say you could do this ahead of time; they look super fancy and they taste delicious.
You could serve them in a little Chinese teaspoon or so, which looks really pretty, and then finish them off with some micro herbs that you just get from the shop.
5) Buffalo Chicken Taquitos (freeze then reheat)

Ingredients
Method
- Mix chicken, buffalo sauce, cream cheese, shredded cheese, dressing, and garlic powder until evenly combined.
- Warm tortillas briefly so they’re pliable. Spoon ~2 tablespoons filling down each tortilla and roll tightly.
- Place taquitos seam-side down on a baking sheet lined with parchment. Spray or brush lightly with oil.
- Bake at 400°F for 12–15 minutes until crisp, flipping once for even browning.
- To freeze: flash-freeze on the sheet 1 hour, transfer to a freezer bag. Reheat frozen taquitos at 400°F for 18–22 minutes.
When I make these chicken taquitos, I make a huge batch and freeze them so I can use them for hosting or a dinner party that's coming up.
Later, I'll take them straight from the freezer and put them in the oven. No need to thaw; they come out crispy, as if you made them fresh, which is honestly the part that surprised me the first time. And they disappear fast at the party, so I always make way more than feels reasonable, because more always seems to be never enough.
This is delicious with a blue cheese dressing and some sweet chili sauce on the side.
6) Prosciutto-Wrapped Melon Bundles (assemble chilled)

Ingredients
Method
- Cut melon into uniform 1-inch wedges and pat dry so prosciutto sticks.
- Lay a basil leaf on each melon wedge if using.
- Wrap each wedge with a half-slice of prosciutto and secure with a toothpick.
- Arrange on a tray, cover tightly with plastic wrap, and chill until serving.
- Drizzle honey or balsamic glaze just before serving, if desired.
These are so easy to make that I actually get my six-year-old son to do. I get them done the morning of the party, pop them in the fridge and cover them, and just before guests arrive, let them come to room temperature on a platter.
There's something about salty cured meat to wrap around something sweet that just works, and of course you've had no cooking here.
I like to serve this with tons of fresh basil from my garden and a balsamic reduction, which really goes well with it. Have some toothpicks on hand for these, or for the plates.
7) Greek Mezze Platter with Marinated Feta (prep olives & feta)

Ingredients
Method
- Whisk oil, oregano, lemon zest/juice, garlic, and red pepper flakes in a bowl.
- Place feta in a shallow container and pour half the marinade over it; add olives to a separate bowl and toss with remaining marinade.
- Refrigerate both covered for at least 4 hours or overnight to meld flavors.
- Arrange feta, olives, cucumber, tomatoes, onion, roasted peppers, and parsley on a platter before guests arrive.
- Serve with warmed pita or sliced bread and let people spoon the marinated oil over their portions.
Guys, I think this is the easiest one to make and probably the one that stands out the most because you can make this look super fancy and put it on a big wooden board. It's just literally opening packets of olive from the shop, feta, that all you need to do is marinade with a little bit of a lot of oil and some Italian herbs and spices from your pantry.
Sun-dried tomatoes are already store-bought; if you prefer, you can rehydrate some yourself and make them from scratch, but buying is just as easy. It's the way you played this that I think is really important. So, add some fresh baguette and hummus, and you've got a delicious grazing platter that probably takes about 10 minutes to make.
8) Bacon-Wrapped Dates Stuffed with Goat Cheese (make ahead, reheat)

Ingredients
Method
- Preheat oven to 400°F (200°C). Line a baking sheet with foil and a wire rack.
- Fill each date with about 1 tsp goat cheese; drizzle honey if using.
- Wrap each stuffed date with a half-slice of bacon and secure with a toothpick.
- Place on rack and bake 15–20 minutes until bacon is crisp. Rotate once for even cooking.
- To reheat: warm in a 350°F oven for 8–10 minutes from refrigerated, or microwave briefly for 30–45 seconds.
I have to admit, goat's cheese and I are not exactly best friends, so I'm usually not the first person to reach for it. But somehow, wrapped in crispy bacon with sweet, sticky dates, even I can get on board.
These are also really good to make ahead because they're so easy: just assemble, pop them in the fridge, and reheat when you're ready to serve.
And my son, who has his own very specific way of eating them, carefully pulls off the bacon, one bit at a time, and leaves the rest. I mean, typical. Honestly, at least he knows what he likes.
These are sweet, salty, crispy, and creamy. And I'm always surprised at how many people really love goat's cheese, so they disappear quickly.
9) Mini Quiche Lorraine (bake and freeze)

Ingredients
Method
- Preheat oven to 375°F. Press pie crust into a 12-cup mini muffin tin; trim excess.
- Cook bacon until crisp, drain and chop. Sauté onion in bacon fat until soft, if using.
- Whisk eggs with half-and-half, salt, pepper, and nutmeg. Stir in bacon, onion, and cheese.
- Fill each crust about 3/4 full with mixture. Bake 18–22 minutes until set and golden. Cool completely.
- To freeze: layer with parchment in an airtight container. Thaw overnight and rewarm at 325°F for 8–10 minutes.
I normally make these mini quiche lorraines when I'm making a big quiche. I'll have leftover pastry and filling, and since I always think ahead for parties and hosting, I'll make little ones on the side and freeze them. They freeze really well. Pretty much just store-bought pastry, egg, cream, bacon, and cheese, and they go. Take them straight out of the freezer and put them in the oven, and you've got yourself a delicious morsel.
10) Honey-Sesame Meatballs with Dipping Sauce (slow-cook then keep warm)

Ingredients
Method
- Mix meat, panko, egg, garlic, ginger, 1 tbsp soy, sesame oil, salt, and pepper; form into 1-inch meatballs.
- Brown meatballs in a skillet, then transfer to a 3–4 qt slow cooker.
- Whisk honey, rice vinegar, hoisin (or soy), and remaining soy; pour over meatballs.
- Cook on low 2–3 hours, or high 1–1.5 hours, then stir slurry into sauce and cook 10 more minutes until glossy.
- Garnish with sesame seeds and green onions; keep on warm for serving.
So you can go all out here and, if you like, make these meatballs from scratch and freeze them, or you can go and buy the meatballs and freeze them, which is basically cutting time in half.
And then on the day of the party, make yourself that delicious dipping sauce, which is the glaze, and heat them up in a frying pan.
And all before we go, sprinkle some toasted sesame seeds over, add some spring onion, and serve with little forks. You can even make these meatballs with vegetarian or chicken meatballs if you've got a whole bunch of friends who don't eat meat or don't specifically like pork; it's always a win.
11) Cranberry Brie Puff Pastry Bites (assemble and bake day-of)

Ingredients
Method
- Preheat oven to 400°F (200°C). Line a baking sheet with parchment.
- Roll puff pastry lightly and cut into 16 equal squares. Dust with flour as needed.
- Place a Brie cube in the center of each square, top with ~1 tsp cranberry sauce and a pinch of herb.
- Fold corners over to form little parcels and press edges to seal. Brush with egg wash.
- Bake 12–15 minutes until golden and puffed. Cool 2 minutes before serving.
Another one I get the whole family involved in, because it's just so easy to make, is the cranberry brie puff pastry bites.
I buy the puff pastry sheets, then cut them into little squares, put some brie in, cut, and then, of course, cranberry jam from a jar, fold them over, and then in the freezer they go.
These go straight from the freezer to the oven and make a delicious mouthful. This is something about that combination of sweet, but the brie and that puff pastry that just goes down like such a treat. This takes me less than 20 minutes to make, and it's a great one to save around Christmas time.
Don't lose this article. Enter your email below, and I'll send it to you right now. Plus a little encouragement and inspiration from me, straight to your inbox.
Room-temperature butter and eggs make every single one of these recipes turn out better. Set them out an hour before you start. That tiny step is the difference between bakery quality and just-okay.
12) Roasted Red Pepper Hummus with Veggie Sticks (make 2 days ahead)

Ingredients
Method
- Combine chickpeas, roasted peppers, tahini, olive oil, garlic, lemon, cumin, paprika, and salt in a food processor.
- Puree until smooth, adding cold water a tablespoon at a time to reach desired creaminess.
- Taste and adjust salt or lemon as needed; transfer to an airtight container.
- Chill up to 48 hours. Cut veggies and store in a separate container with a damp paper towel.
I always make my hummus from scratch, and it's one of those things my friends actually request when they come over- not to pat myself on the back or anything, but it's good. The roasted red peppers make it sweet, smoky, and a little bit more exciting than your everyday normal hummus.
And the best part is you can make it up to 2 days ahead, making it a foolproof meal. My son is also a huge fan, which is such a bonus because it means I can get him involved in the kitchen, and it's so healthy for him. He loves helping me prep the veggies by washing and cutting them. A great, easy make-ahead snack that feels homemade, healthy, and fun for everyone.
13) Pulled Pork Sliders with Coleslaw (make pork in advance)
Ingredients
Method
- Shred pork with forks, stir in 1 cup BBQ sauce, and refrigerate in an airtight container for up to 3 days.
- Mix coleslaw: combine mayo, vinegar, mustard, honey if using, and salt; toss with coleslaw mix just before serving.
- Reheat the pulled pork in a saucepan with a splash of broth, stirring until the center reaches 165°F throughout. For holding only, transfer the hot pork to a preheated slow cooker set to warm at 140°F or above.
- Pile on slider buns, top with coleslaw, and serve with extra BBQ sauce.
One of my husband's absolute favorites is these pulled pork sliders, and we generally have the pulled pork ready, frozen in the freezer from previous times that we've made the batch.
So I just take the little Ziploc bags out and let them defrost, heat them up, and then I just assemble them on the day. I'll buy the little sliders, heat them up a bit, and then the coleslaw is already bought from the shop and just needs a little more mixing through.
You can turn these into Asian-inspired ones also if you add a little bit of sriracha to the coleslaw and serve it with some coriander. It is delicious.
14) Deviled Eggs with Dill and Paprika (classic, make a day ahead)

Ingredients
Method
- Place eggs in a single layer, cover with cold water, bring to a boil, then remove from heat and cover; let sit 12 minutes.
- Cool in ice water 5 minutes, peel, and halve eggs lengthwise. Remove yolks to a bowl.
- Mash yolks with mayo, mustard, vinegar, dill, salt, pepper, and optional pickle until smooth.
- Pipe or spoon mixture back into white halves and sprinkle with paprika.
- Cover and refrigerate up to 24 hours; add paprika just before serving if you want the brightest color.
We're really lucky enough to go and pick fresh eggs and herbs in the garden, and I think that makes these deviled eggs even better because they are super organic.
I have a recipe that's being passed down through generations, although honestly it changes a little bit every time, I think.
I love using my paprika because it gives them that gorgeous smoky flavor that I love. And I have to confess, I usually make a platter of these to bring to everyone, and then suddenly I've eaten half of them before they even get out there.
15) Prosciutto & Fig Crostini with Mascarpone (assemble quickly)

Ingredients
Method
- Brush baguette slices lightly with olive oil and toast in a 400°F oven 6–8 minutes until golden.
- Spread about 1 tsp mascarpone on each toast.
- Top with a fig half (or a small spoon of fig jam) and a folded slice of prosciutto.
- Drizzle with honey, add a crack of black pepper, and finish with thyme or arugula if using. Serve immediately.
For these prosciutto-and-fig crostini, I only make them when figs are in season because that's when they're at their best and not so expensive. And my neighbors know I'm a fan and regularly hand bags of them over the fence.
So I'm always looking for ways to use them; they're really easy to assemble, to the point that even my husband managed to use them in art, needing me to supervise every step.
The combination really works: crisp, sweet, juicy figs, and then that saltiness from the prosciutto. And they also look fancy enough.
“My picky one asked for seconds, which is how I measure a recipe’s success.”
16) Sweet Chili Shrimp Cocktail (poach and chill)

Ingredients
Method
- Bring water, lemon slices, bay leaf, and salt to a simmer in a medium pot.
- Add shrimp and cook 2–3 minutes until pink and just firm; do not overcook.
- Transfer shrimp to an ice bath immediately to stop cooking and chill completely.
- Whisk sweet chili sauce, rice vinegar, and soy sauce; toss half the shrimp in the sauce.
- Arrange sauced shrimp and plain shrimp on a platter with ice or chilled bowl; garnish if desired.
There is nothing more wonderful and nostalgic than a shrimp cocktail, and I love giving the classic version a little sweet-chili twist. What I do is I'll purchase the shrimp and then chill them in the morning, which means there's almost nothing to do when my guests arrive. If I'm being honest, keeping enough shrimp for the actual cocktails is my biggest challenge here because I pick on them all day.
I like to serve these in really old-school cocktail glasses, which I've got at the top of the cupboard. And then I assemble them over the lip of the cup, and then I add some cream sauce in the middle. These are really easy, make-it-entertaining little bites of heaven that everyone seems to love.
17) Loaded Potato Skins (bake and reheat, top before serving)

Ingredients
Method
- Preheat oven to 400°F. Scrub potatoes, rub with oil and salt, and bake 45–60 minutes until tender.
- Cool slightly, halve lengthwise, and scoop out most of the flesh, leaving a 1/4-inch shell.
- Brush shells with oil, return to oven 10–15 minutes until crisp.
- Cool, wrap and refrigerate or freeze for make-ahead storage.
- To serve, reheat skins at 375°F 10–12 minutes, top with cheese and bacon, bake until cheese melts, then dollop sour cream and sprinkle chives.
These are surprisingly satisfying and really easy to make. When I make these, I completely bake the potatoes beforehand and then refrigerate them, and then it's just literally assembling, which I've done a few hours before my guests arrive.
My son would have picked all the bacon pieces off these if they were out, so these are hidden away and covered, and then I just finish them with some spring onion, chives, and a dollop of mascarpone or cream cheese, whatever I've got.
18) Herbed Goat Cheese Stuffed Peppadews (fill jars ahead)

Ingredients
Method
- Whip goat cheese and Greek yogurt in a bowl until smooth; stir in herbs, lemon zest, salt, and pepper.
- Use a small spoon or piping bag to fill each peppadew with the cheese mixture.
- Pack stuffed peppadews into sterilized 16-oz jars, pressing down gently to remove air pockets.
- Pour olive oil over peppers to fully submerge; seal jars and refrigerate at least 2 hours before serving.
- Keep refrigerated up to 5 days; serve with crackers or toothpicks.
We actually have a peppadew bush, and when they are ripe and in season, I typically serve them at a barbecue, or if I'm going somewhere, I'll take them. Personally, I don't use goat cheese; I use cream cheese. And these are made beforehand and are pretty easy because I just fill jars ahead of time; they're so easy to transport as well, and they look really pretty.
It has something really to it, the juice going on with it, when it's been marinated it has a sweet tangy flavor that goes so well with that cheese.
19) Cranberry-Pecan Baked Brie in Puff Pastry (assemble, freeze)

Ingredients
Method
- Mix cranberry sauce, pecans, and brown sugar in a small bowl. Taste and adjust sweetness.
- Place Brie on pastry center, spoon cranberry-pecan mix on top, and tuck herbs if using.
- Fold pastry around Brie, sealing edges; brush with egg wash.
- Wrap tightly in plastic wrap and freeze on a tray until firm, then bag for longer storage.
- To bake from frozen, thaw 30 minutes, preheat oven to 375°F, brush again with egg, and bake 25–30 minutes until golden.
This is so easy to make it should be criminal, and it looks like it's taken skill and effort, but literally it's just a wheel of brie, some cranberry sauce, and toasted pecans. And then wrap the whole thing in a sheet of puff pastry, and in the oven it goes. I think my six-year-old son could make this.
These are great; just make them ahead of time, keep them in the fridge or even in the freezer, and then just bake them off before people arrive. You want it to be warm, though, because that cheese needs to be oozing and delicious. There's something so great about a cranberry pecan combo; it just all works- sweet, tart, and a bit of crunch cutting through that cheese.
Almost every recipe in this list freezes well. I double-batch on a slower Saturday, freeze half in flat zip-top bags, and pull them out on the kind of weeknight where dinner needs to happen yesterday.
20) Mini Chicken and Waffle Bites (make waffles ahead, reheat)

Ingredients
Method
- If waffles are cold, reheat in oven at 350°F for 5–8 minutes or in a toaster until crisp.
- Toss warmed chicken with butter, paprika, salt, and pepper.
- Top each mini waffle with a chicken piece, drizzle with a little maple syrup, and secure with a toothpick.
- Arrange on a serving platter and keep warm in a low oven if needed.
I make these for my son's birthday parties every single year because they are such a hit with the kids and so easy to put together. I'm all for a shortcut here, so I'll happily use a pre-made waffle mix and easy, quick chicken rather than making everything from scratch.
I like to make the little waffles and chicken bites ahead of time, and then I just reheat them in the air fryer, and then the party starts. I think they're really cute and fun to eat, and we like to stick little toothpicks in them, which my son loves to do himself. Always a winner for us.
21) Spinach-Feta Phyllo Triangles (prepare and freeze)

Ingredients
Method
- Squeeze excess moisture from spinach and combine with feta, ricotta, sautéed onion, egg, and seasonings. Taste and adjust salt.
- Lay one phyllo sheet, brush with butter, fold into thirds lengthwise, place a tablespoon of filling at one end, and fold into a triangle. Repeat.
- Arrange on a baking sheet; freeze flat until solid, then transfer to a bag for long-term storage.
- To bake from frozen: brush with egg wash and bake at 375°F (190°C) for 18–22 minutes until golden.
These are the best triangles out there; they are a little bit of a labor of love, but we have the time to make a whole bunch of these and then freeze them. Even if you don't like spinach, you will eat these and enjoy them. I prefer to use fresh spinach for this one because I do feel like it is a bit of a flavor defense here.
22) Avocado Corn Salsa in Endive Spears (mix shortly before serving)

Ingredients
Method
- Combine corn, tomato, red onion, jalapeño, cilantro, lime juice, salt, and pepper in a bowl.
- Gently fold diced avocado into the corn mixture only a few minutes before serving to avoid browning.
- Spoon mixture into chilled endive leaves and arrange on a platter.
- Keep extras refrigerated and assemble more spears as needed to keep leaves crisp.
I don't always find endive, but when I do, I grab them because they make the best edible spoons out there and do make a good canopy. Also, corn needs to be in season with us. And then it's just all about assembling.
Avocado does oxidize, so make yourself set a few hours before, and make sure you squeeze a good amount of lemon and lime over it and balance that art with a good olive oil also. Frozen sweet corn does the job just as well as fresh, is delicious, and you can eat about six of them without feeling full.
23) Italian Antipasto Skewers with Salami and Provolone

Ingredients
Method
- Pat tomatoes and mozzarella dry so they don’t make skewers soggy.
- Thread salami, provolone, tomato, mozzarella, artichoke, and olive onto each skewer in any order you like.
- Whisk olive oil and oregano, then lightly brush or drizzle over skewers.
- Cover and refrigerate up to 24 hours; bring to room temp 15 minutes before serving.
- Garnish with basil just before serving.
When we're having a large number of people over for a dinner party or barbecue, and I feel like going a little bit extra, I'll make a huge batch of these the day before. They refrigerate really well.
There's no real recipe here; it's just having good ingredients and layering them so each part has a bit of everything- salty, something fresh to break it up.
They're also the easiest thing to grab and eat standing up.
I like to serve these with a good drizzle of olive oil and some cracked black pepper, and I think that just finishes it off.
The Whole Point
My whole approach to hosting changed once I stopped trying to make something new every time and just started doubling whatever it was already easy for me. So if I'm making spinach and feta filling for a party, I'll make double the amount and then freeze it, knowing I will use it later.
So that's why I really strategize; it's just being thoughtful enough to save future me the trouble. I used to think every gathering needed something new on the table to prove I'd made an effort, but honestly, now I don't feel that way anymore. I'd rather have five things I know I can pull from the freezer than scramble to embrace something untasted. It also saves me from spending too much time in the kitchen while everyone else is enjoying my party.
, Sara


