

These are some new and exciting chocolate chip cookie variations that I guarantee you have not tried before, and you're going to love them. This is a handpicked collection of recipes, not just a random dump of cookies, and it's perfect for home cooks who want clear, reliable guidance in the kitchen. These recipes are worth your time. Tested, detailed, and actually doable. Let's get baking!
Don't lose this article. Enter your email below, and I'll send it to you right now. Plus a little encouragement and inspiration from me, straight to your inbox.
Classic Brown Sugar Chewy


Dinner is handled every Sunday
Get 5 easy family dinners, printable recipe cards, and one grocery list. Simple meals, normal ingredients, no more starting from zero at 5pm.
Brown sugar is honestly the secret to a chewy cookie because the molasses in it keeps moisture locked in way longer than white sugar does. That's why these chewy cookies will stay soft for a few days. Pull them out of the oven earlier than you think because they keep cooking on that hot pan after you take them out. If they look slightly underdone when you pull the pan out of the oven, it means they'll be perfect once cooled.
I usually chill my dough beforehand because it deepens the flavor and keeps them from spreading too much. And if you go all brown sugar instead of a blend, you'll get a deeper flavor, but your edges won't get as crispy. So it just depends on what kind of cookie you want.
Ingredients
Method
- Preheat oven to 350°F and line baking sheets with parchment paper.
- Whisk together flour, baking soda, and salt in a medium bowl and set aside.
- In a large bowl, beat softened butter and brown sugar until fluffy, about 3 minutes, then add eggs and vanilla and mix until combined.
- Gradually add the flour mixture to the wet ingredients, mixing just until no flour streaks remain.
- Fold in the chocolate chips, then cover the dough and refrigerate for at least 1 hour.
- Scoop dough into 2-tablespoon portions and place 2 inches apart on prepared baking sheets.
- Bake for 10-12 minutes until edges are set but centers still look slightly underdone.
- Let cool on baking sheet for 5 minutes before transferring to a wire rack to cool completely.
Cornstarch Thick Softies

These cornstarch-thick softies are impossibly thick, pillowy cookies that stay soft for days by interrupting gluten formation. Cornstarch is going to replace around 15 to 25 percent of your flour. If you use too much, you will make your cookies greasy and flat, but if you use too little, they're going to lose that pillowy effect.
That gluten interruption I mentioned basically means that you have a tender crumb and chew, which is different from all-butter softness or cake cookies. The starch absorbs moisture over time, which is why they don't dry out as regular cookies do.
You want to have slightly underdone centers, so be sure to take these out before you think they're done, because that carryover cooking matters. The pan is still going to be hot, which means that these keep cooking even outside of the oven. You want your edges to look set, but your centers soft.
Store these in an airtight container, and these cookies will actually improve on day two or three as that moisture redistributes.
Ingredients
Method
- Preheat oven to 325°F and line baking sheets with parchment paper.
- In a medium bowl, whisk together flour, cornstarch, baking soda, and salt until well combined.
- Beat butter, brown sugar, and granulated sugar in a large bowl until light and fluffy, about 4 minutes.
- Add eggs one at a time, beating well after each addition, then mix in vanilla extract.
- Add the flour mixture to the wet ingredients and mix on low speed just until combined.
- Fold in chocolate chips with a spatula, then chill dough for 30 minutes.
- Scoop dough into 3-tablespoon portions and roll into tall balls, placing 3 inches apart on baking sheets.
- Bake for 12-13 minutes until edges are barely golden but centers look puffy and underdone, then cool on the pan for 10 minutes before transferring to a wire rack.
Extra Yolk Gooey Centers

Extra egg yolks create a fudgy cookie center that stays gooey even when it's cool. You're going to use three yolks and one whole egg to create a brownie-like texture that everyone is going to love.
Using three yolks instead of just one whole egg shifts the ratio dramatically, giving you more fat and richness, and gooeyness when cooled is the ultimate cookie payoff. That yolk fat is going to stay soft longer than typical cookie dough, and it's going to have a dark chocolate bitterness as a counterbalance. These won't be light and fluffy like your standard chocolate chip cookies, but they'll be undeniably delicious.
Ingredients
Method
- Preheat oven to 325°F and line two baking sheets with parchment paper or silicone mats.
- Whisk together flour, baking soda, and salt in a bowl and set aside.
- In a large mixing bowl, beat butter, brown sugar, and granulated sugar on medium speed until creamy and smooth, about 3 minutes.
- Add the whole egg and egg yolks one at a time, beating well after each addition, then mix in vanilla extract.
- Reduce mixer speed to low and gradually add the flour mixture, mixing just until no dry streaks remain.
- Fold in dark chocolate chips using a rubber spatula until evenly distributed throughout the dough.
- Scoop dough into 2-tablespoon portions and place 2 inches apart on prepared baking sheets.
- Bake for 13-14 minutes until edges are set and lightly golden but centers still appear very soft and underbaked.
- Allow cookies to cool on the baking sheet for 8-10 minutes before carefully transferring to a wire rack to cool completely.
Browned Butter Rippled Edges

Browning butter creates lacy bakery-style edges and a nutty flavor that is sure to make you stand out. You're going to want to cool these completely before mixing them with sugar. Browning butter is simply milk solids caramelizing at 350 degrees Fahrenheit, creating nutty and toasty compounds that regular melted butter lacks. Cold browned butter changes your texture and affects how this dough spreads and sets during baking, so timing matters for your edge crispiness.
A common mistake is using warmed browned butter. This will not cream properly with the sugar, and it spreads too fast in the oven. That's why you'll want to make this ahead, and that actually has a huge advantage because you can store it for one to two weeks in the fridge and then just return it to room temperature, which is an important step, or the dough won't incorporate smoothly.
These have more flavor complexity, but they do require a slightly more finicky technique than standard melted butter. You're going to love the extra time spent on that.
Ingredients
Method
- Brown the butter in a saucepan over medium heat, stirring constantly until it turns golden brown and smells nutty, about 5-7 minutes, then let it cool completely to room temperature.
- Whisk together flour, baking soda, and salt in a medium bowl and set aside.
- In a large bowl, beat the cooled browned butter with both sugars until well combined, then add eggs and vanilla, mixing until smooth.
- Stir in the flour mixture until just combined, fold in chocolate chips, then scoop dough onto parchment-lined baking sheets and bake at 350°F for 11-13 minutes until edges are golden and rippled.
- Let cookies cool on the baking sheet for 5 minutes before transferring to a wire rack to cool completely.
Olive Oil Nutty Twist

Olive oil can replace butter in chocolate chip cookies, creating a chewy texture while adding just a touch of savory depth. Paired with nuts and sea salt, this will give you a sophisticated twist. And my favorite part: It only takes about half an hour to come together.
Fruity and peppery oils work best because mild, light oils lose their point, and quality matters here. That savory depth from olive oil complements chocolate differently than butter does.
Olive oil is naturally plant-based, which also makes these dairy-free and gives you a texture and richness that traditional cookies just don't have. A touch of salt is going to amplify the complexity of both your chocolate and olive oil.
Ingredients
Method
- Preheat oven to 350°F and line two baking sheets with parchment paper, then whisk together flour, baking soda, and salt in a bowl.
- In a large bowl, whisk together olive oil and both sugars until well combined, then add eggs and vanilla, whisking until smooth and emulsified.
- Stir the flour mixture into the wet ingredients until just combined, then fold in chocolate chips and toasted walnuts.
- Scoop rounded tablespoons of dough onto prepared baking sheets, sprinkle with flaky sea salt, and bake for 10-12 minutes until edges are set but centers are still soft.
- Allow cookies to cool on the baking sheet for 3 minutes before transferring to a wire rack to finish cooling.
No-Chill Ultra Thick

These no-chill ultra-thick cookies use extra flour and egg yolk to skip refrigeration while delivering a perfect, tasty, thick bakery-style cookie with gooey centers and crisp edges. Extra flour strengthens the gluten structure, which helps your dough stay stable without chilling. But you will have a slightly denser crumb than traditional chilled dough, but that is okay.
Egg yolk adds fat and richness, which helps bind without any need for rest time, and it also contributes to that gooey center that you're going to want. A cookie scoop ensures uniform size, which is exactly what you want for that professional appearance.
Forgiving dough is a real advantage here too. Overbaking these by one to two minutes still yields soft cookies. Standard dough can go from perfect to overdone quickly, and that's not the case here. Speed is the whole point, and it's useful for last-minute situations such as bake sales or guests coming over. That said, they do not necessarily have a superior flavor or texture to properly chilled dough.
Ingredients
Method
- Preheat oven to 350°F and line baking sheets with parchment paper, then whisk together flour, baking soda, cornstarch, and salt in a medium bowl.
- In a large bowl, mix melted butter with both sugars until combined, then add eggs, egg yolk, and vanilla, beating until smooth and thick.
- Stir in the flour mixture until just combined and no streaks remain, then fold in chocolate chips until evenly distributed.
- Use a large cookie scoop to portion dough into tall mounds on prepared baking sheets, spacing them 3 inches apart, and bake for 12-14 minutes until edges are golden but centers look slightly underdone.
- Let cookies cool completely on the baking sheet to allow them to set and maintain their thick shape.
Chocolate Chunk Melty Pools

Hand-chopped chocolate chunks, not chips, and underbaking are the secret to these bakery-style cookies with melted chocolate pools. Hand-chopped chunks have irregular sizes, so some will melt fully while others stay chunky, creating a texture variation that chips just cannot compete with.
You want to underbake these because the carryover cooking on that hot cookie sheet will set the centers as they cool, keeping them gooey while the edges crisp up perfectly. Your visual cue matters more than a timer here, so pay attention. You're looking for pale golden edges with a jiggly center, which is when you pull them.
Ingredients
Method
- Preheat oven to 350°F and line two baking sheets with parchment paper.
- Whisk together flour, baking soda, and salt in a medium bowl and set aside.
- In a large bowl, beat softened butter with both sugars until light and fluffy, about 3 minutes.
- Add eggs one at a time, beating well after each addition, then mix in vanilla extract.
- Gradually stir in the flour mixture until just combined, being careful not to overmix.
- Fold in the hand-chopped chocolate chunks, reserving a handful to press into the tops of cookies before baking.
- Scoop dough into 2-tablespoon portions and place 2 inches apart on prepared baking sheets.
- Press a few extra chocolate chunks onto the top of each dough ball for maximum chocolate pools.
- Bake for 11-13 minutes until edges are golden but centers still look slightly underdone.
- Let cookies cool on the baking sheet for 5 minutes before transferring to a wire rack.
Sea Salt Flaky Top
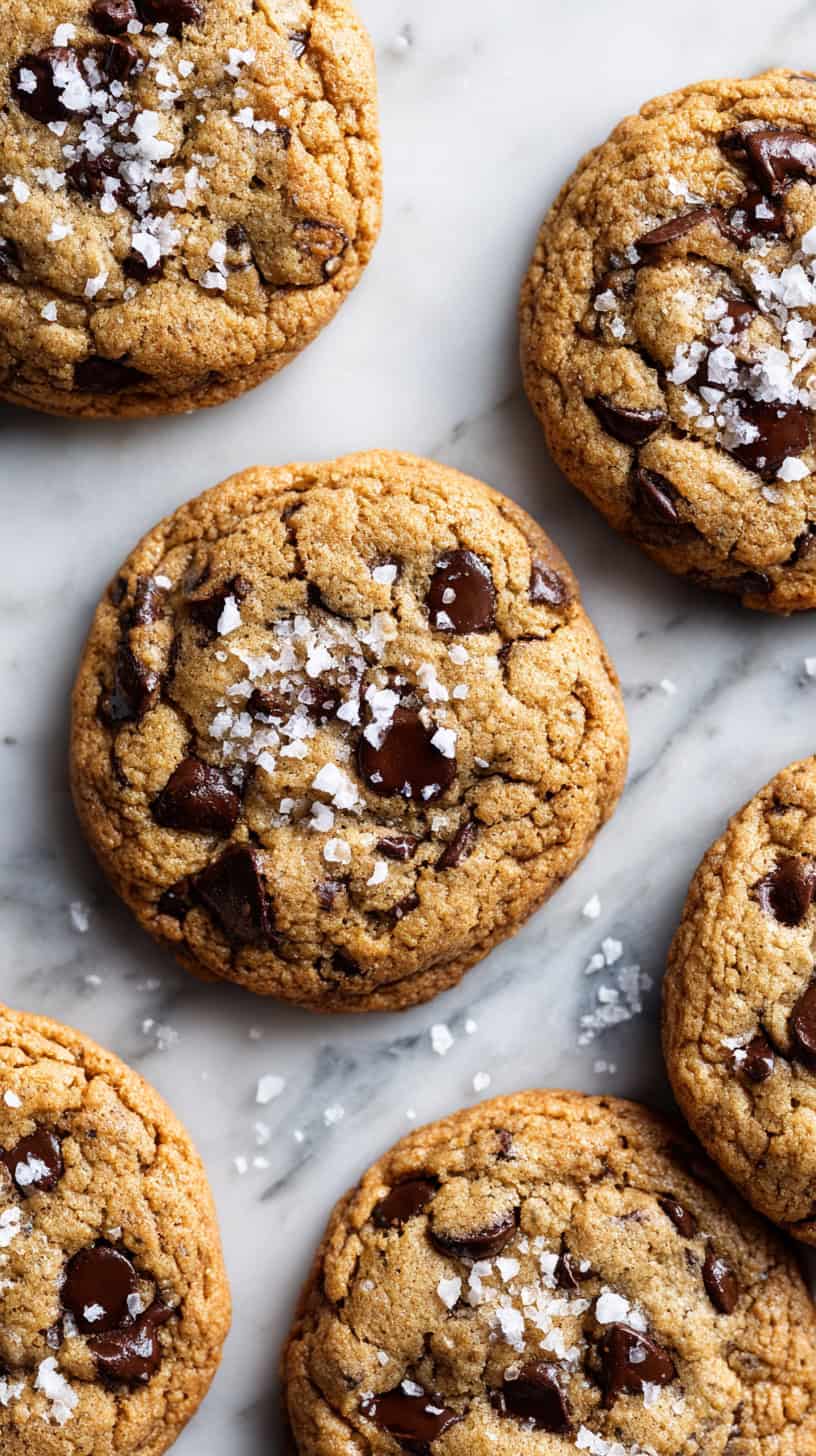
These sea salt flaky top cookies are going to give you a sweet and salty contrast that really steps up the flavor here. The key is being generous with it while using a quality finishing salt like Maldon. Maldon finishing salts have larger crystals and they dissolve slower, giving you a really good texture that table salt cannot compete with. Table salt would be overpowering and bitter, which is exactly what you don't want.
You want to add the salt right out of the oven because it adheres to the residual moisture. If you do it too late, it won't stick. A bold application is the point. You want those visible flakes to catch light and deliver flavor. Under salting kills the whole effect.
Ingredients
Method
- Preheat oven to 375°F and line baking sheets with parchment paper or silicone mats.
- In a medium bowl, whisk together flour, baking soda, baking powder, and fine sea salt.
- Beat butter with both sugars in a large bowl until creamy and smooth, about 2-3 minutes.
- Add eggs and vanilla extract, mixing until fully incorporated and mixture is fluffy.
- Gradually add the flour mixture, stirring just until no dry streaks remain.
- Fold in chocolate chips until evenly distributed throughout the dough.
- Roll dough into balls using about 1.5 tablespoons of dough per cookie and place on prepared sheets.
- Bake for 10-12 minutes until edges are set and lightly golden but centers are still soft.
- Immediately upon removing from oven, sprinkle each cookie generously with flaky sea salt.
- Allow cookies to cool on baking sheet for 3-4 minutes, then transfer to a cooling rack.
Dark Brown Caramel Chew

These dark brown caramel chew cookies are simply made by swapping white sugar for dark brown sugar, which gives you a bakery-quality, toffee-like cookie with a chewy texture that lasts for days. The molasses in brown sugar has a deeper flavor profile than white sugar alone, so it's not just a matter of sweetness.
Underbaking these, plus giving them a five-minute rest on the cookie sheet, is a technique combo that you do not want to skip. Resting allows that carryover cooking to finish the job without overbaking because your cookie sheet is still hot.
This is basically a blondie in a cookie form. It's denser with a softer crumb than a typical chocolate chip cookie, and it's one that your guests are going to die for.
Ingredients
Method
- Preheat oven to 325°F and line baking sheets with parchment paper.
- Whisk flour, baking soda, and salt together in a bowl and set aside.
- In a large bowl, whisk together the melted butter, dark brown sugar, and granulated sugar until smooth and well combined.
- Add the whole egg, egg yolk, and vanilla extract, whisking vigorously until mixture is glossy and smooth.
- Add the flour mixture all at once and stir with a wooden spoon or spatula until just combined.
- Fold in chocolate chips until evenly distributed throughout the thick dough.
- Scoop dough into rounded tablespoon-sized balls and place 2 inches apart on prepared baking sheets.
- Bake for 9-11 minutes until edges are just set but centers still look very soft and slightly underbaked.
- Remove from oven and let cookies rest on the baking sheet for 5 full minutes without moving them.
- Transfer cookies to a wire rack to cool completely, where they will continue to set up with a chewy texture.
Malted Milk Powder Magic

If you’ve never added malted milk powder to your chocolate chip cookies, you’re in for the most delightful surprise! This secret ingredient transforms an ordinary cookie into something that tastes like your favorite malted milkshake in cookie form. The malt adds a subtle toasty, almost caramel-like depth that makes everyone ask “what’s different about these?” They’re especially perfect for anyone who grew up loving Whoppers or malted milkshakes—it’s pure nostalgia in every bite.
The magic happens because malted milk powder doesn’t just add flavor; it actually affects the texture too, creating an extra-tender crumb that stays soft for days. I always keep a container in my pantry now because once you taste these, regular chocolate chip cookies just feel like they’re missing something special.
Ingredients
Method
- Preheat oven to 375°F and line baking sheets with parchment paper.
- In a medium bowl, whisk together flour, malted milk powder, baking soda, and salt.
- In a large bowl, beat butter, granulated sugar, and brown sugar until light and fluffy, about 3 minutes.
- Add eggs and vanilla extract to the butter mixture and beat until well combined.
- Gradually mix in the dry ingredients until just combined, then fold in chocolate chips.
- Drop rounded tablespoons of dough onto prepared baking sheets, spacing 2 inches apart.
- Bake for 10-12 minutes until edges are golden but centers still look slightly underdone.
- Cool on baking sheets for 5 minutes before transferring to a wire rack to cool completely.
Molasses Deep Flavor

Molasses adds complex warmth and chewiness to chocolate chip cookies, which means it'll improve the flavor over time and create an impressive treat. Molasses pulls moisture from the air, giving you a really chewy cookie, and that is why they actually soften and improve by day two or three.
Don't lose this article. Enter your email below, and I'll send it to you right now. Plus a little encouragement and inspiration from me, straight to your inbox.
Throwing in two to three tablespoons per dozen cookies is a typical ratio. If you do more than that, you risk these being bitter or overly dense. Unsulfured molasses is milder and cleaner, whereas sulfured molasses is more assertive, so choose based on your desired intensity as the cook.
Ingredients
Method
- Preheat oven to 350°F and line baking sheets with parchment paper.
- Whisk together flour, baking soda, salt, and cinnamon in a medium bowl and set aside.
- Beat butter, brown sugar, and granulated sugar together until fluffy, about 3-4 minutes.
- Add eggs, molasses, and vanilla extract to the butter mixture and beat until smooth and well combined.
- Gradually add the dry ingredients to the wet ingredients, mixing on low speed until just combined.
- Fold in chocolate chips with a spatula until evenly distributed throughout the dough.
- Scoop dough into rounded tablespoons and place 2 inches apart on prepared baking sheets.
- Bake for 10-11 minutes until edges are set but centers appear slightly soft, then cool on pans for 5 minutes before transferring to wire racks.
Bread Flour Tall Towers

This recipe offers a truly unique twist on cookies. Using bread flour instead of all-purpose flour will give you taller, thicker cookies with crispy edges and soft centers, thanks to its higher protein content and gluten structure. Bread flour has 12 to 14% protein, compared with all-purpose flour at 10 to 12%. That little bit of extra gluten network really does change the architecture of this cookie.
Higher protein means you'll have more structure, but you also risk toughness if you're not careful with your mixing and baking time. This is perfect for drop cookies like chocolate chip because it has a less dramatic effect on rolled and cut cookies.
Avoid overbaking, thinking that they need more time. They actually need less because bread flour sets faster. You're going to lose some tenderness with these, but some people find bread flour cookies are less delicate than traditional versions, and they actually prefer that.
Ingredients
Method
- Preheat oven to 325°F and line baking sheets with parchment paper.
- In a medium bowl, whisk together bread flour, baking soda, and salt until well combined.
- In a large bowl, whisk together melted butter, brown sugar, and granulated sugar until smooth.
- Add the egg, egg yolk, and vanilla extract to the butter mixture and whisk vigorously until mixture is glossy and well combined.
- Add the dry ingredients to the wet ingredients and stir with a wooden spoon or spatula until just combined.
- Fold in chocolate chips, then refrigerate dough for 15 minutes to firm up slightly.
- Scoop dough into 1/4 cup portions and roll into tall balls, then place 3 inches apart on prepared baking sheets.
- Bake for 12-13 minutes until edges are golden brown but centers still look slightly underbaked, then let cool on baking sheets for 10 minutes before transferring to wire racks.
Oatmeal Raisin Studded

Oatmeal raisin-studded cookies are going to be a new favorite for you. You're simply adding oats and raisins to chocolate chip cookies, which gives you a chewier texture and keeps them soft longer. And it does feel like a healthier option. Distinct oat pieces make for a more interesting bite than uniform cookies that you get from smooth dough.
Overmixing these will break down the oats and lose that textural benefit, so you want to fold them in gently and then let the raisins add natural sweetness and fiber. Some prefer them to chocolate chips or use both. It is completely up to you. The trade-off is that they would be less indulgent, rather than having a more complex flavor.
Ingredients
Method
- Preheat oven to 350°F and line baking sheets with parchment paper.
- In a large bowl, cream together softened butter, granulated sugar, and brown sugar until light and fluffy, about 3 minutes.
- Beat in eggs one at a time, then add vanilla extract and mix until combined.
- In a separate bowl, whisk together flour, baking soda, and salt.
- Gradually add dry ingredients to wet ingredients, mixing just until combined.
- Gently fold in oats, chocolate chips, and raisins until evenly distributed throughout the dough.
- Drop rounded tablespoons of dough onto prepared baking sheets, spacing them 2 inches apart.
- Bake for 10-12 minutes until edges are golden but centers still look slightly underdone.
- Let cookies cool on baking sheet for 5 minutes before transferring to a wire rack to cool completely.
Peanut Butter Swirl Delight

These peanut butter swirl delights use a swirl technique that you accomplish simply by dolloping warm peanut butter into chocolate chip dough and then folding it gently. That creates pockets of flavor and a bakery-worthy marble look that everyone is sure to love. Swirling keeps your peanut butter distinct, creating textural contrast and visual appeal.
You can simply microwave your peanut butter for around 10 seconds to warm it up just enough to make it fluid enough to fold in without fully blending. Overfolding destroys the ribbons and defeats the whole point. Restraint is the technique.
These cookies have a salty-sweet contrast, and those peanut butter pockets hit differently than when they're evenly distributed.
Ingredients
Method
- Preheat oven to 375°F and line baking sheets with parchment paper.
- In a large bowl, beat softened butter with granulated sugar and brown sugar until creamy and smooth, about 2-3 minutes.
- Add eggs and vanilla extract, beating until well combined and fluffy.
- In a medium bowl, whisk together flour, baking soda, and salt.
- Gradually mix dry ingredients into wet ingredients until just combined.
- Stir in chocolate chips until evenly distributed.
- Warm peanut butter in microwave for 10 seconds, then dollop spoonfuls throughout the cookie dough.
- Use a spatula to gently fold and swirl the peanut butter through the dough, leaving visible ribbons and streaks.
- Scoop dough by rounded tablespoons onto prepared baking sheets, spacing 2 inches apart.
- Bake for 9-11 minutes until edges are set and golden but centers are still soft.
- Cool on baking sheet for 3 minutes before moving to a wire rack.
White Chocolate Cranberry Mix

White chocolate cranberry mixed cookies offer a visual appeal and sophisticated flavor balance. These cookies have year-round appeal.
You want to use real white chocolate because it contains cocoa butter, which means the melt will be really creamy. The imitation coating is waxy, and the texture difference is noticeable. The tartness and sweetness balance is a key flavor principle.
Dried cranberries' acidity prevents the one-note sweetness that white chocolate alone can have, and the visual contrast of seeing that ruby red with the cream is a selling point for platters and gifts. It makes them almost too pretty to eat, which is real psychology. Dried cranberries concentrate their flavor more than fresh ones, and they won't release moisture into the dough like fresh ones would, so dried is definitely the way to go here.
Ingredients
Method
- Preheat oven to 350°F and prepare baking sheets with parchment paper or silicone mats.
- In a large mixing bowl, cream together softened butter, granulated sugar, and brown sugar until light and fluffy, approximately 3-4 minutes.
- Beat in eggs one at a time, followed by vanilla extract, mixing until smooth and well incorporated.
- In a separate bowl, combine flour, baking soda, and salt, whisking to blend evenly.
- Add dry ingredients to wet ingredients in two batches, mixing on low speed just until no flour streaks remain.
- Fold in white chocolate chips, dried cranberries, and semi-sweet chocolate chips until evenly distributed throughout the dough.
- Using a cookie scoop or spoon, drop rounded tablespoons of dough onto prepared baking sheets, leaving 2 inches between each cookie.
- Bake for 11-12 minutes until edges are lightly golden and centers appear just set but still soft.
- Allow cookies to cool on the baking sheet for 5 minutes to finish setting, then transfer to a wire cooling rack.
Dark Chocolate Intense Bite

Dark chocolate delivers an intense cocoa flavor that people are going to remember, and it's accomplished through a combination of chocolate chunks and cocoa powder. These cookies stay soft by underbaking them slightly and benefit from a flaky sea salt topping.
Dark chocolate has bitter compounds that milk chocolate lacks, which creates complexity, not just sweetness. The cocoa powder with chocolate chunks gives you two different flavor and texture contributions. That powder dissolves into the dough, and your chunks stay distinct.
Underbaking is critical. Your centers are going to continue cooking two to three minutes after removing them from the oven, and if you overbake these cookies, they're going to be dry. Timing varies by oven, so pay attention to visual cues, not just your timer.
Then you're going to top them with sea salt when they are warm, which enhances the chocolate perception and cuts the richness. A small amount goes a long way. You don't want to use too much, just enough to bring these all together.
Brown sugar gives you molasses depth that complements the dark chocolate better than white sugar would, and that is exactly what you're going to use here.
Ingredients
Method
- Preheat oven to 350°F and line baking sheets with parchment paper.
- In a medium bowl, whisk together flour, cocoa powder, baking soda, and salt.
- In a large bowl, beat butter and both sugars until light and fluffy, about 3 minutes.
- Add eggs and vanilla to butter mixture and beat until well combined.
- Gradually stir the dry ingredients into the wet ingredients until just combined.
- Fold in the dark chocolate chunks until evenly distributed throughout the dough.
- Drop rounded tablespoons of dough onto prepared baking sheets, spacing them 2 inches apart.
- Bake for 10-12 minutes until edges are set but centers still look slightly underdone.
- Remove from oven and immediately sprinkle with flaky sea salt.
- Let cool on baking sheet for 5 minutes before transferring to a wire rack.
Coconut Lime Sea Salt
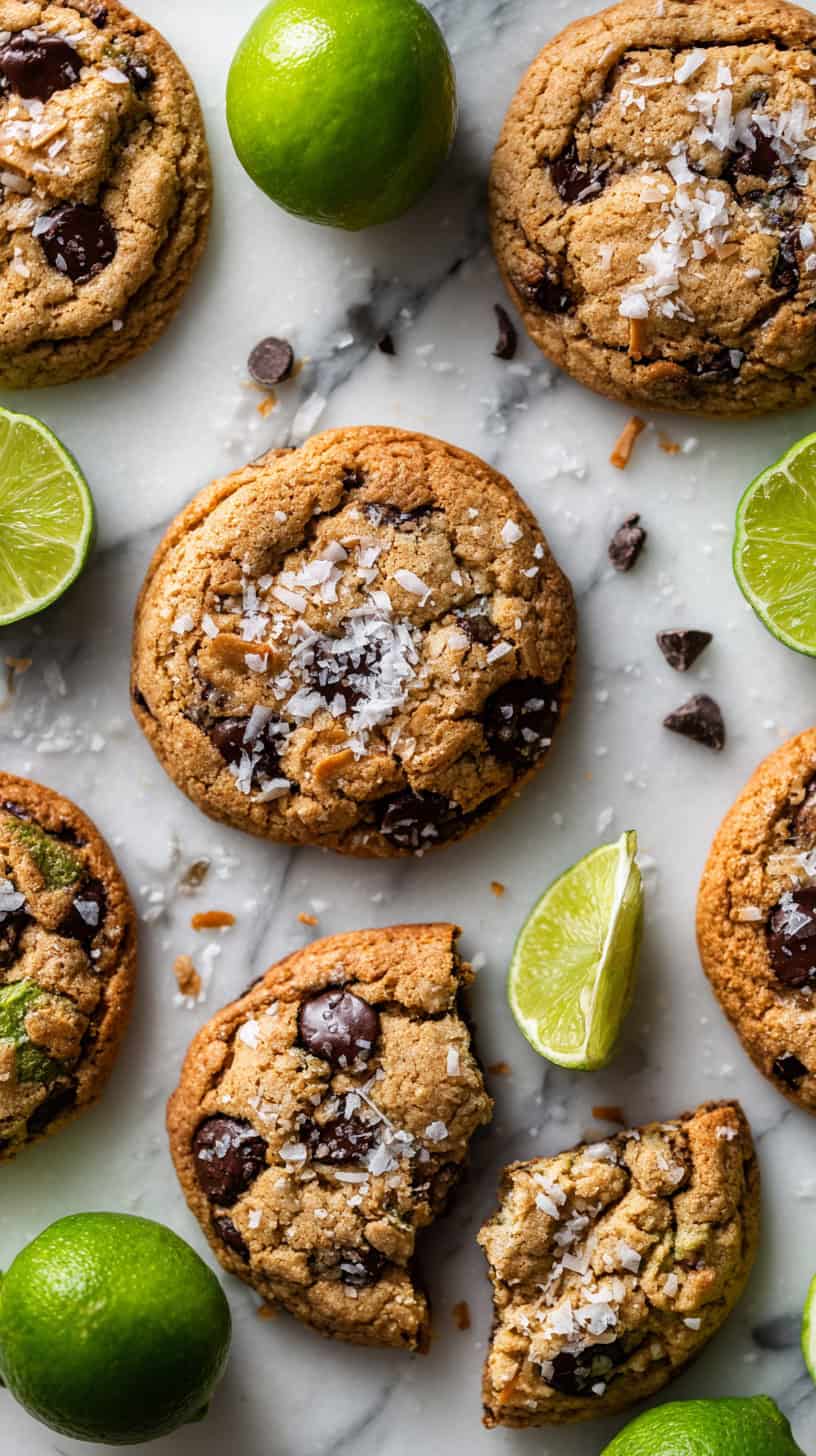
Coconut lime sea salt is unusual, but this is an impressive cookie flavor that is accomplished by combining toasted coconut, lime zest, and sea salt, giving you a bright and complex flavor. Toasting your coconut is a crucial step, and it takes only minutes, but the flavor difference is really dramatic.
The amount of lime zest matters as well. Two limes is plenty, and it affects your balance with sweetness. Some prefer only one, so you'll have to play around with it to see what you prefer. Sea salt is a flavor amplifier, and a common mistake is using too much or using fine salt instead of flaky. This has summer and tropical flavors, but this combo does work year-round and stands out from your standard chocolate chip cookies.
Ingredients
Method
- Preheat oven to 375°F and line baking sheets with parchment paper.
- Toast the shredded coconut in a dry skillet over medium heat for 3-5 minutes, stirring frequently, until golden brown, then set aside to cool.
- In a medium bowl, whisk together flour, baking soda, and salt.
- In a large bowl, beat butter and both sugars until creamy and fluffy.
- Beat in eggs, vanilla extract, and lime zest until well combined.
- Gradually mix the dry ingredients into the wet ingredients until just incorporated.
- Fold in the toasted coconut and chocolate chips until evenly distributed.
- Drop rounded tablespoons of dough onto prepared baking sheets, spacing 2 inches apart.
- Bake for 9-11 minutes until edges are golden but centers still look soft.
- Remove from oven and immediately sprinkle each cookie with a pinch of flaky sea salt.
- Cool on baking sheet for 5 minutes before transferring to a wire rack.
Bar Form Easy Squares

These bar-form easy squares are an easier alternative to individual cookies because you're just going to press your dough in a pan and bake it once, making them perfect for busy nights or baking with kids.
There's no scooping, but do make sure you slightly underbake. They will keep cooking as they cool, so they'll have a slightly soft center, which is your target. You do not want these fully set. They will cool completely in the pan before cutting them, because warm bars are extremely fragile and they will crumble. Be patient; that first bite will be worth the wait.
There is a proportion size trade-off. These are richer and denser than cookies, so smaller squares often feel more satisfying than you'd expect.
Ingredients
Method
- Preheat oven to 350°F and line a 9x13-inch baking pan with parchment paper, leaving some overhang on the sides.
- In a medium bowl, whisk together flour, baking soda, and salt.
- In a large bowl, whisk together melted butter, granulated sugar, and brown sugar until smooth.
- Add eggs and vanilla to the butter mixture and whisk until well combined and slightly thickened.
- Stir the dry ingredients into the wet ingredients until just combined and no flour streaks remain.
- Fold in the chocolate chips until evenly distributed throughout the dough.
- Press the dough evenly into the prepared baking pan, spreading it all the way to the edges.
- Bake for 23-25 minutes until the edges are golden brown and the center looks just barely set.
- Let cool completely in the pan on a wire rack for at least 1 hour.
- Use the parchment overhang to lift the bars out of the pan, then cut into squares with a sharp knife.
Giant Bakery Style

Giant bakery-style cookies are achievable at home using room-temperature butter, chilled dough, and high-heat baking. You're going to finish these with sea salt to give them that professional look and that finishing touch.
Room-temperature butter creams better than melted because it traps air and creates a lift and structure for your cookies. Chilling your dough prevents spread, keeping your edges crisp while your center stays thick. You want to chill it around 30 minutes, but overnight is ideal.
For portioning, you're going to do quarter-cup portions, which means two to three ounces each, which is the bakery standard for that statement piece. Higher temp in shorter time means that you're going to have a Maillard reaction on your edges before your center is set. That residual heat on the sheet will complete your cooking.
Sea salt is going to contrast that flavor, cutting your richness and signaling that this is intentional compared to a plain cookie, as well as giving you that perfect visual attraction.
Ingredients
Method
- In a medium bowl, whisk together the flour, baking soda, and salt. Set aside.
- In a large bowl, beat the softened butter, brown sugar, and granulated sugar together until light and fluffy, about 3-4 minutes.
- Add the eggs one at a time, beating well after each addition, then mix in the vanilla extract.
- Gradually add the flour mixture to the butter mixture, mixing just until combined, then fold in the chocolate chips.
- Cover the dough and refrigerate for at least 2 hours or overnight.
- Preheat oven to 375°F and line baking sheets with parchment paper.
- Scoop 1/4 cup portions of dough and place them 3 inches apart on the prepared baking sheets.
- Bake for 12-14 minutes until edges are golden but centers still look slightly underdone.
- Remove from oven and immediately sprinkle with flaky sea salt, then let cool on the baking sheet for 5 minutes before transferring to a wire rack.
Double Chocolate Overload

These double chocolate overload cookies are the ultra-indulgent cookie with a fudgy base, dual chocolate chips, and a gooey center that is achieved through underbaking. You'll want to use a Dutch-processed cocoa, which has a darker color and deeper flavor. It is also less acidic and bitter than natural cocoa, which matters for your rich claim.
Your cookies will look barely set, and they'll keep cooking on a hot pan, so you'll want to pull them sooner than you might think to achieve that gooey center. If you cook these until they look done, they'll be dry, which is exactly what you don't want.
You're then going to use semi-sweet and white chocolate chips to give you a flavor contrast and visual appeal. White chips melt faster, so your placement and timing matter. The bakery-style texture trend simply refers to a soft, chewy center, which helps distinguish these from the crispy grocery-store versions.
Serve these warm to amplify the chocolate flavor and the melting effect, as the temperature significantly changes perception, and they are perfect with a cool glass of milk.
Ingredients
Method
- Preheat oven to 350°F and line two baking sheets with parchment paper.
- Whisk together the flour, cocoa powder, baking soda, and salt in a medium bowl.
- In a large bowl, beat the butter, brown sugar, and granulated sugar until creamy and smooth, about 2-3 minutes.
- Add the eggs and vanilla extract, beating until well combined and fluffy.
- Gradually mix in the dry ingredients until just combined, then fold in both the semi-sweet and white chocolate chips.
- Drop rounded tablespoons of dough onto the prepared baking sheets, spacing them 2 inches apart.
- Bake for 10-11 minutes until the edges are set but centers still look slightly soft and underdone.
- Let cookies cool on the baking sheet for 5 minutes before transferring to a wire rack to cool completely.


