

Crispy Air Fryer Parmesan Chicken

This is a list of cheap, quick, and healthy creative chicken recipes for busy moms, and we're starting it off with crispy air fryer parmesan chicken. Air frying is a way to get your chicken crispy using little to no oil. Make sure to preheat your air fryer. Skipping that is a common mistake and can lead to uneven cooking.
Don't lose this article. Enter your email below, and I'll send it to you right now. Plus a little encouragement and inspiration from me, straight to your inbox.
You want to cook these at 375 degrees Fahrenheit, which is hot enough to crisp, but not so hot that it burns the coating before your chicken cooks. Together, Parmesan and breadcrumbs give you crunch and saltiness compared to plain breadcrumbs on their own. You also want to do an egg wash on these as a binder to help the coating adhere to the chicken. You don't want to skip that step.

Five simple dinners. One grocery list.
No recipe hunting, no messy shopping notes, no complicated chef projects. Just family dinners that fit real weeks.
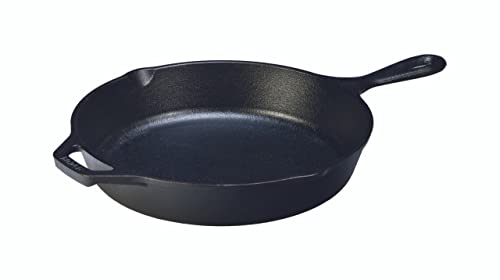
Lodge 12-Inch Seasoned Cast Iron Skillet
Check PriceRead next
More quick chicken dinners for busy nights

Ninja Air Fryer Toaster Oven Combo 8-in-1
Check PriceOne-Pan Honey Garlic Chicken

This one-pan honey garlic chicken comes down to the pounding method, which is something that you want to do because it helps even out the natural taper of a chicken breast. Without pounding it, your thin ends are going to overcook and dry out before the thick center hits a safe internal temperature.
You don't want to pound these too hard, though, as you will tear the meat, which causes you to lose the juiciness. So you just want even, not paper thin. This adds only a couple of extra minutes to your preparation time, but it takes the dish out of that classic raw-middle-dry-edge problem and gives you a delicious honey-garlic chicken that everyone is going to love.
You can also butterfly your chicken breasts, but pounding tends to be a little bit faster, and you don't have to worry about the knife, the mess, or the cleanup.
Pro Tip
Pound chicken breasts to an even thickness (about 3/4 inch) before cooking. They cook faster, more evenly, and you won’t end up with a dry edge and raw center.
A zip-top bag and a rolling pin is all you need.
5-Ingredient BBQ Chicken Tacos

These barbecue chicken tacos are super easy to make, and they don't take a whole lot of ingredients, which makes them a win. You can use rotisserie chicken to cut back on the time here, and you can play around with different barbecue sauce styles that will change the flavor significantly.
A lot of people make the mistake of overfilling their tortillas, which causes them to tear and get really messy. You also want to be sure to warm your tortillas to prevent cracking and help them fold without any breaking.
These have a perfect coleslaw mix on top that is going to give them the perfect crunch and acidity to balance off that sweetness of the barbecue sauce, giving you a classic Southern barbecue pairing. If you use flour tortillas, those are more pliable. Corn is more traditional and authentic for tacos, but it can crack, so keep that in mind.
Sheet Pan Lemon Rosemary Chicken

This sheet-pan lemon rosemary chicken will look a lot more impressive than it actually is. This is a really quick meal to throw together, and sheet pan dinners are popular for easy cleanup and minimal cooking time, making them a win.
Be sure to cut your potatoes and carrots into good bite pieces so they don't undercook while your chicken finishes. The roasted lemon slices will be the finishing touch, adding a bright color and a slightly bittersweet flavor to round everything out.

GoodCook 15" Nonstick Carbon Steel Baking Pan Set
Check Price30-Minute Garlic Butter Chicken

Five-minute garlic butter chicken is one you'll sear in a skillet first, then finish in the oven at 375 degrees Fahrenheit. Searing these on each side gives you a really good golden crust, and then the oven finishes the cook for you. You want to use an oven-safe skillet. That way you can just take that straight from stovetop to oven, limiting your amount of dishes.
A common mistake here would be sautéing your garlic too long. You do not want to burn it because that will make it bitter. If you just do that for a minute, you'll give this dish the flavor it needs.
Bake time ranges from 20 to 25 minutes, and it varies a lot with your breast thickness. Be sure to use a meat thermometer to check your internal temperature, which should reach 165 degrees Fahrenheit for chicken.
Healthy Air Fryer Buffalo Chicken Bites

These healthy air fryer buffalo chicken bites are made by cutting your chicken into bite-sized pieces, coating it in a parmesan breadcrumb mix, and then air frying it at 375, giving you a healthier take on buffalo chicken bites. The air fryer allows these to be 70 to 80% less fat, but still gives you a similar crispiness to regular buffalo chicken bites.
A common mistake with this method is overcrowding your air fryer basket, which blocks airflow and leads to a soggy, uneven cook instead of the crisp you really want. 10 to 12 minutes is the typical cooking time, flipping them halfway through at 375 degrees Fahrenheit.
Instant Pot Chicken Fajitas

These fajitas are a great way to put a delicious meal together quickly. You want to sauté your chicken, then add peppers, onion, seasoning, and broth, and pressure-cook them in an Instant Pot to bring these fajitas to life. Sautéing your chicken first gives you some flavor, so it is a step that you don't want to miss.
You also don't want to overcrowd your chicken in the pot, because then it will steam instead of brown. Half a cup of broth is plenty enough liquid to pressure cook these, and it's not going to give you a saucy dish, which is intentional for fajitas. Bell pepper has a color, but also a sweetness that adds to this recipe.
Ingredients
Method
- Set the Instant Pot to saute, add the olive oil and brown the chicken in batches without crowding the pot.
- Add the sliced peppers, onion and fajita seasoning and stir to coat.
- Pour in the chicken broth and scrape the bottom of the pot.
- Seal and pressure cook on high for 8 minutes, then quick release.
- Serve in warm tortillas with your favorite toppings.
Notes
2️⃣ Sauté:
5️⃣ Serve:
📝 Notes:
Creamy Spinach Stuffed Chicken

This creamy spinach stuffed chicken is another one that looks fancy but it's really easy to make. You want to simply cut a pocket inside your chicken breasts and make sure that you don't cut it all the way through; otherwise, your filling is going to leak out.
Another important step with this one is drying your spinach to prevent any excess water from making your filling runny. And you want to make sure that your cream cheese is at room temp because cold lumps will not blend easily with the mozzarella and parmesan.
You're going to bake these at 375 degrees Fahrenheit, which cooks your chicken through without scorching your filling. Toothpicks or kitchen twine can often be used to seal the pocket shut, and that can help you prevent filling spills.
Ingredients
Method
- Preheat the oven to 375 degrees F.
- Cut a deep pocket into the side of each chicken breast, being careful not to cut all the way through.
- Mix the room-temperature cream cheese with the dried spinach, mozzarella, parmesan and garlic until smooth.
- Stuff each breast with the filling and seal with toothpicks or kitchen twine.
- Season the outside, drizzle with olive oil and bake 25 to 30 minutes, until the chicken reaches 165 degrees F.
Notes
6️⃣ Bake:
7️⃣ Serve:
📝 Notes:
Cheesy Pesto Chicken Bake

This cheesy pesto chicken bake is one of those dishes that is filled with flavor and has that perfect cheese melt that just melts in your mouth. Delicious. Something to keep in mind is that thinner breasts are going to cook faster, and thicker ones risk having underdone centers.
You can pound your breasts to give them an even thickness to help with that. Then you're going to bake these at 375 degrees Fahrenheit for 25 to 35 minutes.
Mozzarella on its own will brown and go rubbery if it's overbaked, so another option is to broil this for the last two to three minutes for color instead of extending the total bake time; that way you get that perfect melt. Pesto can be store-bought, though jarred pesto is often oily and saltier, whereas freshly made is more vibrant but less shelf-stable.
Ingredients
Method
- Preheat the oven to 375 degrees F and lightly oil a baking dish.
- Pound the chicken breasts to an even thickness and season with salt and pepper.
- Spread the pesto over each breast and arrange in the dish.
- Bake 25 to 35 minutes, until the chicken reaches 165 degrees F.
- Top with mozzarella and parmesan and broil the last 2 to 3 minutes for color.
Notes
5️⃣ Bake:
📝 Notes:
5-Ingredient Lemon Garlic Chicken

This lemon garlic chicken is made by marinating your chicken breasts in garlic, lemon juice and zest, and olive oil, then baking it at 375 degrees Fahrenheit for 25 to 30 minutes. You want to remember to zest before juicing your lemon, because if you juice it first, zesting that squeezed lemon will be nearly impossible.
You also want to make sure you do not marinate these for longer than two hours, as the lemon juice can start to toughen the meat's texture, so try to avoid that. Another critical step is resting your chicken for five minutes after baking it, as this will help keep it nice and juicy, and it is often a skipped step.
Ingredients
Method
- Zest the lemon first, then juice it.
- Whisk the lemon zest and juice with the garlic, olive oil, salt and pepper.
- Marinate the chicken for 30 minutes and up to 2 hours in the refrigerator.
- Bake at 375 degrees F for 25 to 30 minutes, until the chicken reaches 165 degrees F.
- Rest for 5 minutes before slicing.
Notes
4️⃣ Bake:
5️⃣ Serve:
📝 Notes:
Easy Teriyaki Chicken Skewers

These easy teriyaki chicken skewers are really fun to make, and they are a delicious recipe that you will come back to again and again. An important step with these is to soak your wooden skewers for 20 to 30 minutes while your chicken is marinating, as this helps prevent the skewers from splintering.
You can also use two skewers per kebab to prevent them from spinning when you flip these. You don't want to marinate for longer than two hours, as that will make the texture mushy and too salty, so definitely avoid doing that. You also want to make sure you don't pour any of your used marinade back over your chicken once it's cooked for food safety, since it had raw chicken in it and you want to avoid cross-contamination.
Ingredients
Method
- Soak the wooden skewers in water for 20 to 30 minutes while the chicken marinates.
- Whisk the teriyaki sauce, soy sauce, honey and garlic together and marinate the cubed chicken for up to 2 hours.
- Thread the chicken, peppers and onion onto the skewers, using two skewers per kebab.
- Grill or broil 12 to 15 minutes, turning, until the chicken reaches 165 degrees F.
- Brush with fresh teriyaki sauce, never the used marinade, before serving.
Notes
6️⃣ Serve:
Keep going
More quick chicken dinners for busy nights
Don't lose this article. Enter your email below, and I'll send it to you right now. Plus a little encouragement and inspiration from me, straight to your inbox.
📝 Notes:
Air Fryer Ranch Chicken Tenders

Air fryer ranch chicken tenders are a dish that the pickiest eater in your house will love. These are made with a ranch panko parmesan mix, and you air fry them at 400 degrees Fahrenheit for about 10 to 12 minutes, flipping them halfway through. Using panko on these gives you a crispier texture in the air fryer due to panko breadcrumbs already having a lighter and airier texture.
Make sure to avoid overcrowding your basket, as you will block the air circulation that is needed to cook these perfectly, and this also helps prevent any soggy spots in your cooking. Patting your chicken dry first and then doing an egg wash on these will help those breadcrumbs stick really well, and you're going to have a crispy chicken tender that you can then serve with ranch to dip in!
Ingredients
Method
- Pat the chicken tenders completely dry with paper towels.
- Mix the panko, parmesan and ranch seasoning together in a shallow dish.
- Dip each tender in the beaten egg, then press into the panko mixture to coat.
- Arrange in a single layer in the air fryer basket without crowding and spray lightly with oil.
- Air fry at 400 degrees F for 10 to 12 minutes, flipping halfway through. Serve with ranch for dipping.
Notes
6️⃣ Serve:
📝 Notes:
Honey Mustard Chicken Thighs

These honey mustard chicken thighs are a simple recipe that you're going to toss in the oven, and you want to use thighs because they stay juicy since they are dark meat that has a little bit more fat. Boneless, skinless thighs will cook faster than bone-in, so just be sure to check your internal temperature on these, as you want your chicken to reach 165 degrees Fahrenheit.
Your honey mustard sauce can actually burn before the chicken finishes if your oven runs too hot or the dish you're cooking them in is too small, so make sure that you don't overcrowd your pan, which will cause these to steam instead of caramelize.
You can also choose between Dijon or yellow mustard on this. Dijon is going to give you a sharper tang, and yellow mustard is milder and sweeter, so this will change your flavor, and it is totally up to you which one you want to use.
Be sure to rest your chicken for a few minutes after baking to really help it stay juicy, which is a step that most people skip.
Ingredients
Method
- Preheat the oven to 400 degrees F.
- Whisk the honey, mustard, olive oil and garlic together.
- Season the thighs and arrange them in a single layer in a baking dish large enough that they are not crowded.
- Spoon the honey mustard sauce over the top.
- Bake 25 to 30 minutes, until the chicken reaches 165 degrees F, then rest a few minutes before serving.
Notes
4️⃣ Bake:
5️⃣ Serve:
📝 Notes:
One-Pot Chicken and Rice

You'll love this recipe because you don't have a whole lot of dishes, which is always an added win in my house. This dish does have frozen peas and carrots, but you want to add them in later so they don't overcook and turn into mush.
You also want to avoid stirring your rice too much once the liquid is added here, or you'll end up with a gummy texture instead of fluffy. Paprika will give you some added color and a mild flavor, and if you want a deeper flavor, go with a smoked paprika to finish this one off.
Ingredients
Method
- Heat the olive oil in a large pot and brown the cubed chicken, then set it aside.
- Add the onion and garlic and cook until softened.
- Stir in the rice and paprika, then add the chicken broth and return the chicken to the pot.
- Bring to a simmer, cover and cook on low for 18 to 20 minutes without stirring.
- Add the frozen peas and carrots in the last 5 minutes, then fluff and season before serving.
Notes
5️⃣ Cook:
6️⃣ Serve:
📝 Notes:
Spicy Sriracha Lime Chicken

This spicy sriracha lime chicken is the perfect way to add a twist on your regular chicken weeknight meals. The good thing about sriracha is you get to control the heat level, and it already has a pretty moderate heat level compared to pure hot sauces, so it makes it really approachable.
You're going to bake your chicken at 375 degrees Fahrenheit for 20 to 25 minutes, depending on the thickness of your chicken breast. Just make sure you hit that internal temp of 165, and using olive oil here will actually help your marinade cling to the chicken and aids in browning, which gives you really good flavor.
Ingredients
Method
- Whisk the sriracha, lime juice, olive oil, garlic and honey together.
- Marinate the chicken for at least 30 minutes.
- Preheat the oven to 375 degrees F.
- Bake 20 to 25 minutes depending on the thickness, until the chicken reaches 165 degrees F.
- Rest 5 minutes before slicing.
Notes
5️⃣ Serve:
📝 Notes:
Taco-Spiced Air Fryer Chicken Breasts

Making this is a great way to use up that taco seasoning you have lying around. You're going to air fry these at 375 degrees for 10 to 12 minutes, flipping them halfway through. Just make sure you're not overcrowding your basket; it will block that airflow in the air fryer, which is exactly what you don't want.
Olive oil will help your seasoning stick and promote browning on these. Skipping that step makes your spices just taste a little blah. Be sure to let this chicken rest for 5 minutes after cooking it to keep those juices flowing, rather than cutting into it right away.
Ingredients
Method
- Pat the chicken dry and rub with olive oil.
- Coat both sides evenly with the taco seasoning.
- Arrange in the air fryer basket in a single layer without crowding.
- Air fry at 375 degrees F for 10 to 12 minutes, flipping halfway through, until the chicken reaches 165 degrees F.
- Rest for 5 minutes before slicing.
Notes
4️⃣ Serve:
📝 Notes:
Crispy Buffalo Chicken Wraps

These crispy buffalo chicken wraps are a really good way to get that buffalo chicken flavor in a little bit of a healthier way. You're going to bake these at 400 degrees Fahrenheit with a panko coating that saves you on calories and fat, but it's not going to get quite as crunchy as deep-fried chicken.
You want to be sure to coat your chicken with flour and an egg wash to help the breadcrumbs stick and give it that perfect crisp when it's done. You also want to toss those baked tenders in the sauce right after baking, which helps keep the coating crispier than if you let the sauce sit on them for too long.
You can then put ranch in your wrap, which is the classic combination with buffalo, but others like blue cheese as well, so that's another option. Something to keep in mind: your tortilla size is going to affect your wrap ability. A trick to keep in mind is warming them, which actually makes rolling easier and prevents tearing.
Ingredients
Method
- Preheat the oven to 400 degrees F and line a baking sheet.
- Coat each tender in flour, then egg wash, then panko breadcrumbs.
- Bake 18 to 20 minutes, flipping once, until crisp and cooked through.
- Toss the tenders in the buffalo sauce immediately after baking.
- Warm the tortillas, then fill with lettuce, the buffalo tenders and a drizzle of ranch or blue cheese before rolling.
Notes
6️⃣ Serve:
📝 Notes:
Easy Caprese Chicken

This easy caprese chicken will give you that Italian restaurant feel right at home. Caprese is simply tomato, mozzarella, basil, and balsamic, which is the classic Italian combo. Then you're going to bake this chicken at 375 degrees Fahrenheit for 25 to 30 minutes.
A common mistake, though, is not checking the doneness with a thermometer and just trusting the clock. Be sure that your chicken reaches that internal temp of 165. I highly recommend using fresh mozzarella, as it melts much more slowly and adds more moisture. And your balsamic glaze is thicker and sweeter than regular balsamic vinegar. You can buy this at the store to save yourself some time.
Ingredients
Method
- Preheat the oven to 375 degrees F.
- Season the chicken and drizzle with olive oil, then arrange in a baking dish.
- Bake 25 to 30 minutes, until the chicken reaches 165 degrees F on a thermometer.
- Top with sliced tomato and fresh mozzarella and return to the oven until the cheese melts.
- Finish with fresh basil and a drizzle of balsamic glaze.
Notes
5️⃣ Bake:
7️⃣ Serve:
📝 Notes:
Garlic Herb Chicken and Veggie Foil Packs

This garlic, herb, chicken, and veggie foil pack recipe is a really fun way to cook, since you're going to be making a foil packet that creates a steaming and roasting hybrid, locking in moisture, which means your chicken stays juicier. 400 degrees Fahrenheit is the sweet spot for this one, and you're going to cook it for 25 to 30 minutes to prevent your chicken from drying out. Be sure not to cut your potatoes too large or they won't cook through in the same time as the chicken, so make sure that they are small, bite-sized pieces.
You also want to create a tight seal with your foil to trap in that steam for even cooking. Loose foil packs will leak moisture, and your veggies will actually turn out dry. This is perfect for meal prep or even camping because it has minimal cleanup. You can customize the veggies, and you're able to do individual portions ahead of time.
Ingredients
Method
- Preheat the oven to 400 degrees F.
- Toss the chicken and vegetables with the olive oil, garlic, herbs, salt and pepper.
- Divide among four sheets of foil and fold into tightly sealed packets.
- Bake 25 to 30 minutes, until the chicken reaches 165 degrees F and the potatoes are tender.
- Open the packets carefully – the steam is hot – and serve.
Notes
3️⃣ Season:
5️⃣ Bake:
6️⃣ Serve:
📝 Notes:
Maple Dijon Glazed Chicken

This Maple Dijon Glazed Chicken will give you a lot of interesting flavors you'll want to make again and again. Your maple and mustard glaze will have the perfect balance, giving you sweetness from the syrup and tang from the Dijon mustard. Too much syrup, though, can burn before your chicken finishes, so be careful with that.
You're also going to have some soy sauce in this recipe, which gives you salt and a little bit extra depth, but it's really easy to underseason or oversalt if you don't taste your chicken before adding extra salt. A tip for this recipe is to sear that chicken first, which is going to help your browning and caramelization, and then toss it in the oven to finish it out.
Ingredients
Method
- Preheat the oven to 375 degrees F.
- Whisk the maple syrup, Dijon, soy sauce and garlic together.
- Heat the olive oil in an oven-safe skillet and sear the chicken 3 to 4 minutes per side until browned.
- Brush the glaze over the chicken.
- Transfer the skillet to the oven and bake 15 to 20 minutes, until the chicken reaches 165 degrees F.
Notes
4️⃣ Bake:
5️⃣ Serve:
📝 Notes:


