
We've all been there. You're so busy, the afternoon disappears, and then BAM, it's 5 pm, and there's absolutely no dinner plan. The chicken is still sitting in the freezer. You forgot to take anything out, and suddenly everyone is asking you what we're eating for dinner.
Don't lose this article. Enter your email below, and I'll send it to you right now. Plus a little encouragement and inspiration from me, straight to your inbox.
I've learned not to panic. After having my son, I became very good at building dinner around what's in the kitchen rather than what I had planned that morning. Frozen chicken, a rotisserie chicken, microwave rice, jarred sauce, frozen vegetables, and a few clever shortcuts can get you out of trouble surprisingly quickly.
Five simple dinners. One grocery list.
No recipe hunting, no messy shopping notes, no complicated chef projects. Just family dinners that fit real weeks.
And as much as I love cooking properly as a trained chef, I'm also a mum, so I'm not above opening a packet when it saves me from standing at the stove for one hour.
These are the dinners I'd make when I've forgotten to thaw anything but still want something that feels like an actual meal.
1) Curried Chicken Salad

Recipe and video by Sydney W.
It's creamy, crunchy, a little sweet from the grapes, and packed with flavor. Perfect for a sandwich, in a croissant, over greens, or just straight out of the bowl.
See the original recipe and story →

Ingredients
Method
- Remove rotisserie chicken skin; shred all meat into a bowl.
- Add diced onion, chopped celery, walnuts, and sliced grapes.
- Mix in olive oil, mayo, curry powder, salt and pepper to taste.
- Stir until well combined and creamy.
- Serve on a sandwich, in a croissant, over greens, or from the bowl.
Notes
2) Super Simple Jambalaya

Recipe and video by Brittney R.
This is a super simple jambalaya to make at home, and it starts with a rotisserie chicken that you're going to shred and then set aside.
See the original recipe and story →

Ingredients
Method
- Shred rotisserie chicken; set aside.
- Chop sausage; sauté in a pan with olive oil.
- Separately sauté chopped green pepper and onion in more olive oil until fragrant.
- Stir shredded chicken into sausage; let simmer.
- Prepare Zatarain’s jambalaya mix according to box directions, using two cups water.
- Add meat and vegetables; cover and simmer 20 minutes.
- Replace lid; finish simmering.
- Serve a couple scoops per bowl.
Notes
3) Honey Soy Wings and Fries Cooked Together in the Air Fryer

Recipe and video by Suzanne K.
Today I'm making my favorite honey soy wings with fries. These are all the spices that I use, and I make sure to marinate it for at least 30 minutes.
4) Quick & Healthy Air Fryer Chicken Greek Bowls
Recipe and video by Brittney R.
As a busy stay-at-home mom, I am always looking for simplicity in the kitchen. Balancing motherhood, fitness, and everyday life means I need meals that are quick, healthy, and—most importantly—food my kids will actually eat. This super simple Greek bowl recipe is one you are going to want to save.
See the original recipe and story →

Ingredients
Method
- Cut chicken into bite-sized pieces; place in air fryer with a liner for easier cleanup.
- Spread evenly; mist with vegetable oil and season with garlic salt and pepper.
- Close air fryer; cook at 425 degrees 12 minutes, flipping halfway.
- Meanwhile, chop cucumber and tomato into bite-sized pieces.
- Microwave Ben’s Original 90 Second jasmine rice for 90 seconds.
- Start bowl with half a cup jasmine rice.
- Add five ounces chicken, then vegetables.
Notes
5) Hot Honey Chicken & Potatoes
Recipe and video by Brittney R.
This is a hot honey chicken and potato recipe.
See the original recipe and story →

Ingredients
Method
- Cut potatoes into wedges; boil with salt until softened.
- Air-fry potatoes with Cajun seasoning, tossing a couple times until done; wrap in foil to keep warm.
- Remove chicken tendons; cut tenderloins into pieces in a bowl.
- Season chicken with hot honey, garlic salt, pepper, and paprika; stir.
- Air-fry chicken at 400 degrees 8 minutes, flipping halfway, until 165 degrees Fahrenheit.
- For sauce, microwave three tablespoons butter about 10 seconds. Add a cup of milk, a drizzle of hot honey, Cajun seasoning, paprika, and garlic salt.
- Grate in cheese; stir and melt in a microwave-safe dish, then whisk. Use less milk or more cheese if too watery.
- Plate chicken and potato wedges; drizzle with sauce.
Notes
6) Air Fryer Teriyaki Chicken Bowls with Rice and Vegetables
Recipe and video by Brittney R.
This is another simple Asian dish you can make at home, and it makes for a great weeknight meal because it's quick and easy to throw together. It is a chicken teriyaki bowl, and you're going to start by cutting your chicken into bite-sized pieces and getting those added to the air fryer.
See the original recipe and story →

Ingredients
Method
- Cut chicken into bite-sized pieces; place in air fryer with a liner for easier cleanup.
- Mist with vegetable oil; season with original Mrs. Dash and black pepper.
- Air-fry at 400 degrees 15 minutes, flipping halfway.
- Meanwhile, prepare instant rice according to package instructions; microwave broccoli and edamame in steamable bags.
- Transfer cooked chicken to a bowl; coat thoroughly with teriyaki marinade or sauce.
- Remove edamame from pods for serving.
- Layer half a cup cooked rice, four ounces cooked chicken, then vegetables in bowl.
- Add broccoli and carrots; top with sesame seeds and serve with soy sauce and sriracha.
Notes
7) Avocado BLT Bowl
Recipe and video by Brittney R.
This is an avocado BLT bowl made with chicken tenderloins, and I actually like to pull the tenderloin out to make the chicken a lot less chewy, and that's very easy to do with a fork and paper towel.
See the original recipe and story →

Ingredients
Method
- Remove tendons from chicken tenderloins with a fork and paper towel; cut into bite-sized pieces.
- Air-fry chicken at 400 degrees 10 minutes, flipping halfway.
- Boil water for cheese tortellini near the end of prep; it doesn’t need to boil long.
- Mix 3 tablespoons Greek yogurt with a couple squirts of Chick-fil-A’s avocado lime ranch dressing. Thin with lime juice, starting with half a lime and adding more if needed.
- Add a little ranch dressing seasoning.
- Build bowl with chopped romaine, avocado, cherry tomatoes, tortellini, and cooked chicken.
- Cut Colby Jack cheese stick into tiny squares; add to bowl.
- Top with crispy bacon and a drizzle of dressing.
Notes
8) Easy Chicken Fried Rice
Recipe and video by Brittney R.
If you love chicken fried rice but you don't want that Chinese takeout price, then this is a recipe you're going to want to save.
See the original recipe and story →

Ingredients
Method
- Cut chicken into bite-sized pieces; spread evenly in air fryer with a liner for easier cleanup.
- Mix with vegetable oil; season with chicken Mrs. Dash, black pepper, and 5 salt and pepper blend, or your preferred seasonings.
- Air-fry at 400 degrees 15 minutes, flipping halfway.
- Meanwhile, prepare instant rice according to package instructions; microwave steamable peas and carrots.
- Scramble six eggs; move to side of pan once done.
- Add steamed vegetables to one corner and rice to another; mix everything.
- Add soy sauce to taste; even low-sodium brands are salty.
- Stir in cooked chicken.
Notes
9) Rotisserie Chicken Alfredo Using Jarred Sauce
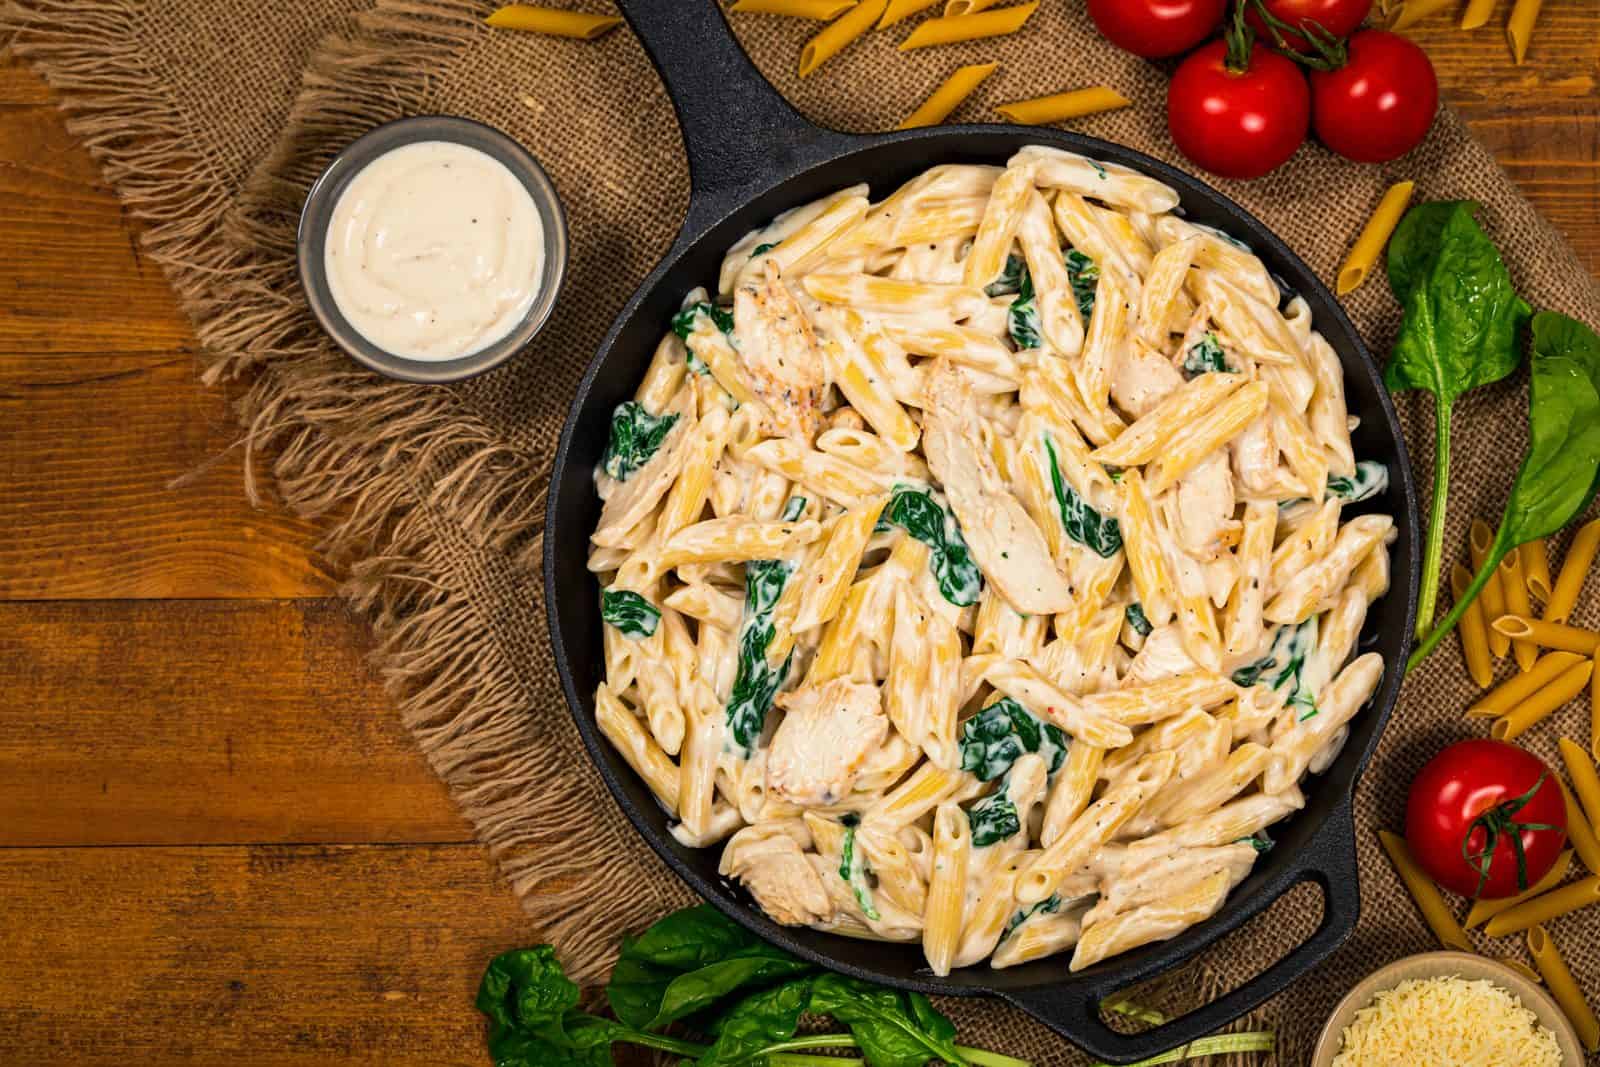
I've been in the supermarket at 5 pm thinking, right, what can I buy that will become dinner before anyone starts asking me where dinner is? Rotisserie chicken and a jar of Alfredo sauce usually solve the problem. Even a packet of sauce.
Cook some pasta, warm the jarred sauce through with the shredded rotisserie chicken, and toss everything together. Add peas, spinach, or broccoli if you have some lurking in the freezer. My little chef trick is to loosen the jar sauce with a splash of pasta water. It makes it coat the pasta really well instead of sticking in thick blobs at the bottom of the bowl.
A little bit of parmesan or pecorino, black pepper, and chopped parsley make it taste so much more homemade and restaurant-worthy. And nobody needs to know the chicken came from a plastic container.
Ingredients
Method
- Boil fettuccine in a large pot according to package directions; add peas for final 3 minutes. Reserve 1 cup cooking water; drain.
- Meanwhile, gently heat Alfredo sauce, chicken, and 1/4 cup reserved water in a large skillet, stirring, for 5–7 minutes until chicken reaches 165°F. Do not boil hard.
- Add pasta, peas, Parmesan, and pepper. Add remaining cooking water a tablespoon at a time to coat pasta. Sprinkle with parsley; serve.
Notes
10) Frozen Chicken Tenders with Waffle Sandwiches

This is the kind of dinner that sounds a bit ridiculous until you eat it and realize it actually is quite brilliant. Put frozen chicken tenders in the air fryer or oven while you toast some waffles. Then make little sandwiches with chicken, lettuce, and a drizzle of honey mustard.
I discovered this on one of those evenings when I had very little in the fridge and even less enthusiasm. Ben loved the idea immediately because, obviously, chicken and waffles sound much more exciting to a six-year-old than please eat your dinner.
For adults, add some hot sauce or pickles. For kids, keep it simple. And if you have frozen waffles hiding in the freezer, this is a very useful dinner emergency situation to remember.
Ingredients
Method
- Cook frozen tenders in one layer on a baking sheet according to package oven directions until crisp and centers reach 165°F. Listed time is an estimate; follow your brand's full timing.
- Mix mayonnaise, mustard and honey. Toast waffles according to the package directions shortly before the chicken is ready.
- Spread sauce over 4 waffles. Add lettuce, chicken, and pickles; close with remaining waffles. Serve immediately.
Notes
11) One-Pan Chicken Sausage and Frozen Peppers
At 5:17 pm, I opened the freezer and stared at it as if dinner might magically reveal itself. Frozen peppers have rescued me more times than I can count. They go straight onto a tray with chicken sausages, olive oil, garlic, and seasoning. No chopping board, no defrosting, no standing at the stove.
I usually throw baby potatoes onto the same tray if I have them. The frozen peppers get a little charred around the edges, and the sausage juices run into everything, so it tastes as if you've actually made an effort.
Don't lose this article. Enter your email below, and I'll send it to you right now. Plus a little encouragement and inspiration from me, straight to your inbox.
And Roger's very happy with sausages when sausages are involved. I can serve myself more vegetables and a few potatoes while he builds the kind of plate that makes me wonder where he puts it all.
Ingredients
Method
- Heat the oven to 425°F. Toss potatoes on an 18×13-inch rimmed sheet pan with 1 tablespoon oil and half the salt. Roast for 15 minutes.
- Add frozen peppers and sausage. Toss with the remaining oil and salt, garlic powder, Italian seasoning and pepper. Spread evenly.
- Roast for 20–25 minutes more, stirring once, until potatoes are fork-tender and sausage reaches 165°F. If the vegetables are watery, spread them out and roast another 5 minutes.
Notes
12) Instant Pot Salsa Chicken with Canned Black Beans

I once had chicken frozen solid at 4 pm and briefly considered changing dinner plans completely. Then I remembered the Instant Pot. Frozen chicken, a jar of salsa, black beans, corn, and some taco seasoning go in. That's it.
Once the chicken is cooked, shred it straight into the sauce. The first time I made it, I added extra stock because I was worried it wouldn't have enough liquid. And it ended up much more like chicken soup than taco filling. Lesson learned. Use the thin broth amount specified in the recipe card and your pressure cooker’s minimum liquid requirement; thick salsa alone is not dependable. Reduce the sauce after pressure cooking if needed.
Pile it onto the microwave rice with avo, cheese, and coriander, or stuff it into tortillas. I also like putting the leftovers into quesadillas the next day.
Ingredients
Method
- Pour broth into a 6-quart electric pressure cooker. Add separate frozen breasts, never a solid block. Spoon salsa over them; sprinkle with chili powder and cumin. Do not stir. Confirm liquid meets your model's minimum.
- Seal; pressure-cook on high 15 minutes. Allow 10 minutes natural release, then release remaining pressure carefully per manual. Allow approximately 15 minutes pressure buildup before timed cooking.
- Check thickest part of each breast for 165°F. If underdone, cover and pressure-cook 2–3 more minutes, release safely, and recheck. Shred cooked chicken on a clean board.
- Switch to sauté. Simmer liquid uncovered 5–10 minutes to reduce. Add beans and corn, then chicken; heat to 165°F. Spoon over hot rice, using a slotted spoon if needed.
Notes
13) Chicken Parmesan with Frozen Breaded Cutlets

I am a trained cordon bleu chef, but I'm also completely comfortable buying frozen breaded chicken. There, I've said it. There are evenings when making breadcrumbs, setting up flour and egg stations, and dealing with raw chicken is simply not gonna happen.
Cook the frozen cutlets until crisp, add a little bit of marinara sauce and mozzarella, and then put them back in the oven until the cheese melts. I keep the sauce restrained because I want the chicken to stay crispy, and then serve it with some spaghetti and a simple green salad or even zucchini noodles. Also tastes really good.
And you've got yourself chicken parm without turning your kitchen into a breading station disaster. If I can get it on the table while only washing one plate and a saucepan, I'm calling that an absolute win.
Ingredients
Method
- Cook frozen cutlets on a sheet pan following package temperature and time until crisp and 165°F inside; timing varies by brand.
- Meanwhile, boil spaghetti according to its package directions and drain. Heat marinara in a small saucepan until simmering.
- Top each cooked cutlet with 2 tablespoons marinara; divide mozzarella over them. Bake 3–5 minutes until melted.
- Toss spaghetti with the remaining 1/2 cup marinara. Serve with the chicken and Parmesan.
Notes
14) Sheet-Pan Chicken Nuggets and Frozen Broccoli

I get that on some nights, you really don't want to cook. All you want to do is put something in an oven and then carry on with whatever else you're doing. Frozen chicken nuggets and frozen broccoli go onto a tray, and here is your solution for those nights.
I toss the broccoli with some olive oil, garlic, and seasoning, and then roast everything until the nuggets are crisp. I'll usually make a quick dipping sauce with mayonnaise and tomato sauce for Ben, and then a mayonnaise and sweet cheese sauce for us.
Ben obviously goes for the chicken nuggets first. The broccoli is there, and he knows it's there, but whether it actually makes it into his mouth is another story. It's an easy one to have in the back pocket for those evenings when you don't have much in the fridge.
Ingredients
Method
- Heat oven to 425°F. Toss frozen broccoli with oil, garlic powder and salt on one half of an 18×13-inch sheet pan. Roast for 10 minutes.
- Add nuggets in one layer on other half. Cook for full package time, turning as directed, until 165°F inside. Roast broccoli until tender and browned; plate it if ready first.
- Mix mayonnaise and ketchup for dipping. Use a second tray if needed to fit food in one uncrowded layer.
Notes
15) Chicken Quesadillas with Shredded Cheese and Salsa

Quesadillas are what I make when I have a few bits and pieces, but nothing that looks remotely like a meal. Shredded rotisserie chicken, grated cheese, and salsa go between two tortillas and enter a hot skillet.
Then I start looking around the fridge. Corn, add it. Black beans, fine. Half an avo; that can go on top. I've even thrown leftover roast vegetables into them. Once you've got melted cheese holding everything together, it's honestly difficult to go too far wrong.
I sometimes rub a tiny bit of mayonnaise over the outside of the tortilla before cooking. It gives it a really good crisp finish without needing much oil. And then for Ben, I keep the salsa mild, and I don't overdo his fillings. For Roger, I'll make his much bigger because apparently one quesadilla is never enough.
Cut them into wedges and serve with extra salsa and some sour cream.
Ingredients
Method
- Microwave chicken with 1/4 cup salsa in a covered microwave-safe bowl, stirring halfway, until 165°F. Divide over half of each tortilla; add cheese and fold closed.
- Spread mayonnaise thinly over the outside surfaces. Heat a large nonstick skillet over medium heat.
- Cook two quesadillas at a time for 3–4 minutes per side, lowering heat if needed, until golden and cheese melts. Cut into wedges and serve with remaining salsa and sour cream.
Notes
16) Skillet Chicken Pot Pie with Refrigerated Biscuits

Your classic chicken pot pie, but with refrigerated biscuits. I like to use shredded rotisserie chicken, frozen veggies, and a creamy chicken sauce in a skillet. Then put refrigerated biscuits over the top and bake until they're puffed. I actually prefer the biscuit topping for this. There's no pastry to roll, no individual pies to assemble, and everything cooks in one dish.
I've made proper chicken pot pie lots of times, but this version is just a whole lot less work. And if you want to make the filling earlier, keep it in the fridge and then just add the biscuits before baking. They seem much nicer that way instead of sitting on the wet filling for hours.
If you don't have mixed veggies, use what you've got: peas or corn, carrots, and broccoli. They all work.
Refrigerated biscuit dough was invented in the 1930s as a way to shortcut homemade biscuits, and it still does exactly that job almost a century later. Not much has changed except how many dinners I’ve personally rescued with a single tube of it.
Ingredients
Method
- Heat oven to 400°F. Melt butter in a 12-inch oven-safe skillet over medium heat. Stir in flour and cook for 1 minute.
- Gradually whisk in broth and milk. Add thyme, pepper and frozen vegetables and simmer 5 minutes, stirring, until thickened. Stir in chicken and return the filling to a simmer.
- Space biscuits over hot filling. Bake uncovered 15–20 minutes or the package's full bake time, until tops are golden, undersides cooked through, and filling 165°F. Tent loosely with foil if tops brown too fast.
- Rest for 5 minutes before serving.
Notes
17) Buffalo Chicken Sliders with Rotisserie Chicken
I don't make buffalo chicken too often, mainly because Ben thinks anything remotely spicy is a personal attack. But these sliders are very easy to split into two versions.
Warm shredded rotisserie chicken with buffalo sauce for the adults, and leave some plain chicken aside for the kids. Pile the chicken into small rolls with cheese, brush the tops with melted butter, and bake until it's golden. I like adding a little ranch dressing and something crunchy, like shredded lettuce or coleslaw, once they come out of the oven. The crunch makes a big difference because buffalo chicken can otherwise be a bit soft.
These are also good for those evenings when everyone is eating at different times. I can make the tray, leave it ready in the fridge, and then bake it when we're actually ready to eat.
Ingredients
Method
- Heat oven to 350°F. Toss chicken with Buffalo sauce and microwave, covered and stirring once, until 165°F.
- Split rolls horizontally, keeping bottoms together. Place in a 9×13-inch dish. Top bottoms with chicken and provolone; replace tops and brush with butter.
- Cover loosely with foil and bake for 10 minutes. Uncover and bake for 5–10 minutes until cheese melts and rolls are golden.
- Open sliders carefully and add ranch and lettuce immediately before serving. Serve 2 per portion.
Notes
18) Chicken Taco Bowls with Microwave Rice

I really like putting dinner on the table and then letting everyone assemble their own version. It's just way easier that way. Heat some microwave rice and chicken with taco seasoning, and then put out black beans, corn and grated cheese, lettuce, avo, salsa and coriander.
Ben's bowl will pretty much only contain chicken, rice, and a little bit of cheese, while everything else is carefully pushed to one side. And my husband likes everything in his. Mine is usually more lettuce and avocado with a smaller scoop of rice, if any.
And that's the beauty of a taco bowl. Nobody has to eat the same dinner. If I have leftover chicken, I'll use it. But I'll also make these with frozen chicken strips chopped up after cooking. Even a supermarket rotisserie chicken works really well here.
And then for a really quick sauce, mix a spoonful of sour cream with lime juice and a little taco seasoning. It takes about 30 seconds and makes the whole bowl taste much more put together.
Ingredients
Method
- Heat chicken with taco seasoning and water in a covered skillet over medium-low heat, stirring occasionally, until 165°F, about 5–7 minutes.
- Heat rice according to the package. Microwave beans and corn in a covered microwave-safe bowl with 1 tablespoon water for 3–4 minutes, stirring, until hot throughout.
- Mix sour cream and lime juice. Divide rice, chicken, beans and corn among 4 bowls; add romaine, avocado, cheddar, salsa and lime cream.
Notes
19) Chicken Ramen Stir-Fry with Bagged Coleslaw
I started buying bags of coleslaw mix specifically for stir-fries. It sounds slightly lazy, and it is. But cabbage and carrots are already shredded, so dinner starts with the chopping done.
Heat a little bit of oil in a large pan and stir-fry the coleslaw mix with garlic. Add shredded chicken, soy sauce, sesame oil, and a little bit of honey. Then cook the ramen noodles on the side. Drain them and toss them through the pan. I don't use the little ramen flavor sachet. Soy sauce, rice vinegar, ginger, and a touch of honey make a much better quick sauce.
The nice thing is that you can throw other things in without measuring anything. I like to add mushrooms, pepper, spinach, and spring onion, whatever I've got. And don't worry about making it perfectly authentic. This is a 15-minute fridge and freezer dinner, not a cooking school practical.
“The best weeknight dinners aren’t the ones that look impressive. They’re the ones that get made at all.”
Ingredients
Method
- Mix soy sauce, vinegar, honey, sesame oil and water in a small bowl. Boil noodles in a pot of water for 1 minute less than package directions, then drain.
- Heat neutral oil in a large skillet over medium-high heat. Add slaw and stir-fry for 4–5 minutes until crisp-tender. Add garlic and ginger and stir for 30 seconds.
- Add chicken and sauce; toss for 3–4 minutes until chicken reaches 165°F. Add drained noodles and toss for 1–2 minutes until tender and coated.
Notes
20) Chicken and Stuffing Casserole with Boxed Stuffing
I love a proper homemade stuffing, and my mother-in-law makes the absolute best. But I'm not above using the box stuff. Especially when dinner needs to happen without turning it into a full-blown project.
Mix shredded chicken with frozen veggies and a creamy chicken sauce, spread it into a baking dish, and then prepare the box stuffing according to the packet instructions. Spin it over the chicken mixture and then just bake it until it's crisp.
The best bit is the contrast between the soft chicken filling underneath and the crunchy stuffing on top. I've used peas and corn, but frozen mixed vegetables are completely fine. You could also add mushrooms or chopped spinach if you have it.
One thing I wouldn't do is prepare the stuffing hours in advance and then leave it sitting on the filling. Add it just before baking, so you still get that crisp top. It's very forgiving, which is exactly what I want when I'm cooking while simultaneously trying to remember where Ben left his school shoes.
Most frozen chicken breasts take roughly 50% longer to cook through than thawed ones at the same oven temperature. That’s the whole reason a meat thermometer earns its spot in my kitchen drawer over any guessing game involving cut chicken and a timer.
Ingredients
Method
- Heat oven to 375°F. Mix chicken, vegetables, condensed soup and milk in a 9×13-inch baking dish and spread evenly.
- Boil water and butter in a saucepan. Remove from heat; stir in stuffing, cover, and rest 5 minutes. Follow package quantities if different liquid or fat amounts are required.
- Fluff stuffing and spread over chicken. Bake uncovered for 30–35 minutes, until browned and the center of the filling reaches 165°F. Rest for 5 minutes before serving.

