

You know that sticky backyard moment where the lemonade is sweating, the kids are circling, the sun is still high, nothing has even had a chance to melt yet, but you know that it will. This is a roundup of 19 heat-proof summer desserts that will survive the backyard heat without melting, tested by a busy parent between errands.
Don't lose this article. Enter your email below, and I'll send it to you right now. Plus a little encouragement and inspiration from me, straight to your inbox.
It's perfect for parents and hosts alike who are dealing with backyard heat, melting treats, and kids underfoot. These are practical, not fussy, and very forgiving of chaos.

Dinner is handled every Sunday
Get 5 easy family dinners, printable recipe cards, and one grocery list. Simple meals, normal ingredients, no more starting from zero at 5pm.
1) Frozen Greek yogurt bark with berries

Ingredients
Method
- Line a baking sheet with parchment and spread yogurt to a 1/4-inch layer.
- Scatter berries and nuts over the yogurt, pressing gently so they stick.
- Freeze until solid, about 2 hours.
- Break into pieces and store in a sealed container in the freezer.
Frozen Greek yogurt bark with berries is super easy to make because it doesn't take a whole lot of effort. You're simply going to grab a cookie sheet, spread out some Greek yogurt, throw in some berries, pop it into the freezer, and let it harden.
When it comes out, break it up, and it's ready to serve. The kiddos are going to love it as they are playing out in the yard. It's a very easy grab-and-go snack.
2) No-bake lemon cheesecake jars

Ingredients
Method
- Mix crumbs and melted butter in a bowl. Press 2 tbsp into each jar to form a base.
- Beat cream cheese and powdered sugar until smooth.
- Stir in lemon zest and lemon juice until even.
- Whip heavy cream to soft peaks.
- Fold whipped cream into lemon mixture gently.
- Spoon filling over crust in jars. Smooth tops.
- Chill at least 2 hours before serving. Add fruit on top.
No-bake lemon cheesecake jars are the perfect summer treat. No-bake means no oven. These are going to set in the fridge with cream cheese and a whipped cream structure, not eggs.
The jars create individual portions, making these super easy to serve, transport, or control compared to a full cheesecake. It prevents cutting, mess, and everything in between, making this a go-to summer treat.
The lemon flavor is going to come from lemon zest, which is going to carry more intensity than just the juice. Both are usually used together. Graham crackers are used as the base, pressed into the jar bottom with butter, which binds it. Again, no baking required.
A common mistake is not whipping your cream to stiff peaks before folding it in, which causes a runny filling. Your chill time on this one is two to four hours, but overnight is actually better for a clean set.
3) Peach and burrata skewers with balsamic glaze

Ingredients
Method
- Thread a peach wedge, a basil leaf, and a burrata ball onto each skewer.
- Arrange skewers on a platter in a single layer.
- Drizzle olive oil over the skewers.
- Spoon balsamic glaze in a thin line across the top.
- Sprinkle with a light pinch of flaky salt and serve right away.
Peach and burrata skewers with a balsamic glaze are a sure way to switch things up on a hot summer day. Burrata is a fresh mozzarella shell filled with cream and stracciatella. It tears open when it's cut or bitten, so you want to keep it whole on the skewer. Peak peach season is late June to August, making this the perfect summertime treat.
Balsamic glaze is reduced and thickened, making it much sweeter than just balsamic vinegar, and it clings rather than drips. You can buy this already made or reduce it yourself, but that is an additional 10 to 15 minutes, which is something to keep in mind.
This is a classic Italian pairing that has fat, acid, and sweet fruit. It is in the same family as prosciutto melon. A common mistake with this one is assembling it too far ahead. The burrata weeps and the peaches will begin to oxidize, so this is best served within 30 minutes of serving.
4) Chocolate-dipped frozen banana bites

Ingredients
Method
- Slice bananas into 1/2-inch rounds and lay them on a parchment-lined tray.
- Freeze the rounds for 30 minutes until firm.
- Melt chocolate and coconut oil in a microwave in 20-second bursts, stirring between.
- Dip each frozen banana half about halfway into the chocolate.
- Place dipped bites back on parchment. Sprinkle nuts or sprinkles if using.
- Freeze again for 15 minutes until chocolate sets.
- Transfer to a freezer bag for storage.
Chocolate-dipped frozen banana bites are a go-to kid snack that everyone is going to love. They're a simple frozen treat made by coating banana pieces in melted chocolate and then freezing them. You'll want to use slightly underripe to ripe bananas, because overripe ones will turn mushy when thawed, and you don't want that. Be sure to freeze your banana pieces one to two hours before dipping so that the chocolate sets fast on contact.
For the chocolate, you'll want melted chocolate and one teaspoon of coconut oil per cup, which keeps your shell glossy and snappable. A common mistake is dipping room-temperature bananas. The chocolate is going to slide right off of them, and you definitely don't want that.
You can also add some fun toppings, which the kids love, such as crushed nuts, sprinkles, or even sea salt. They must go on immediately, though, before your chocolate sets. You can store these in an airtight container or a freezer bag, and they're best within one to two weeks before freezer burn.
5) Avocado lime mousse in cups

Ingredients
Method
- Scoop avocados into a bowl and mash until mostly smooth.
- Add honey, yogurt, lime juice, zest, and salt.
- Whisk or blend until light and fluffy.
- Taste and add a bit more honey if you want it sweeter.
- Spoon into 6 small cups and chill at least 30 minutes.
- Top with berries or mint before serving.
Avocado lime mousse in individual cups is sure to be the new summer hit. Avocado and lime juice together actually prevent the avocados from browning thanks to the acidity of the lime juice. It also brightens the flavor. The fat content in avocado is naturally creamy, which gives you a mousse-like texture without dairy.
The key ratio here is one ripe avocado per two servings. If you use overripe, this is going to be bitter, and if you use underripe, it's going to be very grainy, so you want that perfect happy medium. The mousse effect is achieved by blending thoroughly in a food processor. That will be better than fork-mashing to really give you that airiness. Some recipes will also fold in whipped cream or aquafaba for lift, but that's not necessary.
You're then going to serve these in cups, giving you individual portions and making them super easy to grab. Chill them for at least 30 minutes and press cling film directly on the surface to prevent browning. A common mistake is using too little lime or salt. Both are essential to balance the avocado's richness and make the perfect treat here.
6) Coconut chia pudding with toasted coconut

Ingredients
Method
- Measure milks into a jar. Stir in maple, vanilla, and salt.
- Add chia seeds. Whisk or shake until evenly mixed.
- Let sit 10 minutes. Stir or shake again to break clumps.
- Cover and chill at least 2 hours or overnight.
- Toast 1/4 cup shredded coconut in a dry skillet over medium until golden. Watch it closely.
- Spoon pudding into cups. Top with toasted coconut and fresh fruit.
There is just something about coconut that screams summer, and this coconut chia pudding with toasted coconut is sure to be a hint. Chia seeds gel when they're soaked in liquid, and coconut milk gives a richness and subtle sweetness. If you use a full-fat coconut milk, that is going to give you a creamier pudding, but it does make it higher calorie. Light coconut milk will give you a much thinner texture, so that is definitely based on preference.
Toasting your coconut is something you'll want to do in the oven at 325 degrees Fahrenheit until golden. Just be sure to watch them closely because these can burn fast. You can also do this in a dry pan, whichever is easier.
A common mistake is not stirring after 10 to 15 minutes. Your seeds will start to clump at the bottom if they're left undisturbed early on, so make sure you're giving it a good stir. This can sit overnight or at least a minimum of four hours, making it a great make-ahead dish. The texture will continue to thicken in the fridge, making it the perfect summer treat.
7) Pineapple and mint granita

Ingredients
Method
- Blend pineapple, sugar, water, and lime juice until smooth. Scrape down the sides as needed.
- Stir in chopped mint. Taste and add 1 tablespoon more sugar if too tart.
- Pour mixture into a shallow metal pan. Spread it thin so it freezes fast.
- Freeze 30 minutes, then scrape with a fork to loosen crystals.
- Repeat scraping every 30 minutes, three to four times, until flaky and frozen.
- Serve in small bowls and top with a mint leaf.
This pineapple and mint granita is going to be your new summer fave. This is a Sicilian frozen dessert, and it's a lot coarser than sorbet. It's made by scraping ice crystals as it freezes, not turning. Pineapple is high in bromelin, which is an enzyme that tenderizes protein, and mint adds brightness and cuts through the sweetness.
You want to do a two-to-one fruit juice to sugar syrup ratio. Too much sugar will lower your freeze point and keep this mushy, so be careful with that one. You will also want to scrape this every 30 to 45 minutes, which will greatly determine your texture. If you neglect it and you get a solid block, you won't have flakes.
Serve immediately, or it will collapse. You can hold it in the freezer, but it needs one final scrape before plating.
8) Frozen yogurt-covered grapes
Ingredients
Method
- Stir yogurt with honey and vanilla if you want it sweeter.
- Thread grapes on a fork or skewer to dip more quickly.
- Dip each grape into yogurt, tapping off excess.
- Lay grapes on parchment in a single layer.
- Freeze for at least 2 hours until firm.
- Store in a sealed container in the freezer.
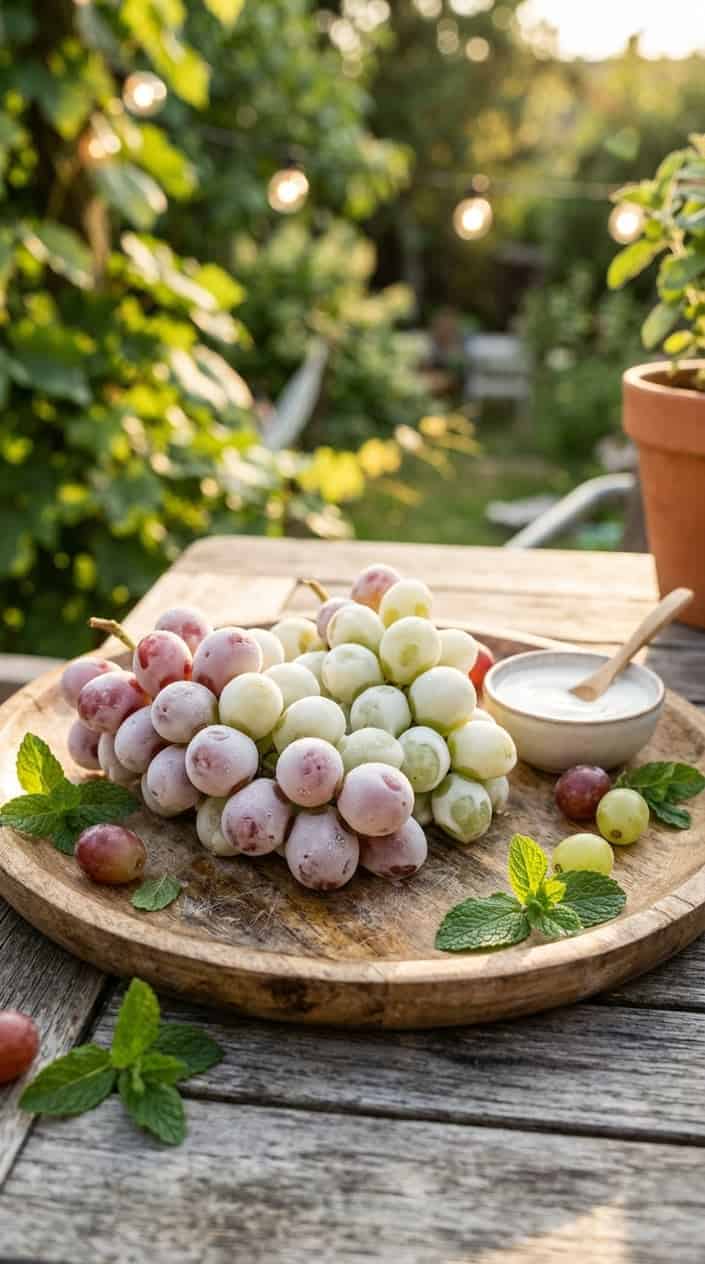
Frozen yogurt-covered grapes are a favorite for both kids and adults. Your grapes are going to be frozen and then dipped or rolled in yogurt, and then you freeze them again until that coating is solid. Greek yogurt gives a thicker, tangier shell compared to regular yogurt, which is a lot thinner and has an icier coat. Natural fruit sugar keeps the grapes from freezing rock hard, so they stay slightly chewy inside, which is exactly what you want.
Don't wet your grapes before dipping them, because the coating will slide off. So pat them completely dry before dipping. This is a portion-friendly snack that is a lower-calorie alternative to ice cream bites, which is exactly why everyone loves it.
9) Ricotta and honey-stuffed figs

Ingredients
Method
- Stir ricotta, 2 tbsp honey, lemon zest, and salt in a bowl until smooth.
- Spoon about 1 tbsp ricotta mixture into each fig half.
- Sprinkle toasted walnuts over the filled figs.
- Drizzle a little extra honey on top just before serving.
- Serve at room temperature within an hour for best texture.
Ricotta and honey-stuffed figs are such a different spin on dessert, but they are something that everybody is going to enjoy on a hot summer day. Fresh versus dried figs does matter. Fresh will hold up best for stuffing, and dried actually need to be rehydrated, so it's an extra step that you just want to avoid if you can.
Your ricotta needs to be drained and strained because the excess moisture will make your filling watery and completely ruin the texture of this dessert. The variety of honey you choose will also change the flavor significantly. Wildflower is mild, buckwheat is bold, and chestnut is bitter and sweet, so that is totally up to your preference. This can be served raw, grilled, or roasted.
The heat will caramelize the figs' natural sugars and soften the skin, so again, that is totally up to your preference. Some common additions to this one would be lemon zest, fresh thyme, crushed pistachios, or a balsamic glaze for some added contrast.
10) Almond butter energy bites (no-bake)

Ingredients
Method
- Stir oats, chia, salt, and chocolate chips in a bowl.
- Add almond butter, honey, and vanilla. Mix until sticky and even.
- Scoop tablespoon-sized portions. Roll into balls with slightly wet hands.
- Chill on a tray for 20–30 minutes to firm up.
- Store in an airtight container in the fridge for up to a week.
No-bake almond butter energy bites are the perfect grab-and-go snack. The core formula consists of oats, nut butter, and sweetener such as honey or maple syrup, plus mix-ins of your choosing. You'll want to do one cup of oats to one half cup of nut butter, keeping the bites from crumbling or going soggy. Almond butter has a milder flavor than peanut butter, and it's also slightly less sticky, but you can use a touch of peanut butter if you need more of a binder.
Don't lose this article. Enter your email below, and I'll send it to you right now. Plus a little encouragement and inspiration from me, straight to your inbox.
The chill time is key on these. 20 to 30 minutes in the fridge is going to firm them up perfectly, so don't skip that or your bites will fall apart. Some common add-ins are chocolate chips, chia seeds, flaxseed, honey, and vanilla. It is completely easy to customize this one for dietary needs and preference.
11) No-bake peanut butter chocolate oat bars

Ingredients
Method
- Line an 8×8 pan with parchment and spray lightly.
- Heat peanut butter, honey, and butter in a small pot over low heat. Stir until smooth.
- Remove from heat. Stir in vanilla and salt.
- Mix oats into the peanut butter mixture until coated.
- Press half the oat mix into the pan firmly.
- Melt chocolate chips in a bowl over simmering water or in 20-second bursts in microwave. Stir until glossy.
- Pour chocolate over pressed layer and spread evenly.
- Crumble remaining oat mix over chocolate and press lightly.
- Chill at least 1 hour. Cut into bars.
No-bake peanut butter chocolate oat bars? Yes, please. These bars set in your fridge or freezer, usually in one to two hours. The base is made up of rolled oats, peanut butter, and honey or maple syrup, with a ratio of two to one and a half cups. Your chocolate layer is going to be melted chocolate chips with a little peanut butter or coconut oil for a smooth finish.
A common mistake with these is not pressing that base layer down firmly enough, because your bars will crumble when cut. Make sure you press it in well so it's ready to set. Natural peanut butter can make these bars a little oilier and softer because there are no stabilizers, so using processed peanut butter is the go-to here since it holds its shape better.
12) Mango sticky rice cups (chilled)
Ingredients
Method
- Combine rice and water in a pot. Bring to a boil, then lower heat and simmer 15–18 minutes until water is absorbed.
- Stir coconut milk, sugar, and salt in a small saucepan over low heat until sugar dissolves. Do not boil.
- Mix half the coconut sauce into the hot rice. Cover and let sit 10 minutes so rice soaks.
- Spoon rice into small cups. Top with mango slices and drizzle remaining coconut sauce.
- Chill at least 30 minutes. Sprinkle sesame seeds before serving.
These mango sticky rice cups are the summer dessert you didn't know you needed. The traditional version uses Thai sticky rice, which is steamed and then mixed with coconut milk, sugar, and salt. You'll want to use a mango variety such as Nam Dok Mai or a tolfo because they're sweeter and less fibrous than the common supermarket mangoes that you're probably used to.
Chilling changes the texture of these because your rice is going to firm up, but it can dry out and harden if you don't store these with enough coconut sauce. A common mistake is using regular long-grain rice instead of the glutinous sweet rice because you're not going to get that sticky texture.
Serving these in a cup gives you a convenient, portion-controlled way to serve them versus the traditional plated version with toasted mung beans or sesame for crunch. Your coconut sauce ratio is key. Too little in your rice tastes bland once it's cold. Too much and you turn it soggy. So be careful with this one.
13) Berry and mascarpone phyllo rolls (baked quickly)

Ingredients
Method
- Preheat oven to 400°F. Line a baking sheet with parchment.
- Whisk mascarpone, powdered sugar, and vanilla until smooth.
- Toss berries with lemon juice.
- Lay one phyllo sheet on the work surface, brush lightly with butter, and top with a second sheet. Keep the remaining sheets covered while you work.
- Spread one quarter of the mascarpone mixture in a thin line near one edge and top with one quarter of the berries.
- Roll tightly into a log and place seam-side down on the prepared sheet. Repeat with the remaining phyllo, filling, and berries to make 4 rolls.
- Brush all 4 rolls with the remaining butter and sprinkle with the coarse sugar.
- Bake 10–12 minutes until golden and crisp. Cool 5 minutes, then slice.
These berry and mascarpone phyllo rolls are a dessert that bakes quickly, and they are super tasty. Phyllo dries out fast, so you want to keep your unused sheets under a damp towel while you're working. Mascarpone is Italian cream cheese. It is 44% fat, higher than regular cream cheese, making it richer and less tangy. You'll want to brush each phyllo layer with melted butter or oil, creating a flaky, crisp layer when baked.
Baked quickly means that you're going to have a high heat, around 375 to 400 degrees Fahrenheit for 15 to 20 minutes. Be sure to watch these closely because phyllo burns fast. Frozen berries will release more liquid, which can make your filling soggy, so be sure to pat dry or pre-cook them briefly to reduce moisture. Roll these tightly to avoid air pockets, and seal the ends or tuck under to keep your filling from leaking.
14) Cucumber-mint yogurt cooler (dessert drink)

Ingredients
Method
- Add yogurt, water, cucumber, mint, honey, and lime to a blender.
- Blend until smooth and pale green.
- Taste and add more honey or lime if needed.
- Fill glasses with ice.
- Pour the cooler over ice and stir briefly.
- Garnish with mint sprigs and serve right away.
This cucumber mint yogurt cooler is a dessert drink that is sure to cool everyone down on a hot summer day. Cucumber, mint, and yogurt are the classic cooling combo and are very popular across Middle Eastern, South Asian, and Mediterranean cuisines.
The yogurt base will be full-fat Greek yogurt for creaminess, or regular if you want a thinner texture. You can sub kefir for a tangier, more drinkable consistency as well. Be sure to peel your cucumbers and seed them to reduce bitterness and excess water. English or Persian cucumbers are milder than standard, so that is a great alternative as well.
You only want to use fresh mint with this recipe. Dried mint turns muddy and medicinal, spearmint is sweeter, and peppermint is more intense.
You're going to serve this drink very cold. A pinch of salt and a squeeze of lime or lemon sharpens all the flavors and cuts the dairy heaviness.
15) Chilled panna cotta jars with berry compote

Ingredients
Method
- Pour cream, milk, and 1/2 cup sugar into a small saucepan. Heat until it steams but does not boil.
- Stir in vanilla. Remove from heat.
- Sprinkle gelatin over cold water. Let sit 1 minute, then stir until dissolved.
- Whisk gelatin into warm cream until smooth.
- Divide mixture into four small jars. Cool to room temp, then chill 4 hours.
- For compote, heat berries, 2 tbsp sugar, and lemon in a small pan. Simmer 5 minutes until saucy.
- Cool compote, spoon over chilled panna cotta, and serve.
Chilled panna cotta jars with berry compote are going to be the perfect backyard summer treat. Panna cotta is Italian for cooked cream, and you set it with gelatin, not eggs, so it's closer to a jelly than a custard. You'll want to use typically two grams of gelatin per 200 milliliters of cream. If you do too much, this is going to be rubbery, and too little, it won't hold.
Chilling these in individual jars skips the unmolding step, which makes this a practical portion-controlled recipe that is visibly clean. And the berry compote adds acidity to cut the richness. Fresh or frozen both work; frozen often is more consistent with off-season.
Don't add your gelatin to boiling liquid because it kills its setting power. Bloom first in cold water and add off heat.
16) No-churn espresso semifreddo (keeps shape)

Ingredients
Method
- Bloom espresso: stir espresso and 2 tbsp hot water until dissolved. Cool slightly.
- Whip cream: beat cold heavy cream to soft peaks. Stop before it gets grainy.
- Fold: pour condensed milk, espresso, vanilla, and salt into whipped cream. Fold gently until streaks disappear.
- Transfer: spoon mixture into a loaf pan lined with plastic wrap. Smooth top.
- Freeze: cover and freeze at least 4 hours, or overnight.
- Serve: unwrap, slice with a hot knife for clean pieces.
This no-churn espresso semifreddo is a delicious Italian frozen dessert. Semifreddo means half cold, and it's softer than ice cream but firmer than mousse. It sits around negative 8 to negative 10 degrees Celsius, which will be your serving temp.
No-churn works because whipped cream and eggs trap air, bypassing the need for an ice cream machine's constant agitation. Espresso adds flavor and a slight bitterness to cut the sweetness perfectly, and it also lowers your freezing point slightly. Alcohol in spirits does the same, just more dramatically.
Keeping shape is the key semifreddo selling point. High fat with aerated eggs gives you a sliceable loaf straight from the freezer, unlike granita or sorbet. A common mistake is under-whipping the cream or the eggs, which will make this icy and give you a dense result. Overfolding will cause you to lose air, leading to the same problem.
17) Frozen mango pops with chili salt

Ingredients
Method
- Blend mango, lime juice, honey, and salt until smooth.
- Stir in 1/4 tsp chili powder. Taste and add a bit more if you like heat.
- Pour mixture into molds, leaving a little space at the top.
- Tap molds on the counter to remove air bubbles.
- Freeze at least 4 hours until solid.
- Run molds under warm water to release pops, then sprinkle with a pinch of chili salt.
Frozen mango pops with chili salt are the perfect sweet-heat treat. It's a classic Mexican street food combo using ripe mangoes, chili, lime, and salt. Tajin is the go-to brand with this one. Tajin is simply a chili lime salt blend, but you can sub it with a homemade mix of chili powder, lime zest, and salt.
You'll want to first freeze mango chunks partially before blending them for a creamier, less icy texture. Keep in mind that Ataulfo and honey mangoes are sweeter and less fibrous than Tommy Atkins.
Heat level here is adjustable. If you add chili salt only on the outside, that will make this milder. If you mix it in, you're going to have more heat throughout this dessert.
18) Dark-chocolate sea salt bark (keeps firm)

Ingredients
Method
- Line a baking sheet with parchment. Spread a rim of parchment for easy lift.
- Melt chocolate and coconut oil in a heatproof bowl over simmering water. Stir until smooth.
- Stir in 1/2 tsp sea salt. Add nuts or dried fruit if using.
- Pour chocolate onto parchment and spread to 1/4-inch thickness. Tap the pan to level.
- Sprinkle sea salt flakes on top. Chill in the fridge until firm, about 20–30 minutes.
- Break into pieces and store in a cool place or fridge.
Dark chocolate sea salt bark keeps firm in the summer heat, making this the perfect backyard treat. Dark chocolate sets firm at room temp due to having a higher cocoa butter content in comparison to milk chocolate. You'll want to melt this at 115 degrees Fahrenheit and then cool it to 88 degrees Fahrenheit, giving you a glossy, snap-firm bark. Untempered, this will be soft and streaky, which is something you don't want.
Flaky sea salt will be added after spreading. You don't want to stir it in. Adding it after preserves your texture and gives you visual contrast, which is going to make these an appealing snack everyone is going to grab. Salt enhances the perceived sweetness and bitterness balance. Fine table salt will clump and disappear, so your flake type really matters here.
A common mistake is refrigerating these to set. This is going to cause white streaks to form from the cocoa butter and sugar, so it's better to set these at a cool room temp. Bark stores well for two to three weeks in an airtight container, and be sure to avoid moisture, which will also cause sugar bloom.
19) Greek yogurt and honey panna cotta

Ingredients
Method
- Sprinkle gelatin over cold water in a small bowl. Let sit 5 minutes.
- Warm milk, cream, and honey in a saucepan until steaming. Don’t boil.
- Remove from heat. Stir in vanilla and bloomed gelatin until dissolved.
- Cool mixture 10 minutes, then whisk in Greek yogurt until smooth.
- Pour into 4 ramekins. Cover and chill at least 4 hours or overnight.
- Run a knife around edges to loosen. Invert or serve straight from ramekin.
- Drizzle with honey before serving.
Greek yogurt and honey panna cotta are the perfect summer treat. Panna cotta is an Italian cooked cream traditionally set with gelatin and served cold. Greek yogurt adds tang and protein and cuts the richness compared to all-cream versions. Using honey as a sweetener really depends on preference because floral notes vary widely, which is worth mentioning.
Your gelatin ratio is critical because if you use too little, this won't set, but if you use too much, this can turn rubbery in a hurry. So I highly recommend using 2 grams per 250 milliliters as your common baseline. A common mistake with this recipe is adding gelatin to boiling liquid, which will kill its setting power. So you want to bloom and dissolve off heat.
Serve this one with fresh fruit, honeycomb, or crushed pistachios for that perfect textural summer contrast.
Ingredients
Instructions


