

You can show up to a barbecue with a bag of chips, or you can show up with something that took you 15 minutes but looks like you've planned your whole week around it.
Don't lose this article. Enter your email below, and I'll send it to you right now. Plus a little encouragement and inspiration from me, straight to your inbox.
This is 14 sides built for that second version. Nothing mushy, nothing weird sitting out for two hours while everyone argues about whether it's done. Just the stuff that gets empty first and gets asked about after.

Dinner is handled every Sunday
Get 5 easy family dinners, printable recipe cards, and one grocery list. Simple meals, normal ingredients, no more starting from zero at 5pm.
1) Creamy Southern Potato Salad with Dijon and Sweet Pickles

Ingredients
Method
- Place the potatoes in a big saucepan, filling it with cold water. Add a teaspoon of salt. Bring it to a boil and cook until you can easily insert a fork, which should take around 12 to 15 minutes.
- After draining them, let them cool for about ten minutes. They should still be a little warm.
- In a large bowl, combine the mayonnaise, Dijon mustard, vinegar, sugar, pepper, and parsley. Stir until smooth.
- Gently mix the potatoes, pickles, celery, onion, and eggs in the dressing. Be careful not to mash any of the ingredients.
- For the best flavor, chill the mixture for a minimum of two hours and up to overnight. Taste for seasoning and add more salt and pepper as necessary.
This is such a classic, and I actually don't know of anyone who doesn't make any type of potato salad at a barbecue. I think it's all about the balance for me with this one. The Dijon mustard brings that sharpness; the sweet pickles cut through the bit of sweetness and not others.
Boil the potatoes, but don't overdo them, because this is where everything turns to mash. Fold everything through while they're still warm. What happens here is it just soaks up all the dressing. Let it sit in the fridge for a bit before serving.
2) Grilled Corn with Chili-Lime Butter and Cotija

Ingredients
Method
- In a bowl, combine and stir until smooth butter, lime juice, lime zest, chili powder, paprika, salt, and pepper.
- Preheat your grill to medium-high heat of about 400°F (204°C). Lightly oil the grates.
- Lightly apply oil to the corn and grill for 10-12 minutes. Be sure to turn the corn every 2-3 minutes so they become evenly charred.
- While still hot, spread chili-lime butter on each ear so it melts in.
- Serve with lime wedges and sprinkle some cotija and cilantro over corn.
Good corn is one of those simple dishes that always disappears first. Smoky, charred grilled corn with chili-lime butter and salty cotija cheese turns corn into something special, and it comes together in just 20 minutes. It's good served with grilled chicken, fish, or burgers, or on its own.
3) Vinegar-Based Carolina Coleslaw
Ingredients
Method
- Put cabbage, carrots, and red onion in a large bowl.
- Combine vinegar, sugar, salt, pepper, oil and celery seed in a jar and whisk until the sugar dissolves.
- Drizzle dressing over your salad and use the salad tongs to mix until everything is covered.
- Let cool for at least 1 hour to allow the flavors to meld. Stir again before serving.
Mayo-based slaw has never really done it for me. I personally think it's too heavy and one-note, but the Carolina style is the one I actually reach for because the vinegar does all the work, with just enough sugar to take the edge off. Cabbage gets tossed and left to sit, softening up with that tang to match. It's the dish that saves whatever rich, heavy things you've put next to it on the plate. Delicious with lots of fresh herbs too.
One thing I can tell you here: make sure you don't add the dressing too far in advance. It should be about 30 minutes before serving.
4) Bacon-Wrapped Green Bean Bundles

Ingredients
Method
- Set your oven to 400°F and cover the baking sheet with foil.
- Toss beans with a bit of olive oil, salt, and pepper.
- Grab about 8-10 beans and take one half-slice of bacon and wrap it around the center. Tuck the end under.
- If you’re using brown sugar, sprinkle it on the sheet after placing the bundles seam-side down.
- Bake for 18–22 minutes until the bacon is crisp. Turn it over after 10 minutes for even browning.
- Before serving, allow it to rest for 3 minutes so the bacon firms up.
When my son sees these, he will take a few, put them on his plate, literally pull the beans out, leave them on the side, and just eat the bacon. It's a bit of a waste of time, but everyone else seems to really enjoy them.
Bacon-wrapped anything is a bit of a party trick, isn't it? Everyone acts like it's fancy, but it's really just the green beans doing time in a bacon jacket.
Blanching means they're still going to have bite (And, in my opinion, there's nothing worse than a gray bean that's been overcooked). Wrap them in bacon and put them in the oven until the bacon's crispy, so you've got to serve these right before people eat.
I like to brush on something sweet, like brown sugar or even a bit of honey, at the end, and it just takes it from fine to "this is amazing."
5) Tangy Baked Beans with Brown Sugar and Mustard

Ingredients
Method
- Set your oven to 325 degrees F. In a skillet, cook the bacon until it is crisp, then place on a paper towel.
- Sauté the onion in the reserved bacon fat until soft, about 5 minutes. Stir in the smoked paprika and cook for 30 seconds.
- Combine the beans, bacon, onion, ketchup, brown sugar, mustard, Worcestershire sauce, pepper, and water in a baking dish. Then, stir the mixture until fully integrated.
- Wrap with foil and cook for 45 minutes. After this, take off the foil and bake for an additional 15 minutes to thicken.
- For make-ahead service, cover and refrigerate the baked beans overnight. Reheat them on the stovetop, in a 325°F-or-hotter oven, or in the microwave until they reach 165°F (74°C); transfer the already-hot beans to a preheated slow cooker on WARM only for holding.
The garage baked beans, I feel like they're really underrated, but they make wonderful sides. You don't need anything fancy; just add a few extra ingredients to make them taste as if you spent much more time on them than you actually did.
The brown sugar in this recipe adds a touch of sweetness and the mustard goes in the little tin, and after a while everything kind of comes together and it's so rich and it's perfect with burgers, ribs, hot dogs, or grilled chicken. It's such a classic American side dish.
And you can add a splash of apple cider vinegar right at the end, which I think brightens the flavors.
6) Smoky Macaroni and Cheese with Panko Topping

Ingredients
Method
- Take a pot of water and boil some macaroni until it is slightly tender. Drain the water and put the macaroni to the side.
- In a saucepan, melt the butter, then stir in the flour, whisking for about one minute.
- Gradually incorporate milk and cream. Whisk for about 5 minutes or until thickened.
- Add the cheeses, smoked paprika, mustard, salt, and pepper and mix until even.
- In a 9×13 dish, combine the pasta and cheese sauce.
- Mix the panko with olive oil, then spread on top.
- Bake until it’s golden and bubbly. That’s usually about 20-25 minutes at 375°.
Smoky mac and cheese has a spot at a barbecue because it's a side that can actually stand up to smoking meat without getting lost. I like to add some smoked cheese in the mix, and it's playing the same game as whatever is coming off the fire.
I like to toss the panko breadcrumbs in some melted butter before it goes on so it toasts up in the oven instead of just sitting there. That contrasts the creamy sauce underneath, which is the whole reason people go back for seconds.
This makes such a great leftover meal, so make sure you make tons of it so you can get it for the next week.
7) Grilled Peach Caprese Salad with Burrata

Ingredients
Method
- Preheat the grill to medium-high heat and brush the peach halves with olive oil.
- Grill the peaches cut-side down for 3 to 4 minutes, until grill marks appear. Flip and grill for 1 minute, then cool for 5 minutes and slice.
- Place the tomatoes, peaches, and basil on the platter, then tear burrata cheese on top.
- Serve at room temperature. Drizzle with the remaining olive oil and the balsamic glaze, then season with salt and black pepper.
This is the salad I make when peaches are in season. Grilling brings out their sweetness and gives them those lovely char edges, while the burrata makes it feel a little bit more special. It's the kind of dish that looks impressive when you put it down; it's actually incredible how it comes together.
If you don't have peaches, nectarines would work just as well. I always add a handful of toasted almonds or pecans for extra crunch to this dish. I think the salad is lovely alongside grilled chicken or fish, as it adds fresh contrast to richer proteins.
A little fun fact: peaches belong to the rose family, which I did not know, which means they're actually related to roses, apples, and almonds.
Drizzle with some reduced balsamic reduction, and you've got yourself a healthy summer salad ready to eat.
8) Cilantro-Lime Mexican Street Corn Salad (Esquites)

Ingredients
Method
- Put some oil in a big skillet and heat it on medium-high. Add corn and stir it a few times so it cooks evenly and gets charred, around 6–8 minutes.
- Put the corn in a bowl and let it cool for 5 minutes.
- Mix mayo, sour cream, lime juice, cotija, cilantro, chili powder, cumin, and salt and pepper to taste.
- For better flavor, allow chilling for at least 30 minutes. Before serving, taste, and adjust lime juice or salt.
Street corn is one of those things I properly fell for: eating it off a cart somewhere, corn charred right there, then loaded up with all that creamy, tangy, cheesy mess. Esquites is basically that same idea, just off the cob and in a bowl so you're not fighting it with your hands.
Don't lose this article. Enter your email below, and I'll send it to you right now. Plus a little encouragement and inspiration from me, straight to your inbox.
Char the corn hard; don't be shy about it- that's where the flavor comes from. Then toss it through some mayo, lime, cotija, a good handful of cilantro, and then chili powder on top.
This tastes like street food even though you've never left the kitchen.
It makes such a good side because it doesn't compete with anything else on the table. Works really well with grilled meats, tacos, barbecue, basically anything smoky and rich, because it cuts through instead of adding more heaviness.
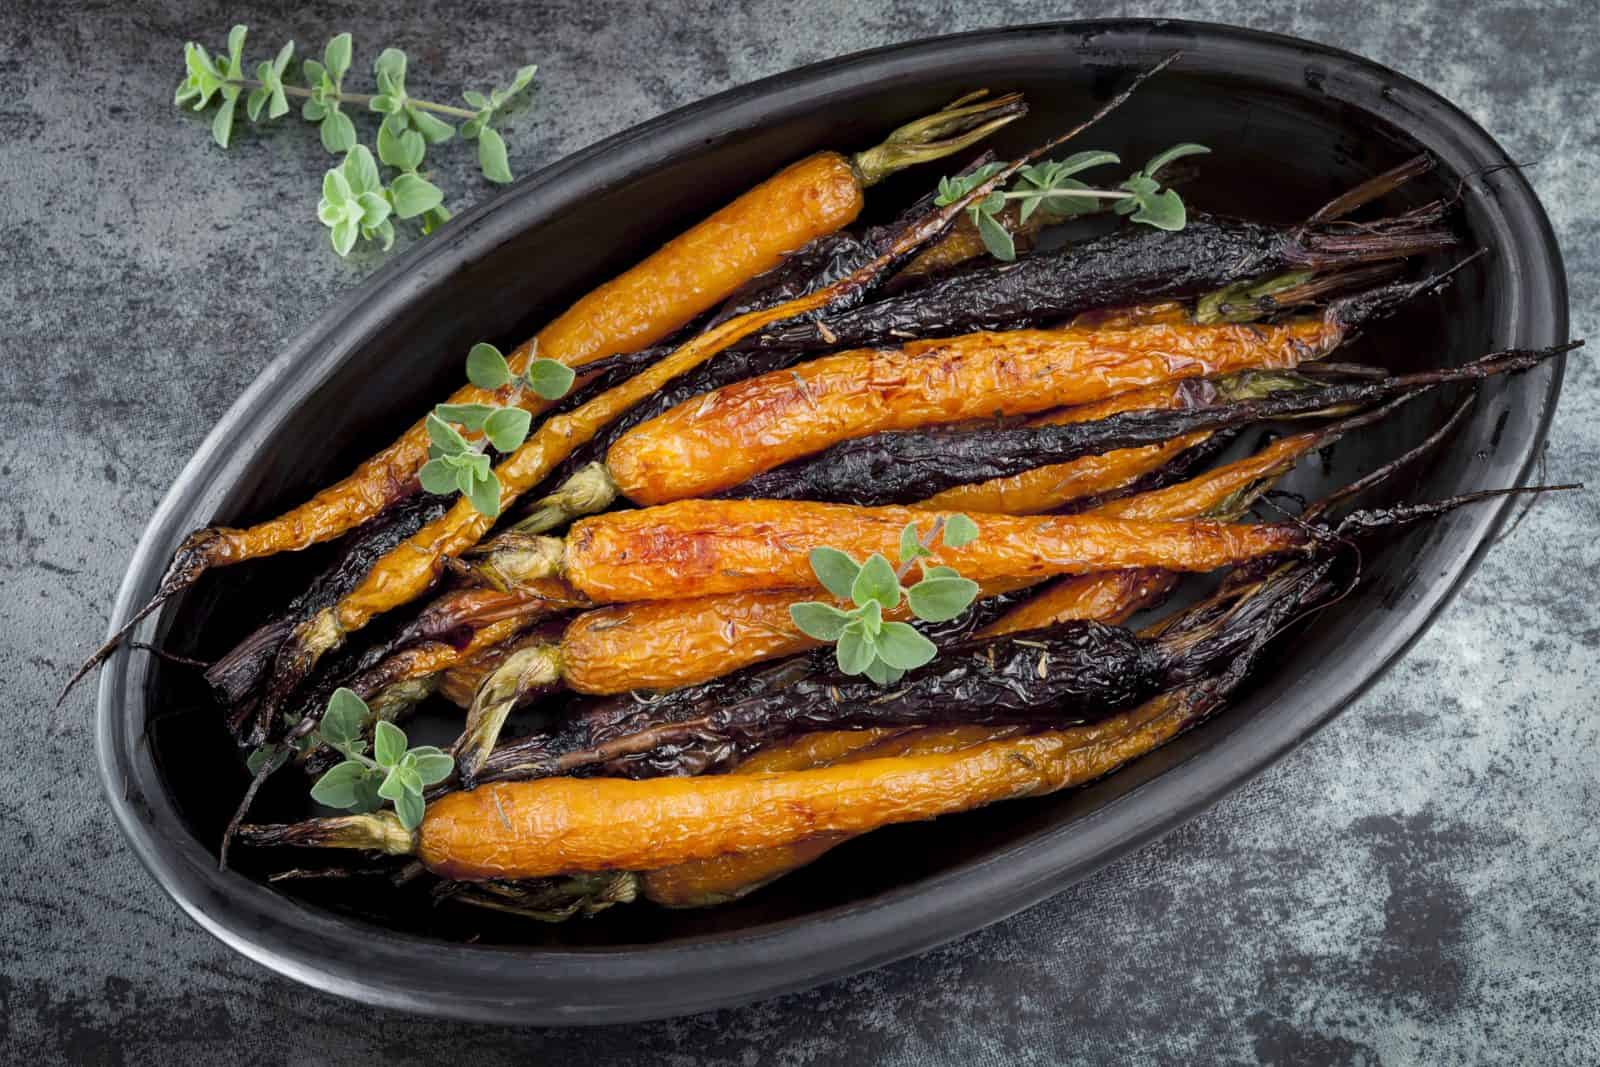
9) Honey-Sriracha Glazed Baby Carrots
Ingredients
Method
- Preheat the oven to 400 degrees Fahrenheit (200 degrees Celsius). On a rimmed baking sheet, mix the carrots with butter and salt.
- Cook for 20-25 minutes until tender, and beginning to brown.
- In a small bowl, whisk together the honey, soy sauce, and Sriracha.
- Pour glaze over the carrots and return them to the oven for 5 minutes. Stir once until sticky.
- If you want a fresh touch, sprinkle parsley before serving.
The honey just makes them beautifully caramelized, while the sriracha adds just enough heat to keep things interesting without overpowering.
They're colorful, easy to make, and a nice change from the usual sausage and potato dishes.
I always taste it before adding it for the guests and adjust the direction to suit my son's preference.
I like to just squeeze fresh lime juice just before serving because I think that adds a lovely fresh finish. These are so delicious warm but also surprisingly good at room temperature, so making it perfect for a barbecue spread.
Don't boil the carrots for too long; when you're glazing them, they need a mushy texture rather than a tender, crisp carrot.
10) Classic Caponata with Eggplant and Pine Nuts

Ingredients
Method
- Place your eggplant in a colander and salt them for 20 minutes. Once the time is up, rinse and pat the eggplants dry.
- Heat 2 tbsp of oil in a large skillet over medium-high heat. Once the oil is heated, add half the eggplant to the skillet and cook until browned. Remove from the skillet and repeat this process with the other half of the eggplant.
- Pour in the rest of the oil, then sauté the onion and celery for about 5 minutes or until they are soft.
- Add the bell pepper and garlic and cook for 3 minutes.
- Put eggplant back into the pan. Then add the vinegar, tomato paste, sugar, olives, and capers. Stir occasionally and simmer for 15 minutes.
- Stir in basil and pine nuts. Season with salt and pepper.
One of those dishes that sounds fussy but really just comes down to patience. Salt the eggplant first, then let it sit and sweat out that bitterness; that's the step people skip and regret. Let it sit. Then it cooks down properly, becoming soft and a bit caramelized. For the tomatoes, olives, and capers, go with a special vinegar for that sweet side thing it's known for.
This works really well for a barbecue because you can serve it at room temperature. This is already done and waiting on the side in the kitchen until the meats are ready.
Pine nuts at the end for crunch, though people also use almonds because they're cheaper and work just as well.
This is also a really good one to have at a barbecue for vegetarians. It's really good as a meal on its own too.
11) Cold Cucumber-Dill Yogurt Salad

Ingredients
Method
- Put your sliced cucumbers in a bowl and sprinkle with salt. Allow to sit for 10 minutes, then pour out the excess liquid.
- In a separate bowl, stir until smooth the yogurt, dill, lemon juice, garlic, pepper, and olive oil.
- Gently mix the drained cucumbers and red onion with the yogurt mixture until fully covered.
- Let it sit for at least 30 minutes to allow the flavors to blend together. Before serving, taste it one last time and if needed, add more salt or lemon.
The cool cucumber, cream, yogurt, and fresh dill are such a good combination that I always end up making this, since I normally have all of it in the fridge already. It's great for when the weather is super warm because it's so refreshing.
Sometimes the simplest dishes end up being everyone's favorite. It's pretty common across Greek, Turkish, and Persian cuisines, so it's nice to add a little bit of cumin on top of it and also just bring it.
Dill is the defining herb here, and I always use fresh. It just makes a huge difference; it's brighter and more aromatic.
Tip: Persian cucumbers have fewer seeds and are less watery than standard field cucumbers, so always look for them in the salad. Fresh mint is a great decision as well if you want an extra boost.
And of course, the salad goes with pretty much anything: chicken, seafood, or even just as a dip with a piece of bread the next day.
12) Charred Broccoli with Lemon Zest and Parmesan

Ingredients
Method
- In a large bowl, add olive oil, salt, and pepper, then toss the broccoli with them.
- A medium-high range heat level should be used to prepare a grill or grill pan before placing florets cut-side down.
- Without moving for the first 3-4 minutes, cook them to get some charring, then flip and cook for an additional 2-3 minutes until they are tender-crisp.
- Place the mixture into a bowl and incorporate lemon zest, lemon juice, parmesan, and red pepper flakes. Mix and check for seasoning.
- Serve warm or at room temperature.
Broccoli doesn't always have devotees, and my son protests every single time I put it down in front of him. I always pull this recipe out of the proof. It's the char that gives it its florets crispy little edges, while keeping the stems tender, and the lemon and parmesan that really bring everything to life.
It's incredibly easy to make but tastes like you put in far more effort than you actually have, which is true of all of these recipes. Even people who usually pass on broccoli seem to come back for another helping.
I like to cut the florets to a similar size so they cook evenly, and I add a pinch of chili flakes if they're up for it. You could set this out at a barbecue, and everyone would think it was something else.
Then it's the parmesan that makes a lovely crunchy topping if you've got some on hand; otherwise, breadcrumbs do the trick. With some lemon freshly squeezed on top, that's what finishes it.
13) Pineapple-Jalapeño Salsa
Ingredients
Method
- Mix pineapple, jalapeno, red onion and cilantro in a bowl. Stir until mixed evenly.
- Mix the lime juice, honey, and salt in a small cup; stir until fully combined. Pour the mixture over the salsa.
- Gently toss and refrigerate for a minimum of 30 minutes. Sample and adjust salt or lime as necessary.
- Serve this with chips, or drizzle over grilled pork or chicken.
This salsa is so fresh, and it balances all that rich barbecue food. The pineapple's sweet and juicy, the jalapeño has just enough heat, and the lime pulls everything together.
You can either make this salsa fresh or grill the pineapple, which changes the flavor profile in a big way. Grilling caramelizes the sugar and adds smokiness, which I like in this salsa. It's best to use fresh pineapple with the salsa. The canned version just doesn't make it. It's too sweet, and it's watery, but I suppose whatever you've got on hand.
This also pairs so well with pork tacos, grilled chicken, or shrimp. It's a staple we do in Tex-Mex or Caribbean-style barbecue cooking. Serve it with fresh cilantro and some crispy tortilla chips on the side.
14) Buttery Garlic Dinner Rolls with Fresh Herbs
Ingredients
Method
- In a mixing bowl, add warm milk, sugar, and yeast and whisk together. Set the mixture aside for 5 to 7 minutes until it becomes frothy.
- Mix in the cooled butter, egg, salt, and 2 cups of the flour. Add the rest of the flour until the dough starts to separate from the sides.
- Knead dough for a smooth finish as described for 8 to 10 minutes. Place in a bowl that has been greased, cover it and let it rise for 1 hour.
- After punching it down, split into 12 equal balls and arrange in a 9×13 pan. Cover and let it rise for 30 to 45 minutes.
- Combine softened butter, garlic, parsley, and chives. Before baking, brush the rolls.
- Bake for 18 to 20 minutes, or until they are golden brown. After baking, brush with the herb butter again.
When I make a batch of these buttery garlic rolls, they don't even make it to the table with the meal. They gobbled up right away, which is great because they're much better cut out of the oven.
Okay, perfect for mopping up sauces, making little sliders with butter and meat, or just eating in with soup. They're so much better if they're still warm inside your mouth. I brush these with butter straight out of the oven, which makes them super soft, fluffy, and impossible to just stop at one.


