

I grew up watching my grandmother make these kinds of dishes from scratch in the kitchen on the farm. I can still picture her there, making everything with no shortcuts, because that's just how she always cooked. There were no packets of sauces, no shortcuts dressed up in flavor. Just real food made properly.
Don't lose this article. Enter your email below, and I'll send it to you right now. Plus a little encouragement and inspiration from me, straight to your inbox.
Chicken Tetrazzini Bake


Five simple dinners. One grocery list.
No recipe hunting, no messy shopping notes, no complicated chef projects. Just family dinners that fit real weeks.
My grandma made everything from scratch on the farm, and this chicken tetrazzini was one of those dishes that turned up whenever there was leftover chicken and a house full of people to feed. It's a creamy, cheesy pasta bake loaded with chicken. Proper farmhouse comfort food, no fuss about it.
She would make this dish when there was leftover chicken, which is exactly how it worked on the farm. Nothing went to waste. Add mushrooms to balance out all that cream and cheese, then bake until golden and slightly crisp. Grandma used to add a dash of sherry for depth.
One mistake I've made myself in the past is over-baking it. Pasta keeps absorbing liquid in the oven, and it can become a bit mushy.
Chicken Tetrazzini Bake
Ingredients
Method
-
Preheat oven to 350°F and grease a 9×13-inch baking dish.
-
Cook spaghetti according to package directions until al dente, drain and set aside.
-
In a large skillet, melt butter over medium heat and sauté mushrooms until tender, about 5 minutes.
-
Add sherry, garlic powder, salt, and pepper, and simmer until sauce thickens, about 5 minutes.
-
Stir in 1 1/2 cups cheddar cheese and half the Parmesan until melted and smooth.
-
Combine cooked spaghetti, chicken, peas, and sauce in the baking dish, mixing well.
-
Top with remaining cheddar and Parmesan cheese, then bake for 30-35 minutes until golden and bubbly.
King Ranch Chicken Layers

Pro Tip
Always grate cheese fresh from the block instead of using pre-shredded bags. Pre-shredded cheese is coated with anti-caking starch that prevents smooth melting.
Freshly grated cheese gives you that stretchy, gooey pull every casserole deserves.
King Ranch Chicken is layers of tortilla, chicken, and a properly made sauce with cheese and bacon, all set together. The combination is delicious. Now, we actually don't know where the name comes from. It's not from the famous King Ranch in Texas. The connection has never been confirmed. It's one of those food mysteries nobody's solved.
The sauce comes from tomatoes and green chilies, which gives it more depth than a standard cream-based casserole. I like to let it rest for 10 minutes after pulling it from the oven. I just find that makes a real difference. I also tend to use thicker chicken cuts. That significantly reduces drying out without losing anything.
This dish needs the chicken cooked specifically for it. Don't try to shortcut that. And the cheese on top should get a good stretch going, but add it only toward the end of baking. Too early and it overcooks. The dish holds together a bit better than most casseroles, which helps when you're serving it.
King Ranch Chicken Layers
Ingredients
Method
-
Preheat oven to 350°F and grease a 9×13-inch baking dish.
-
Sauté onion and bell pepper in butter over medium heat until softened, about 5 minutes.
-
In a large bowl, mix together both soups, Rotel tomatoes, chicken broth, chili powder, cumin, and garlic powder.
-
Stir in the sautéed vegetables and shredded chicken until well combined.
-
Layer half the tortilla strips in the bottom of the baking dish.
-
Spread half the chicken mixture over tortillas, then sprinkle with half the cheese.
-
Repeat layers with remaining tortillas, chicken mixture, and cheese.
-
Bake uncovered for 40-45 minutes until bubbly and cheese is golden brown on top.
Hamburger Potato Delight

Ground beef and potato baked together with cheese. It sounds straightforward, but the order in which you build it is what makes or breaks the dish. I like to use cream of mushroom soup because it acts as a binding sauce, adds moisture, and saves me from making a roux from scratch. I slice potatoes on a mandolin so they're uniform and cook evenly.
Make sure you choose a fattier ground beef, as it stays juicier. I just find that leaner beef can dry out under the heat. I like to add a layer of onions between the beef and the potato. That sweetens as it bakes and keeps the whole dish from tasting a bit flat.
Cheese goes on at the end, just enough time to melt through properly without overcooking before the rest catches up. Then I like to rest it for 10 minutes when it's out of the oven so it slices clean instead of falling apart on the plate. This is such a hearty one.
Hamburger Potato Delight
Ingredients
Method
-
Preheat oven to 375°F and grease a 9×13-inch baking dish.
-
Brown ground beef with diced onion in a large skillet over medium-high heat, breaking up meat as it cooks, about 8 minutes.
-
Drain excess fat and season beef with garlic powder, paprika, salt, and pepper.
-
In a bowl, whisk together cream of mushroom soup and milk until smooth.
-
Layer half the sliced potatoes in the bottom of the baking dish, overlapping slightly.
-
Spread the cooked ground beef mixture over the potatoes, then pour half the soup mixture on top.
-
Sprinkle with 1 cup of cheese, then layer remaining potatoes on top.
-
Pour remaining soup mixture over potatoes, dot with butter pieces, cover with foil, and bake for 45 minutes, then uncover, top with remaining cheese, and bake 15 minutes more until potatoes are tender and cheese is golden.
Bacon Cheeseburger Grilled Cheese
This one throws me back to when my brother and I would play all day outside on the farm, and then my grandma would call us in for this delicious toasted bacon cheeseburger sandwich. The patty is thin and cooked through before it goes anywhere near the bread. A thick patty throws off the whole build and gets a bit watery from the juices.
I like to use butter on the bread, not oil, because it gives it that proper golden crust that everyone's always after. Low and slow on the heat matters more than you'd think. If it's too hot, the bread turns before the cheese is melted through. I like to use two cheeses, sharp cheddar and more of a processed cheese, and they melt together instead of going oily.
Bacon Cheeseburger Grilled Cheese
Ingredients
Method
-
Preheat oven to 350°F and grease a 9×13-inch baking dish.
-
Brown the ground beef in a large skillet over medium heat, breaking it into crumbles, then drain excess fat and season with salt and pepper.
-
Layer half of the bread cubes in the prepared baking dish, then top with ground beef, crumbled bacon, and half of both cheeses.
-
Add remaining bread cubes on top and sprinkle with remaining cheese.
-
Whisk together eggs, milk, melted butter, garlic powder, and onion powder in a large bowl, then pour evenly over the casserole.
-
Press down gently with a spatula to ensure bread absorbs the liquid, then let sit for 10 minutes.
-
Bake uncovered for 35-40 minutes until golden brown and set in the center.
-
Let cool for 5 minutes before cutting into squares and serving.
Broccoli Chicken Crunch

I love this dish more for the texture, honestly, than the actual flavor. I like to use crushed crackers or fried onions on top, and I put those on toward the end so they stay crisp instead of going soft in the bake. Always blanch your broccoli first. Raw broccoli releases too much water and will water down the whole dish. You've got to make your sauce the right way, too.
If the sauce is too thin or runny, it won't hold everything together. The chicken should also be cooked and shredded or cubed beforehand. This is more of a family-and-crowd situation. I'm not cooking from raw on this one.
Always rest it after the oven, as it helps the sauce set so it doesn't run everywhere when you serve it. It's soft underneath with that crunchy top. Delicious every single time.
Broccoli Chicken Crunch
Ingredients
Method
-
Preheat oven to 350°F and grease a 9×13-inch baking dish.
-
In a large bowl, combine cream of chicken soup, sour cream, mayonnaise, garlic powder, and black pepper until smooth.
-
Stir in the cooked chicken, blanched broccoli, and 1 1/2 cups of cheddar cheese until everything is well coated.
-
Pour mixture into the prepared baking dish and spread evenly.
-
Sprinkle remaining cheddar cheese and Parmesan cheese over the top.
-
Bake for 25 minutes, then remove from oven and top with French fried onions.
-
Return to oven and bake an additional 5-7 minutes until onions are golden and casserole is bubbly.
-
Let stand for 5 minutes before serving.
Turkey Noodle Comfort
This is the dish that traditionally turns up after a roast, and I like to use leftover turkey rather than cooking it specifically for this. Make this with a roux-based sauce, not cream alone; it holds up far better and won't separate or turn grainy when it's baked. I like to add some peas or any veg I can find in the fridge and stir them through for color and a bit of freshness. It just cuts through that richness.
The noodles should be slightly undercooked before they go in the oven. They'll finish cooking in there and absorb the sauce properly, so make sure you don't overcook them beforehand, or the whole dish will go to mush. I like to top this with cheese and breadcrumbs. It gives that texture on top with the saucy noodles underneath.
I think this is one of the better casseroles for using up odds and ends, whatever's left in the fridge after a big meal.
Turkey Noodle Comfort
Ingredients
Method
-
Preheat oven to 350°F and grease a 9×13-inch baking dish.
-
Cook egg noodles according to package directions until al dente, then drain and set aside.
-
In a large bowl, combine cream of mushroom soup, sour cream, chicken broth, thyme, and black pepper, whisking until smooth.
-
Stir in the cooked noodles, turkey, peas, Swiss cheese, and cheddar cheese until everything is well combined.
-
Pour mixture into the prepared baking dish and spread evenly.
-
In a small bowl, toss crushed Ritz crackers with melted butter until well coated.
-
Sprinkle the buttered crackers evenly over the top of the casserole.
-
Bake for 30-35 minutes until the topping is golden brown and the casserole is bubbling around the edges, then let cool for 5 minutes before serving.
Chicken Enchilada Stack
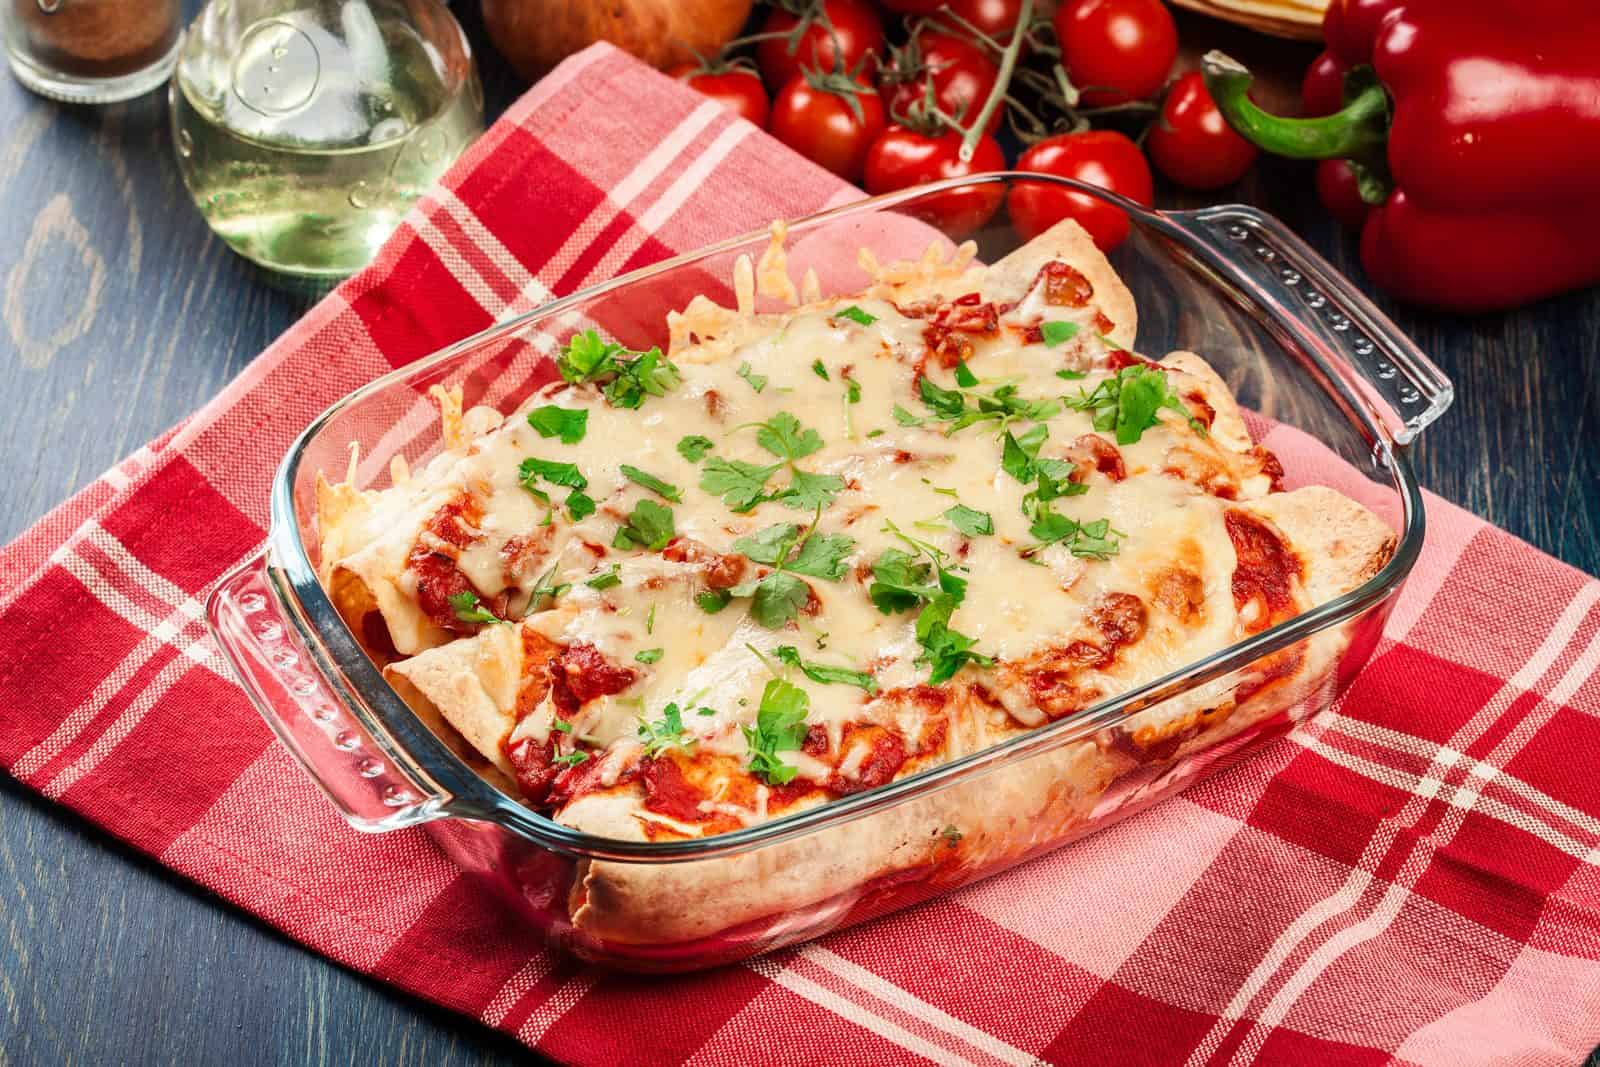
This is an easy weekend casserole, stacked like lasagna, no rolling required, with tons of melted cheese, soft corn tortillas, and flavors that deepen overnight. Stacking instead of rolling is faster and means every bite gets equal sauce and cheese, so nothing is left dry in the middle. I use corn tortillas because they're traditional and hold the structure far better than flour ones.
A proper enchilada sauce made from scratch with real dried chiles and tomatoes makes the difference between something that tastes authentic and something that just tastes flat. I like to let this rest for 10 minutes after it comes out of the oven. It stops it from collapsing the second you try to serve it.
The cheese should be laid between every layer, not just on top. It gives that extra something, and it holds the stack together when you cut it. Serve it with a dollop of sour cream and some fresh cilantro on top.
Chicken Enchilada Stack
Ingredients
Method
-
Preheat oven to 375°F and spray a 9×13-inch baking dish with cooking spray.
-
In a large bowl, combine shredded chicken, black beans, green chiles, cumin, garlic powder, and 1 cup of cheese.
-
Spread 1/3 cup enchilada sauce on the bottom of the baking dish, then layer 4 tortillas to cover the bottom.
-
Spread half the chicken mixture over tortillas, drizzle with 1/3 cup enchilada sauce, then repeat layers with remaining tortillas and chicken mixture.
-
Pour remaining enchilada sauce over the top and sprinkle with remaining 1 cup cheese.
-
Cover with foil and bake for 25 minutes, then remove foil and bake 10 more minutes until cheese is bubbly and golden.
-
Let stand 5 minutes, then top with dollops of sour cream and fresh cilantro before serving.
Beefy Mac Cheese Mash

Modify mac and cheese with beef and mash for the ultimate comfort food, and a crowd-pleasing weeknight bake. The cheese sauce needs a roux base with butter cooked properly before anything else goes in, and that's what stops it from splitting or going grainy.
Make sure the pasta is slightly undercooked, because it keeps absorbing liquid as it sets and you don't want it to get mushy. The beef should be well browned and well drained. The extra fat makes the whole dish greasy rather than rich. I like to use a mix of cheeses because it gives a bit of flavor and a bit of melt. Sharp cheddar and then something softer for stretch, like a good amount of mozzarella.
This is more of a stovetop-to-table dish than a baked one. Seasoning matters more here than in most casseroles because there's no crusty topping doing extra work. The sauce has to carry it on its own. No baking or layering, just everything stirred together properly and taken to exactly what you want it to be.
Beefy Mac Cheese Mash
Ingredients
Don't lose this article. Enter your email below, and I'll send it to you right now. Plus a little encouragement and inspiration from me, straight to your inbox.
Method
-
Preheat oven to 350°F and grease a 9×13-inch baking dish.
-
Boil potatoes in salted water until tender, about 15 minutes, then drain and mash with 1/4 cup butter, 1/2 cup milk, salt, and pepper. Set aside.
-
Cook macaroni according to package directions until al dente, drain and set aside.
-
In a large skillet, brown ground beef with onion and garlic over medium-high heat, breaking up meat as it cooks, about 8 minutes.
Drain excess fat.
-
In a medium saucepan, melt remaining 1/4 cup butter, whisk in flour and cook 1 minute, then gradually add 3 cups milk, whisking constantly until thickened, about 5 minutes.
-
Stir 2 cups cheese into the sauce until melted, then combine with cooked macaroni and mix well.
-
Spread mac and cheese in prepared baking dish, top with seasoned ground beef, then spread mashed potatoes evenly over the top.
-
Sprinkle with remaining 1 cup cheese and paprika, then bake uncovered for 30 minutes until golden and bubbly.
Creamy Chicken Bacon Pasta

I find that whenever I make this creamy chicken bacon pasta, it's a crowd pleaser, and everyone always comes back for more. A few tips here: cook the pasta al dente, because this dish goes in the oven and the sauce moisture finishes it off, so fully cooked pasta turns mushy.
I find that the bacon smokiness comes from curing and rendering, and it infuses into the cream sauce, which gives it a delicious flavor. I like to use tube shapes or short ribbed pasta like penne, because the ridges hold the cream sauce so well. Smooth pasta like spaghetti or linguine doesn't really work in this dish.
Creamy Chicken Bacon Pasta
Ingredients
Method
-
Preheat oven to 375°F and grease a 9×13-inch baking dish.
-
Cook pasta according to package directions until 2 minutes shy of al dente, drain and set aside.
-
In a large skillet, melt butter over medium heat and sauté garlic until fragrant, about 1 minute.
-
Add heavy cream, chicken broth, and cream cheese to skillet, whisking until cream cheese is melted and sauce is smooth, about 3 minutes.
-
Stir in Italian seasoning, salt, pepper, 1 cup mozzarella, and 1/2 cup Parmesan until cheeses are melted.
-
Add cooked pasta, diced chicken, and half the bacon to the sauce, stirring until everything is well coated.
-
Transfer mixture to prepared baking dish and top with remaining mozzarella, Parmesan, and bacon.
-
Bake uncovered for 25 minutes until cheese is melted and bubbly, then garnish with fresh parsley before serving.
Beef Tortellini Skillet
I find that this beef tortellini skillet, made with a proper sauce, comes together nicely and easily in one pan. I brown the beef first, then remove it from the pan and do the sauce separately. A lot of the flavor comes from cooking it this way. You can use fresh or frozen tortellini, since it cooks directly in the sauce and absorbs all that flavor as it cooks.
Make sure the sauce is saucy, more than you think it needs to be, because the tortellini soaks up the liquid as it finishes cooking. I normally add a handful of spinach at the end to add some color. This is one of the faster dishes in the skillet category because nothing goes in the oven. It's a stovetop, one-pan situation, made in under 30 minutes.
Beef Tortellini Skillet
Ingredients
Method
-
Brown the ground beef in a large oven-safe skillet over medium-high heat, breaking it up with a spoon, about 5-7 minutes. Drain excess fat and season with salt, pepper, garlic powder, and Italian seasoning.
-
Add the marinara sauce and beef broth to the skillet, stirring to combine with the seasoned beef.
-
Add the uncooked tortellini to the skillet and stir gently to coat with sauce.
Bring to a simmer, then reduce heat to medium-low, cover, and cook for 8-10 minutes until tortellini is tender, stirring occasionally.
-
Preheat broiler to high. Sprinkle mozzarella and Parmesan cheese evenly over the top of the skillet.
-
Place skillet under the broiler for 2-3 minutes until cheese is melted, bubbly, and golden brown.
Watch carefully to prevent burning.
-
Remove from oven, let cool for 5 minutes, and serve hot with additional Parmesan if desired.
Tater Tot Shepherd’s Pie

Tater Tot Shepherd's Pie
This dish is a twist on the traditional shepherd's pie, where tater tots swap in for mashed potatoes, giving you that extra crunch on top and a sort of soft, creamy potato underneath. Make sure your meat and vegetable filling is properly seasoned and sufficiently reduced before the tots go on. A watery filling is what makes the tater tots soggy.
The pro tip here is that the tots should go on the hot filling straight from the freezer. That's what gives you the best contrast between crispy and soft. I like adding a thin layer of cheese underneath the tots, not on top. This helps bind everything together without losing the crunch on the surface.
The tots also need real oven heat at the end, not just warming through. I think that's what gets them properly golden and crusted rather than just hot. This is a lovely dish with crunch on the top and comfort underneath.
Tater Tot Shepherd’s Pie
Ingredients
Method
-
Preheat oven to 400°F. In a large skillet, cook ground beef and diced onion over medium-high heat until beef is browned and onion is softened, about 8 minutes.
Drain excess fat.
-
Add minced garlic and cook for 1 minute until fragrant. Sprinkle flour over the meat mixture and stir well to combine, cooking for 2 minutes.
-
Pour in beef broth and Worcestershire sauce, stirring constantly until mixture thickens, about 3-4 minutes.
Add frozen mixed vegetables, thyme, salt, and pepper, then stir to combine.
-
Transfer the beef mixture to a 9×13-inch baking dish, spreading it evenly across the bottom.
-
Arrange tater tots in a single layer over the beef mixture, covering it completely.
-
Bake uncovered for 25-30 minutes until tater tots are golden brown and crispy. Sprinkle shredded cheddar cheese over the top and return to oven for 5 minutes until cheese is melted.
Let stand 5 minutes before serving.
Green Bean Casserole Classic
This green bean casserole is such a classic. My grandma always served this at every holiday: Christmas and Easter. It never gets old: green beans, a creamy sauce, and something crispy on top.
The dish was actually invented by Campbell's in the 1950s as a way to sell condensed soup, and it's stayed almost completely unchanged since. Fresh green beans retain their texture and color far better than canned ones, even though canned beans are the traditional shortcut most people grew up with. That was a different way I used to eat it, and those beans were very overcooked by my grandfather's standards.
The sauce needs real depth, so mushrooms and a bit of garlic. I wouldn't go straight from the can if you want it tasting properly made. Then throw the crispy onions on at the very end of the baking, just long enough to warm through. If you add them any earlier, you lose the crunch completely.
You also want to blanch the beans before they go into the dish, because you don't want them releasing too much water and watering down the sauce. I find this is one of the few casseroles that's better slightly underdone than overdone.
Green Bean Casserole Classic
Ingredients
Method
-
Preheat oven to 350°F. Grease a 2-quart baking dish with cooking spray or butter.
-
In a large mixing bowl, combine cream of mushroom soup, milk, garlic powder, salt, and pepper, stirring until smooth and well blended.
-
Add the drained green beans, shredded cheddar cheese, and half of the French fried onions to the soup mixture.
Stir gently until everything is evenly coated.
-
Pour the green bean mixture into the prepared baking dish and spread evenly.
-
Bake uncovered for 25 minutes until the casserole is hot and bubbly around the edges.
-
Remove from oven and sprinkle the remaining French fried onions evenly over the top. Return to oven and bake for an additional 5 minutes until onions are golden and crispy.
Serve hot.
Tuna Noodle Retro Bake

This tuna noodle dish is proper retro. It has its roots in 1950s American convenience cooking, when canned tuna and condensed soup made a hot dinner in under an hour. Make sure your noodles go in slightly undercooked, because they keep cooking in the sauce and the oven, and the last thing you want is a mushy bake.
I always make a sauce from scratch. I find this gives it real depth, with onion and a bit of mustard. Then I add some peas for color and a bit of sweetness, because the sauce is really rich. I then use breadcrumbs or crushed crackers on top, and I put those on at the end of the baking so they stay crispy.
Make sure you get all the liquid out of the tuna. Too much liquid and the whole sauce goes thin.
Tuna Noodle Retro Bake
Ingredients
Method
-
Preheat oven to 375°F and grease a 9×13-inch baking dish.
-
Cook egg noodles according to package directions until al dente, then drain and set aside.
-
In a large bowl, combine cream of mushroom soup, sour cream, milk, garlic powder, salt, and pepper, mixing until smooth.
-
Add cooked noodles, drained tuna, frozen peas, and 1.5 cups of the shredded cheddar cheese to the soup mixture, stirring until everything is well combined.
-
Pour the mixture into the prepared baking dish and top with remaining 1/2 cup cheddar cheese.
-
In a small bowl, mix panko breadcrumbs with melted butter until evenly coated, then sprinkle over the casserole.
-
Bake for 30-35 minutes until bubbly and golden brown on top, then let rest for 5 minutes before serving.
Cheesy Beef Enchilada Casserole

This casserole is a tried-and-true grandma-style comfort dish with seasoned beef, corn tortillas, and a cheddar-Monterey Jack cheese blend. Layering instead of rolling individual enchiladas saves so much time without losing anything, so everybody still gets their sauce, cheese, and beef.
I find that corn tortillas hold their shape better than flour tortillas. The flour tends to go gummy under the sauce, which some people prefer, but corn holds up. The sauce needs real depth from chiles, so make them properly rather than from a jar. That's the difference between authentic and flat.
I like to well-brown the beef and fully season it before it goes in. Cheese between every layer, not just on top, holds the whole thing together when you cut it. And definitely rest it for 10 minutes after it comes out of the oven. If you don't, it all slides onto the plate. A well-loved classic.
Cheesy Beef Enchilada Casserole
Ingredients
Method
-
Preheat oven to 350°F and spray a 9×13-inch baking dish with cooking spray.
-
In a large skillet over medium-high heat, brown the ground beef with diced onion until meat is fully cooked and onions are softened, about 8-10 minutes, then drain excess fat.
-
Add minced garlic, chili powder, cumin, salt, and pepper to the beef mixture and cook for 1 minute until fragrant.
-
Stir in black beans, enchilada sauce, and diced tomatoes with green chiles, then simmer for 5 minutes.
-
Layer half of the tortilla strips in the bottom of the prepared baking dish, then top with half of the beef mixture and 1 cup of cheese.
-
Repeat layers with remaining tortilla strips, beef mixture, and top with remaining 2 cups of cheese.
-
Cover with foil and bake for 20 minutes, then remove foil and bake an additional 10 minutes until cheese is bubbly and lightly browned.
-
Let stand for 10 minutes, then serve topped with dollops of sour cream and fresh cilantro.
Hash Brown Sausage Casserole

This hash brown sausage casserole works just as well for breakfast as it does for dinner. It uses frozen hash browns for a crispy top crust, bulk breakfast sausage browned first, and then sour cream as the sauce.
I tend to use frozen shredded hash browns because they have less moisture than fresh-grated ones and produce less steam. Fresh potatoes need to be squeezed or parboiled to accomplish that, though you can make it from scratch if you'd prefer.
Browning the sausage first gives it that delicious flavor and depth, not just texture. I find if you skip this step, the casserole ends up tasting a bit flat. The classic shortcut version uses condensed soup, but I use sour cream. It's much richer, tangier, and it doesn't taste as processed.
I sometimes eat this with a poached egg for breakfast during holiday mornings, because it can be assembled the night before and baked fresh. This one was definitely one of my grandmother's recipes.
Hash Brown Sausage Casserole
Ingredients
Method
-
Preheat oven to 350°F and grease a 9×13-inch baking dish with butter or cooking spray.
-
In a large skillet over medium heat, cook the breakfast sausage with diced onion, breaking up the meat with a spoon, until sausage is browned and cooked through, about 8-10 minutes, then drain.
-
In a large mixing bowl, combine cream of chicken soup, sour cream, melted butter, garlic powder, paprika, salt, and pepper, stirring until smooth.
-
Add thawed hash browns, cooked sausage mixture, and 2 cups of shredded cheddar cheese to the soup mixture, stirring until everything is evenly combined.
-
Spread the mixture into the prepared baking dish and top with remaining 1 cup of cheddar cheese.
-
Bake uncovered for 40-45 minutes until the casserole is hot and bubbly and the top is golden brown.
-
Let cool for 10 minutes before serving, then garnish with sliced green onions.


