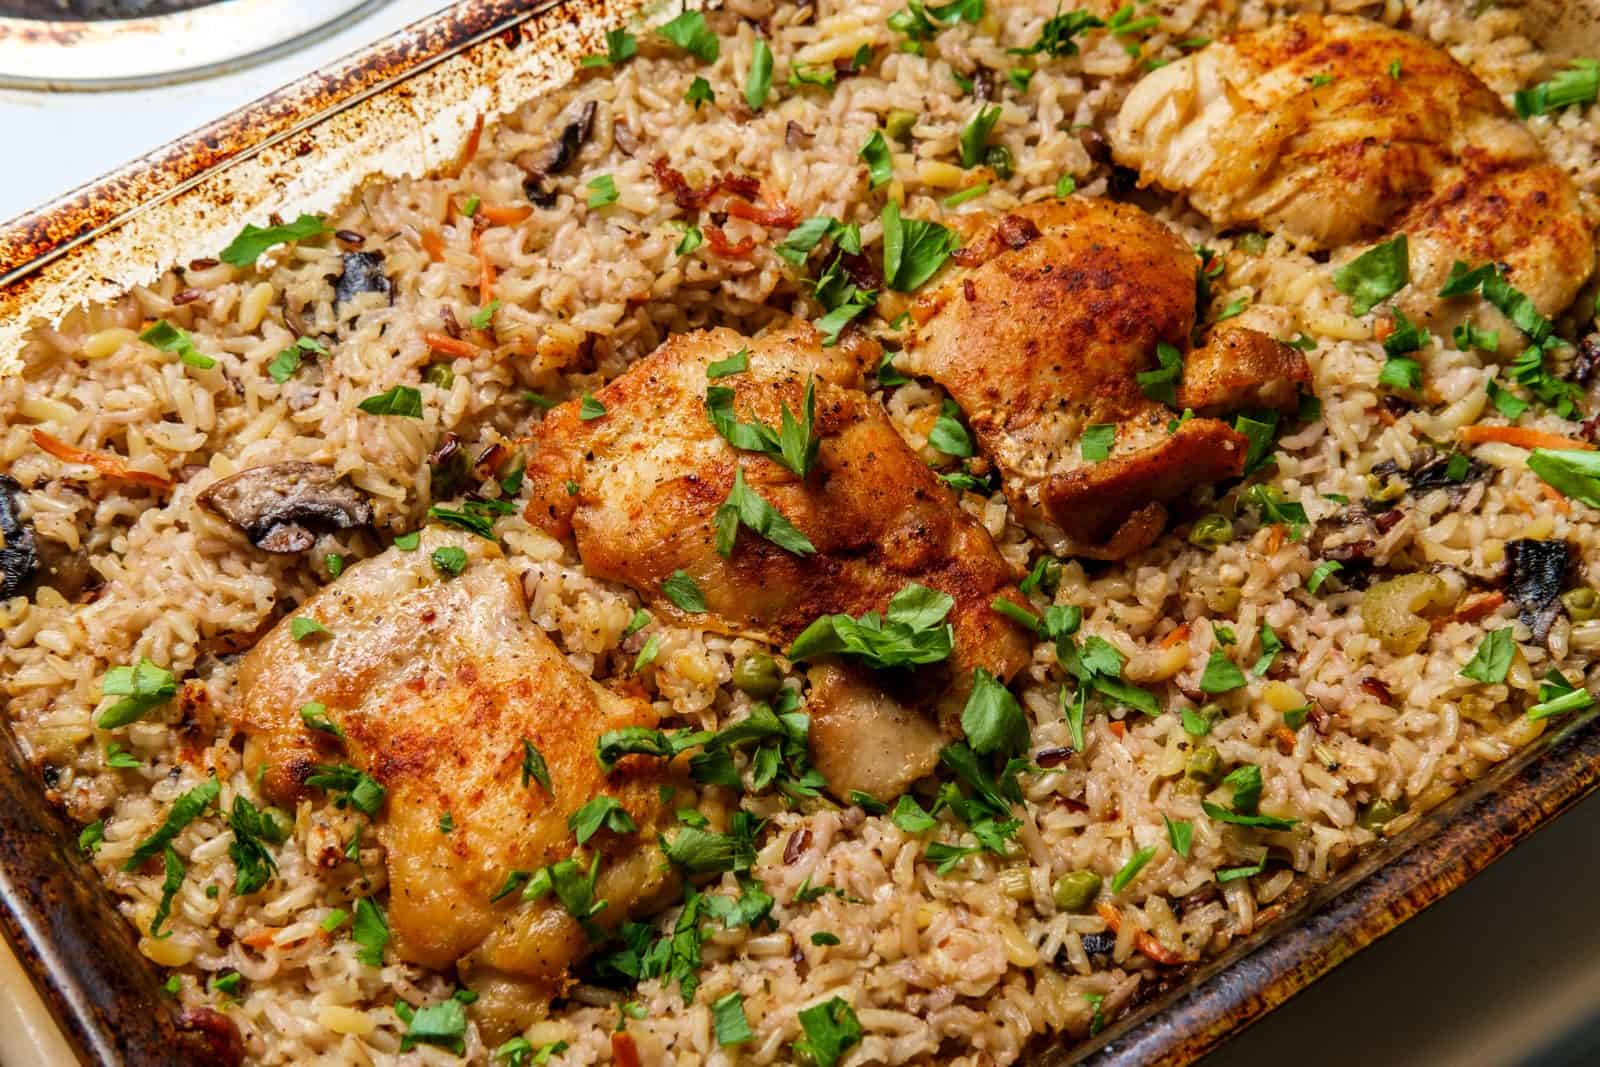
I love a dinner that I can make when I actually have the time and then forget about it until I need it. Nowadays, between Ben, my husband, my dogs, school, etc., I don't always have time to cook from scratch. That's why I'm a huge fan of these freezer casseroles. I think they're so practical. They feed a family, and if you do a few things right, you can taste that they can taste as if you've just made them.
Don't lose this article. Enter your email below, and I'll send it to you right now. Plus a little encouragement and inspiration from me, straight to your inbox.
I also love that I can make one while I'm cooking something else. Portion it up and have dinner waiting for one of those evenings when I have absolutely no desire to think about food. And these aren't side freezer meals. There are plenty of little chef tricks here.
Five simple dinners. One grocery list.
No recipe hunting, no messy shopping notes, no complicated chef projects. Just family dinners that fit real weeks.
And the cooking poster: cool food slightly before freezing, keep crunchy toppings separate, and know which sauces freeze beautifully and which ones just don't. A casserole is also one of the easiest ways to make a meal stretch. I've totally found this. Add a salad, some steamed veggies, or whatever herbs are growing in the garden, and dinner is sorted.
One freezer rule I swear by: label everything. Write the name, date, and reheating instructions on the container. I promise you, future you will be very grateful.
1) Classic Beef and Cheddar Tater Tot Casserole

I think this is proper family food, and one I literally make once a week, when I'm going to be busy. Brown the mince really well with onion so it gets that caramelized deliciousness going on. Don't just cook it until it goes grey. I promise you, you lose all the flavor there. That little bit of browning makes such a difference to the finished casserole.
And then I love the crispy tater tots on top. But if you're making this ahead, I wouldn't put them on before freezing. Keep them in a separate bag and then scatter them over when you're ready to bake it. Otherwise, they can lose that lovely crunch. And then your whole meal is ruined.
Don't be shy with the cheddar. I like to use a good mature cheddar because it gives you much more flavor than a mountain of mild cheese. Like just a tomato salad from the garden. This is one of Ben's favorite meals and my husband's, too.
Ingredients
Method
- Heat oven to 400°F; set out a 9×13-inch baking dish.
- Cook beef and onion in a large skillet over medium-high heat 7–9 minutes, breaking up meat, until browned and 160°F. Drain excess fat; transfer to a bowl.
- Melt butter in skillet over medium heat. Cook mushrooms 5–7 minutes, until liquid evaporates. Stir in flour; cook 1 minute.
- Spread filling in dish; sprinkle with cheddar. Arrange frozen tots in a single layer on top. Bake uncovered 30–35 minutes, until crisp and filling’s center reaches 165°F. Continue baking if tots need longer to brown.
- Rest 10 minutes before dividing into 6 portions.
Notes
2) Chicken Broccoli Rice Casserole

This is such a useful family casserole because you've got your chicken, rice, and veggies all in one dish. I especially like making it when I've got leftover roast chicken because it turns something that's already cooked into a completely different dinner.
I wouldn't cook the rice until it's completely soft. Take it off while it still has a little bite because it's going to absorb some of that sauce and continue cooking when the casserole reheats. The same goes for that broccoli. You want it bright green and just tender, not floppy.
For the sauce, I like adding a little Dijon mustard and lemon zest. It sounds like a tiny thing, but I promise you it stops the creamy sauce from tasting heavy and gives the whole casserole a bit of freshness.
And don't feel like you have to cook everything from scratch, guys. A supermarket roast chicken is one of my favorite shortcuts when I'm short on time.
If I'm freezing it, I'll portion it into smaller dishes when I can. They're much easier to reheat evenly, and I don't have to defrost the whole thing for one dinner.
Ingredients
Method
- Heat oven to 375°F. Grease a 9×13-inch baking dish with the extra teaspoon butter. Start with cooked chicken and rice; preparing from raw adds time.
- Boil broccoli in a saucepan of water 2 minutes; drain thoroughly, still firm.
- Melt 3 tablespoons butter in a large skillet over medium heat. Cook onion 4–5 minutes until softened. Stir in flour; cook 1 minute.
- Gradually whisk in milk and broth. Simmer 3–5 minutes, stirring, until lightly thickened. Remove from heat; stir in mustard, lemon zest, salt, pepper and 1 cup cheddar.
- Fold cooked rice, chicken and drained broccoli into sauce. Spread in dish; sprinkle with remaining 1 cup cheddar.
- Bake uncovered 25–30 minutes, until bubbling throughout and center reaches 165°F. Rest 10 minutes before serving.
Notes
3) Baked Ziti with Italian Sausage

Baked pasta is one of the first things I think of when someone says freezer cooking. It's incredibly forgiving, and honestly, I think some pasta bakes taste even better the next day because the sauce has time to soak into everything.
For this one, I like using Italian sausage rather than just mince because you get all those herbs and spices already built into the meat. I brown it really well before adding the tomato sauce. And if you've got time, let that sauce simmer for a little while or two. It makes a jar of tomato sauce taste much more homemade.
The biggest thing is not to fully cook the pasta. Take a couple of minutes off the packet instructions. It will finish cooking in the oven, and this is especially important if you're freezing it.
I sometimes make two smaller dishes rather than one huge one. One goes into the freezer and the other one goes into the fridge for dinner. It means you've done the work once, but you've got two meals ahead and sorted.
When you're ready to bake it, add fresh mozzarella and parmesan over the top. That's what gives you that lovely bubbly cheesy crust.
Ingredients
Method
- Heat oven to 375°F. Oil a 9×13-inch baking dish. Bring a large pot of water to a boil; add salt.
- Cook ziti 2 minutes less than package’s al dente time; drain. Pasta finishes cooking in oven.
- Meanwhile, brown sausage and onion in a large skillet over medium-high heat 8–10 minutes, breaking sausage into small pieces. Cook pork sausage to 160°F or poultry sausage to 165°F. Drain excess fat.
- Cook garlic 30 seconds. Stir in marinara and 1/2 cup water; simmer 5 minutes. Remove from heat.
- Fold pasta into sauce. Separately mix ricotta, Parmesan, pepper and 1 cup mozzarella. Spread half the pasta in dish; dot with ricotta mixture and cover with remaining pasta. Top with remaining 1 cup mozzarella.
- Cover loosely with foil; bake 20 minutes. Uncover; bake another 10–15 minutes, until center reaches 165°F and cheese melts. Rest 10 minutes before serving.
Notes
4) Shepherd’s Pie with Ground Beef

This is one of my husband's absolute favorite meals. And I always have this in the freezer. It's also one of the best ways I know to use leftover mashed potatoes. If I've made too much mash, which I normally do, I immediately start thinking about this shepherd's pie.
I'll make a rich beef filling, and in a blender, I'll add onions, carrots, and peas. No, I'll just add onions and carrots, celery, blitz them all up, then I'll add the peas. The peas don't get blitzed up. Then you add Worcestershire sauce, thyme, and a little bit of tomato paste.
I also like to add a little bit of red wine. The trick with the mince is giving it enough time in the pan to actually brown. If you rush it, you get a watery filling instead of that lovely rich gravy.
For the potato topping, I actually like it a little bit rustic, so I don't bother making it perfectly smooth. I spread it over the top and then run a fork through it to make those little crispy ridges. Those ridges go beautifully crisp and golden in the oven. And if you want to take it a step further, before you put it in the oven to grill, you can brush some melted butter over the top, or even an egg yolk.
When I'm freezing this, I'll often make two smaller pies rather than one enormous one. One can be dinner, and one can disappear into the freezer. This is the kind of food I want waiting for me after a long day. Not fancy, just really good, filling, and homemade. And of course, minimal effort. Lentils mixed with some soya mince for a vegan filling.
Ingredients
Method
- Heat oven to 400°F. Cover potatoes with cold water in a saucepan; bring to a boil. Simmer 15–20 minutes until very tender. Drain well; mash with 3 tablespoons butter, warm milk, 1/4 teaspoon salt and 1/4 teaspoon pepper.
- Meanwhile, brown beef, onion, carrots and celery in a large skillet over medium-high heat 10–12 minutes, breaking up beef, until meat reaches 160°F and vegetables soften. Drain excess fat.
- Stir tomato paste, flour and thyme into beef 1 minute. Add broth, Worcestershire, remaining 1/2 teaspoon salt and 1/4 teaspoon pepper. Simmer 5–7 minutes until gravy thickens; stir in peas.
- Transfer filling to a 2 1/2-quart baking dish. Top with mash; roughen with a fork and dot with remaining tablespoon butter. Set on a tray; bake 20–25 minutes until ridges are golden and center reaches 165°F. Rest 10 minutes.
Notes
5) Chicken Enchilada Casserole

This is basically my lazy girl version of enchiladas. I love enchiladas, but sometimes I don't have the patience to fill and roll a whole tray of tortillas. Instead, I lay everything out and call it a casserole.
You get shredded chicken, tortillas, beans, corn, and enchilada sauce, and plenty of cheese, and it's so easy to have in the freezer. This is another great place to use leftover chicken. I'll often shred up whatever I've got left from a roast. Or a rotisserie chicken, and suddenly it feels like a completely new meal.
I like adding cumin, smoked paprika, lime, and fresh coriander. I think the lime is especially important because you've got quite a rich, cheesy dish, and that little bit of acidity cuts through it. Add some fresh cheese when you're ready to bake it, and you'll get a much better finish.
And then serve it with something fresh like avocado, chopped tomato. I like to make a salsa with coriander and lime. You don't need much else. And everyone literally digs into this one.
Ingredients
Method
- Heat oven to 375°F. Oil a 9×13-inch baking dish. Mix chicken, beans, corn, cumin, paprika, lime juice and 1 cup enchilada sauce.
- Spread 1/2 cup sauce in the dish. Cover with one-third of the tortillas, half the chicken mixture and 1/2 cup cheese. Repeat tortillas, remaining chicken and 1/2 cup cheese. Finish with remaining tortillas, all remaining sauce and remaining 1 cup cheese.
- Cover with foil and bake 25 minutes. Uncover and bake 10–15 minutes, until bubbling and 165°F in the center. Rest 10 minutes and sprinkle with cilantro.
Notes
6) Tuna Noodle Casserole with Peas

This dish is definitely a little bit old-fashioned, but we all seem to love it. It's inexpensive, comforting, and incredibly practical when you need to feed a family without spending a fortune.
The trick is making sure the noodles don't get overcooked. I take them off the stove while they're still quite firm because they're quick going to cook again in the casserole. And if you cook them perfectly the first time, they'll be soft by the time you eat the finished dish. Frozen peas are perfection here. They can go straight in, so there's no extra chopping or cooking.
And then I also like adding a little bit of Dijon, lemon zest, and lots of black pepper to the creamy sauce. It makes a big difference with tuna because otherwise the whole thing can taste a little bit one-dimensional.
For the topping, I prefer something crunchy: breadcrumbs, crushed crackers, or even a mixture of parmesan and breadcrumbs. If I'm freezing it, I'll keep that topping separate and add it just before baking so you actually get that lovely crunch.
This is really, really delicious with a big green salad. And I actually never have leftovers.
Ingredients
Method
- Heat oven to 375°F. Use 1 teaspoon of the butter to grease a 9×13-inch dish. Cook noodles in boiling water for 2 minutes less than package directions; drain.
- Melt 3 tablespoons butter in a saucepan over medium heat. Whisk in flour and stir 1 minute. Gradually whisk in milk and broth; simmer 3–5 minutes until lightly thickened. Stir in mustard, zest, salt and pepper.
- Fold in noodles, tuna and frozen peas. Spread in the dish. Melt the remaining 2 teaspoons butter and mix with panko and Parmesan; scatter over the casserole.
- Bake uncovered 25–30 minutes, until golden and the center reaches 165°F. Rest 10 minutes.
Notes
7) Sausage, Egg, and Hash Brown Breakfast Casserole

I started making breakfast casseroles because I realized I was spending half my morning cooking breakfast when actually everyone just wanted to eat and get on with their day. Ben is especially not interested in waiting around for eggs to cook when there are far more important things happening.
This is one I like making the night before. Sausages, eggs, cheese, and hash pounds all go into one dish. And then in the morning I just put it in the oven. I'll usually throw in some mushrooms or leftover spinach if I have them.
And I have absolutely no problem using frozen hash browns. In fact, I've never made them from scratch. I'm not getting up early to grate potatoes and go down that road at all.
Bake until the egg mixture is set in the center and a food thermometer reads 165°F. Let it rest for 10 minutes before slicing; resting helps the texture, but it does not replace cooking the center to a safe temperature.
And then I like to chop some fresh parsley and sprinkle it over, and it looks like I've spent hours slaving away in the kitchen.
Ingredients
Method
- Heat oven to 350°F; butter a 9×13-inch baking dish. Brown sausage in a skillet over medium heat 8–10 minutes, breaking it up, until 160°F. Drain; cool slightly.
- Spread dry, thawed hash browns, sausage and 1 1/2 cups cheddar in dish. Whisk eggs, milk, garlic powder, salt and pepper until smooth; pour evenly over potatoes. Top with remaining cheese.
- Bake uncovered 45–55 minutes, until middle is set and 165°F. Tent with foil if top browns early. Rest 10 minutes; sprinkle with parsley.
Notes
8) Turkey and Stuffing Casserole

If you know me, I cannot stand waste. And I'm also a huge fan of doing something completely different with leftovers. I don't want to eat the same Christmas or Sunday roast three days in a row.
This is one of those recipes that gives everything a bit of a makeover. You can use leftover turkey, stuffing, veggies, and gravy and turn it into a completely new dinner. In fact, I sometimes think the leftovers are better in a casserole because all the flavors get mixed.
The sweet cranberry against that savory turkey and stuffing is really good. Just be careful with the gravy. Stuffing is like a sponge and will absorb everything. So I make the sauce a little looser than I normally would.
And I wouldn't bother making the crispy topping until you're ready to eat it. That's the part I want fresh and crunchy. And then you can spruce this up, but we're serving it with some green beans on the side.
Ingredients
Method
- Heat oven to 375°F. Grease a 9×13-inch baking dish with the teaspoon butter. Mix turkey, vegetables, gravy and broth; spread in dish.
- Break up prepared stuffing with a fork; toss with melted butter and scatter loosely over filling. Cover with foil.
- Bake covered 20 minutes, then uncovered 15–20 minutes, until stuffing browns and both filling and stuffing’s center reach 165°F. Rest 10 minutes; serve with cranberry sauce.
Notes
9) Creamy Chicken and Wild Rice Casserole

I don't know who doesn't love the combination of wild rice and mushrooms with chicken. It has a slightly nutty, earthy flavor, and it's a nice change from another pasta bag. I think this is brilliant for leftover roast chicken.
I usually keep some of the darker meat for casseroles because it stays much juicier than breast meat. And I like to add lots of thyme, mushrooms, and lemon, and sometimes a little bit of parmesan if I've got some in the fridge.
The lemon is important because otherwise sometimes a creamy casserole can become quite heavy. And I'm not about heavy meals. I also learned not to make the sauce too thick before freezing. The rice keeps drinking it up as it sits. So what looks like it's slightly too saucy going into the freezer actually usually comes out perfectly.
If it looks a little bit dry when you're reheating it, don't panic. Just a splash of stock or milk stirred through brings it straight back to life. I also like to add cream spinach to this dish if you've got it; it just adds a different texture and flavor profile.
Don't lose this article. Enter your email below, and I'll send it to you right now. Plus a little encouragement and inspiration from me, straight to your inbox.
Ingredients
Method
- Heat oven to 375°F; oil a 9×13-inch baking dish. Start with cooked rice and chicken; preparing from raw adds time.
- Melt butter in a large skillet over medium-high heat. Cook mushrooms and onion 8–10 minutes, until moisture evaporates. Stir in flour and thyme 1 minute.
- Gradually whisk in broth and milk. Simmer 3–5 minutes, stirring, until sauce lightly coats a spoon. Remove from heat; add lemon zest, juice, salt, pepper and Parmesan.
- Fold in cooked rice and chicken; spread in dish. Cover; bake 20 minutes. Uncover; bake 10–15 minutes more, until center reaches 165°F. Rest 10 minutes.
Notes
10) Lasagna with Ground Beef and Mozzarella

When I make lasagna, I tell myself every single time not to worry about the time I'm spending on it because I know I'm gonna get more than one dinner out of it. It is a labor of love.
When I do make lasagna, I usually make a big pot of meat sauce rather than just enough for one dish. If I'm already chopping onions and garlic, I might as well make extra. One lasagna goes into the oven, and another one goes into the freezer.
This is literally my husband's favorite meal. So I always make a big amount. My little trick is letting the meat sauce simmer longer than you think it needs to. Even if I'm using a good store-bought tomato sauce, I'll add garlic, oregano, basil, and parmesan, and then it bubbles away, and it will taste rich, and it gets that really developed flavor.
I don't like a dry lasagna because I have made quite a few lasagnas in the past that have come out really dry. So I'm very generous with the sauce, especially around the edges.
And don't cut it the second it comes out of the oven. I know it's tempting, and I've done this quite a few times, especially when the cheese is bubbling. It's very tempting. But give it 10 or 15 minutes. What happens is it settles, and you get those lovely layers instead of a plateful of sliding pasta.
Ingredients
Method
- Heat oven to 375°F; oil a deep 9×13-inch baking dish. Boil noodles 2 minutes less than package time; drain and separate on a tray.
- Brown beef and onion in a skillet 8–10 minutes, breaking up beef, until 160°F. Drain fat. Cook garlic 30 seconds; add marinara, water and oregano. Simmer 10 minutes.
- Mix ricotta, egg, Parmesan and pepper. Spread 1 cup meat sauce in dish. Layer 3 noodles, half the ricotta mixture, 1 cup mozzarella and one-third of remaining sauce. Repeat once. Finish with 3 noodles, remaining sauce and remaining 1 cup mozzarella. Cover every noodle edge with sauce.
- Tent with foil so it doesn’t touch cheese. Bake covered 35 minutes, then uncovered 15–20 minutes, until bubbling and center reaches 165°F. Rest 15 minutes; add basil.
Notes
11) Mexican Chicken Tortilla Casserole

I make this Mexican chicken tortilla casserole when I open the fridge and realize I've got a bit of this and a bit of that and no actual plan for dinner. Some leftover chicken, half a tin of beans, some corn, salsa, and a few tortillas can all become this. That's what I like about it. It doesn't really need a very precise shopping list. Doesn't need a very precise shopping list.
And then I usually make a mild version because Ben isn't interested in eating something that's going to set his mouth on fire. Then Roger and I can add chili or hot sauce at the table.
I like warming the cumin and smoked paprika in the pan before adding everything else. It takes about 30 seconds but makes the spices smell amazing.
This is definitely one where I save the fresh bits for the end. Avocado, coriander, lime, chopped tomato. Honestly, whatever you've got in the fridge. After a rich, cheesy casserole, those fresh flavors are exactly what you need.
Ingredients
Method
- Heat oven to 375°F; oil a 9×13-inch dish with 1 teaspoon oil. Heat remaining tablespoon oil in a large skillet over medium heat. Cook onion 5 minutes; stir in cumin and paprika 30 seconds.
- Add chicken, beans, corn, salsa and broth; bring to a simmer. Spread one-third in dish; add half the tortilla strips and 1/2 cup cheese. Repeat with another third filling, remaining tortillas and 1/2 cup cheese. Top with remaining filling and final cup cheese.
- Cover; bake 20 minutes. Uncover; bake 10–15 minutes, until center reaches 165°F. Rest 10 minutes. Add avocado and cilantro to servings; offer lime wedges.
Notes
12) Ham and Cheese Scalloped Potato Casserole

I am a sucker for a scalloped potato casserole. It's one of those dinners where I know I'm going to have to make something big and green to go with it because otherwise I could happily eat half the dish. Thin potatoes, salty ham, cream, and cheese. It's simple food, but when it's done properly, it is so, so good.
I learned years ago that the potatoes need to be sliced evenly. And if you have a mandolin, this is where it is going to be put to very good use. I once made a dish where half the potatoes were beautifully soft, and the other half were still crunchy, and that was enough to teach me. And I asked for a mandolin for Christmas.
I like adding garlic, thyme, and a little bit of nutmeg to the cream. Nothing complicated, but it gives the whole thing a lovely savory flavor. I also don't drown the potatoes in cream. They release moisture as they cook, so you don't use as much as you might think.
For this one here, I use chicken ham, because I just prefer not eating pork. When I'm freezing it, I like to use a smaller dish rather than an enormous one. It reheats much more evenly, and it means I can pull out exactly what I need.
A sharp green salad with lemony dressing, like rocket and feta, is perfect with this because you need something fresh against all that creamy cheese.
Ingredients
Method
- Heat oven to 375°F; butter a deep 9×13-inch dish. Slice potatoes uniformly with a guarded mandoline or sharp knife; do not substitute thick chunks.
- Warm cream, milk, garlic, thyme, nutmeg, salt and pepper in a saucepan until steaming, not boiling.
- Layer half the potatoes, slightly overlapping, in dish. Add half the ham and 1/2 cup cheese. Repeat potatoes and remaining ham; pour warm cream mixture evenly over everything. Top with remaining 1 cup cheese.
- Cover tightly with foil; bake 55–65 minutes. Uncover; bake 15–20 minutes until a knife slips easily through center potatoes, top is golden and filling reaches 165°F. Re-cover if browned before potatoes soften. Rest 10 minutes.
Notes
13) Baked Macaroni and Cheese

Strangely, everyone always assumes that your child or children are gonna absolutely love mac and cheese, but my son doesn't. My husband is the one who absolutely loves baked macaroni and cheese in our house. So I make this for him.
For freezing, I cook the macaroni quite a bit less than I normally would. It should still have a proper bite to it, though. Otherwise, once you've frozen and reheated it, you're left with very soft pasta. And I've been told by my husband that he really doesn't like that.
I like mature cheddar with parmesan, and sometimes I'll add a little bit of mozzarella if I've got it for that stretchy texture. A tiny bit of Dijon or English mustard in that cheese sauce is another trick I use. You don't really taste mustard. It just makes the cheese taste more savory.
And then when you're reheating it, I like to add a splash of milk. It just brings that creamy sauce back rather than leaving you with dry pasta. For the top, bread crumbs mixed with parmesan are a firm favorite in my house. And I think that's what everybody loves also is that really, really crunchy part.
Ingredients
Method
- Heat oven to 375°F; butter a 9×13-inch dish with extra teaspoon. Boil macaroni 2 minutes less than package directions; drain.
- Melt 3 tablespoons butter in a saucepan over medium heat. Whisk in flour; cook 1 minute. Gradually whisk in milk; simmer, stirring, 4–5 minutes until lightly thickened. Remove from heat; add cheddar, 1/4 cup Parmesan, mustard, salt and pepper.
- Stir macaroni into sauce; spread in dish. Melt remaining tablespoon butter; mix with panko and remaining Parmesan. Sprinkle over pasta.
- Bake 20–25 minutes, until bubbling and center reaches 165°F. Rest 10 minutes.
Notes
14) Chicken Pot Pie Casserole with Biscuit Topping
I love a chicken pot pie, but I don't always love making a chicken pot pie. There is a difference here. This is my shortcut version. You get the creamy chicken and a vegetable filling. But instead of wrestling with pastry, put biscuits over the top.
This is particularly good when I've got leftover chicken. I'll shred it all up, add cooked carrots and peas, make a creamy sauce, and suddenly dinner is halfway done. Magical.
I like putting in a little bit of thyme at the end, because I've got tons of that in my garden. And if I have some white wine open, which I always do, I'll splash a little in the pan before adding the stock. It just gives the sauce a really lovely depth.
And I'm going to say it again: Bought biscuit dough is absolutely fine, and no one is going to know, and no one is really going to care. I don't think I'd know anyone who spent hours making biscuits for a chicken pot pie.
When I'm freezing it, I'll often just freeze the filling separately and then make the biscuit topping fresh. It just takes very little time, and you get that gorgeous golden fluffy top. I love making this one because everyone thinks I've put so much effort into it, but meanwhile, half of it's just come out of the freezer.
Ingredients
Method
- Heat oven to 375°F. Set a 9×13-inch dish on a rimmed baking sheet. Melt butter in a large saucepan over medium heat; cook onion 5 minutes until soft.
- Stir in flour and thyme and cook 1 minute. Gradually whisk in broth and milk; simmer 4–5 minutes until thickened. Add chicken, frozen vegetables, salt and pepper; simmer 3 minutes. Transfer the hot filling to the dish.
- Arrange biscuit quarters on top in a single layer with small gaps; do not press into the sauce. Bake 25–30 minutes until browned, the filling reaches 165°F and the undersides of biscuits are fluffy rather than wet dough. If tops brown early, tent loosely with foil and continue baking until biscuit centers are cooked. Rest 10 minutes.
Notes
15) Meatball and Marinara Pasta Bake

I really like using meatballs and pasta bakes because you get those little pockets of juicy, savory meat throughout the dish. And yes, I've probably used store-bought meatballs here. In fact, I absolutely have. If I'm making dinner on a Wednesday, I'm not gonna feel guilty about it, and no one has to.
The sauce is where I like to put a little bit of effort. I like to use garlic, oregano, thyme, parmesan, and fresh basil, all from my garden, to make a magic tomato sauce. I also like to undercook the pasta slightly. It might seem too firm when you first drain it, but that's exactly what you want. I promise you.
When I'm freezing the dish, I'll sometimes leave the mozzarella off until the day I bake it. Fresh mozzarella melts so much more beautifully than frozen mozzarella. And if you've got basil growing in the garden, tear a few leaves over the top just before serving. That fresh aroma makes the whole kitchen smell amazing.
Ingredients
Method
- Heat oven to 375°F; oil a 9×13-inch dish with 1 teaspoon oil. Boil rigatoni 2 minutes less than package directions; drain.
- Heat remaining oil in a saucepan over medium heat. Stir garlic, oregano and thyme 30 seconds. Add marinara, water and thawed fully cooked meatballs; simmer gently 5 minutes.
- Combine pasta, sauce and meatballs; spread in dish and top with Parmesan and mozzarella. Cover; bake 20 minutes. Uncover; bake 10–15 minutes, until casserole’s center and a meatball in the middle reach 165°F. Rest 10 minutes; add basil.
Notes
16) Sausage and Pepper Penne Bake

This is the casserole I make when I don't want anything really too fancy, just something really tasty that I know everyone is going to eat. It's like comfort food, right?
I love cooking the peppers and onions slowly so they get sweet and soft. It takes a few extra minutes, but it's worth it, I promise you. Then I brown the sausage properly before adding the tomato sauce. I think it's quite important to have a good quality sausage. Always keep your eye out for the better, higher-quality ones.
And if I'm short on time, I'll use a jar of tomato sauce and just give it a little bit of help with some garlic, oregano, chili flakes, anything. Thyme, a little bit of a splash of olive oil. That's one of my favorite cooking shortcuts. Don't fight the shortcut. Just make it taste better.
Penne is perfect because the sauce gets into all those little tubes. And then for the freezer part, I don't cook the pasta completely because it will soften as it reheats. And I save some of the cheese for the top rather than putting absolutely everything before freezing.
It's one of those casseroles where a simple salad and maybe some crusty bread is all you need. I don't want to spend an hour making side dishes when the whole point is an easy dinner.
Ingredients
Method
- Heat oven to 375°F; oil a 9×13-inch dish with 1 teaspoon oil. Boil penne 2 minutes less than package directions; drain.
- Heat remaining oil in a large skillet over medium heat. Cook peppers and onion 8–10 minutes until softened; transfer to a bowl. Brown sausage in skillet 8–10 minutes, breaking it up, until 160°F; drain excess fat.
- Cook garlic 30 seconds; return vegetables and stir in marinara, water and oregano. Simmer 3 minutes; fold in penne and transfer to dish. Top with mozzarella and Parmesan.
- Cover; bake 20 minutes. Uncover; bake 10 minutes more, until bubbling and center reaches 165°F. Rest 10 minutes.
Notes
17) Broccoli, Cheddar, and Rice Casserole

I love a good meat-free casserole, especially when it doesn't feel like you're eating a meal that is missing something. This one is perfect. It's creamy, cheesy, and packed with broccoli, and it's a really good way of using leftover rice.
I'm always trying to find ways to use up bits and pieces in the fridge. I can't stand throwing stuff away. I give the broccoli a quick blanch first. I don't want it completely cooked because it gets another round in the oven, and nobody wants grey, floppy, horrible broccoli. The cheese sauce is where I add a little bit of Dijon and smoked paprika. I've learned that trick over the years, and I use it whenever I'm making a cheese sauce because it gives much more depth. I actually learned that at culinary school.
And because it's so rich, I like serving it with something really simple. Tomatoes, cucumber, rocket, whatever I've got growing or sitting in the fridge. You can add any type of protein to this. Anything really that you've got lying around. It doesn't have to be meat-free, but it is nice to have as a side or to whip out quickly for a lunch or an easy dinner.
Ingredients
Method
- Heat oven to 375°F; butter a 9×13-inch dish with extra teaspoon. Blanch broccoli in boiling water 2 minutes; drain thoroughly. Start with cooked rice; preparing from dry adds time.
- Melt 3 tablespoons butter in a saucepan. Stir in flour; cook 1 minute over medium heat. Gradually whisk in milk and broth; simmer 3–5 minutes until lightly thickened. Remove from heat; stir in 1 1/2 cups cheddar, mustard, paprika, salt and pepper.
- Fold in rice and broccoli; transfer to dish. Top with remaining 1/2 cup cheddar. Bake uncovered 30–35 minutes, until bubbling and center reaches 165°F. Rest 10 minutes.
Notes
18) Chicken Parmesan Casserole
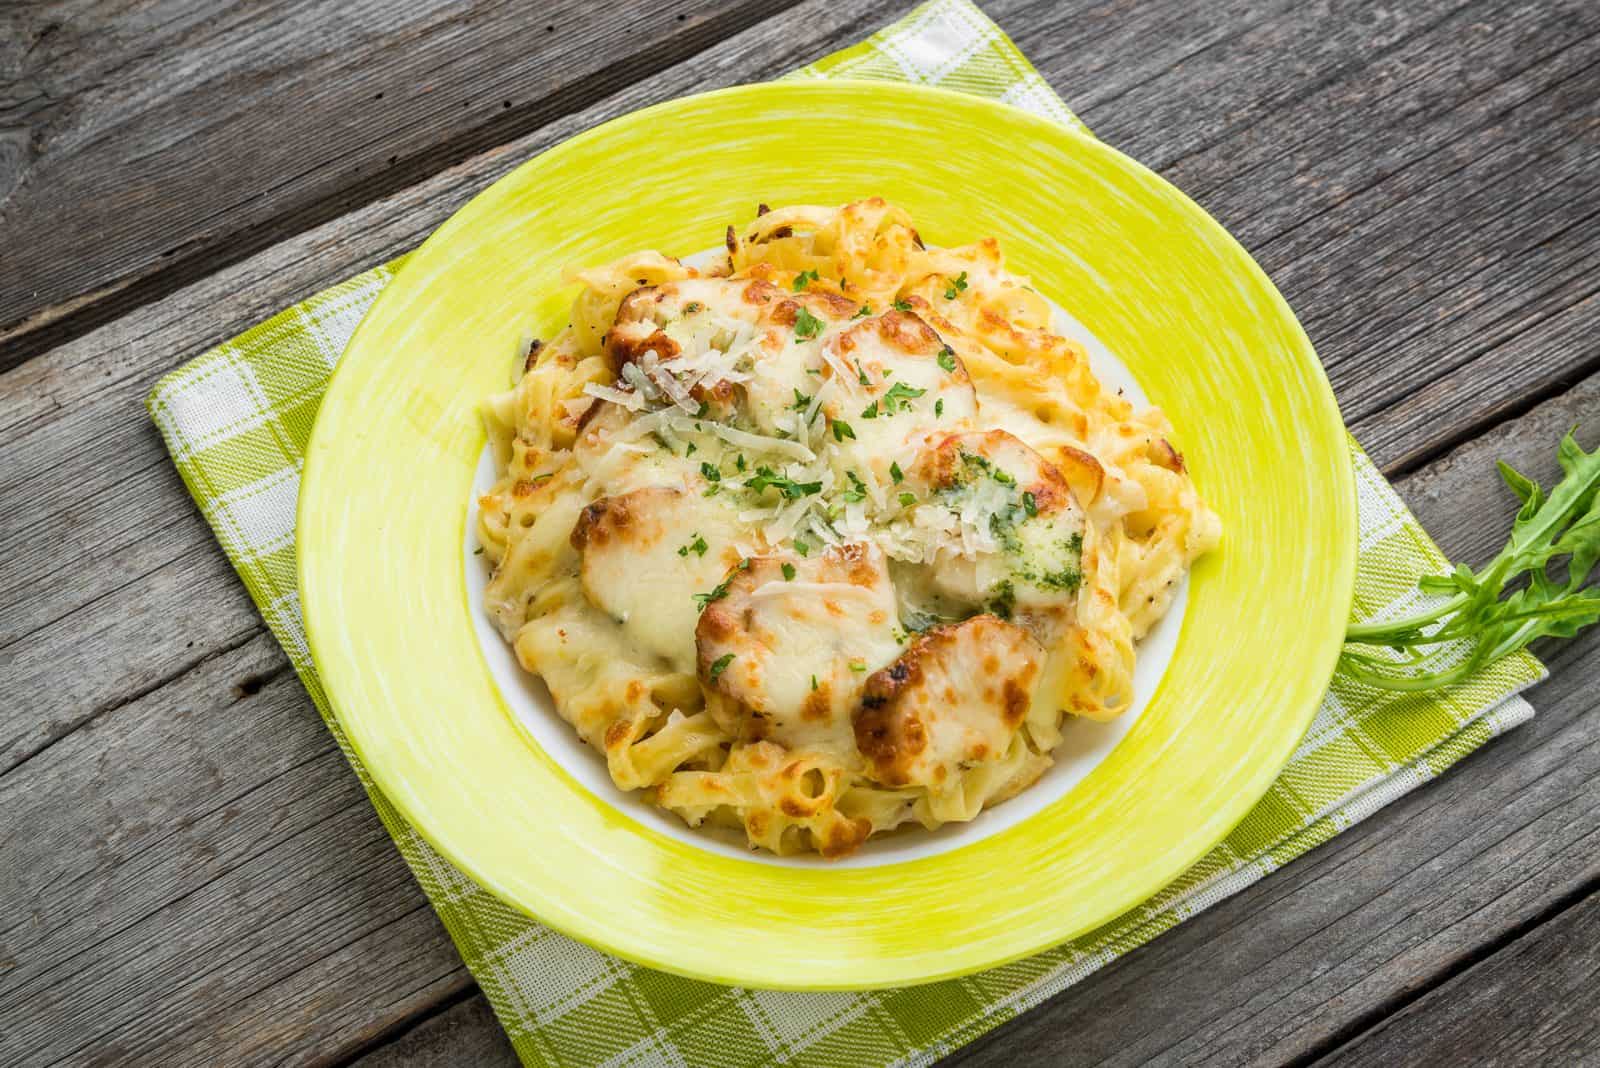
I think we all have chicken parmesan in this house. But I don't always want to stand at the stove frying chicken while they're trying to get the rest of the dinner sorted, right? This is my much easier version. Cheat version.
Instead of usually breading and frying every piece, I use chicken chunks. I use chunks of chicken, tomato sauce, mozzarella, parmesan, and really good crispy breadcrumb topping. In fact, sometimes if there's chicken schnitzel in the freezer, I'll just use chicken schnitzel and cut it up.
The breadcrumb mixture is my favorite part. I like adding Parmesan, garlic, and Italian herbs, and I don't put it on until I'm ready to bake the casserole. Otherwise, you lose that crunch.
If I don't have chicken schnitzel in the freezer, I'll use chicken breast. I make sure I don't cut the pieces too small. Smaller pieces dry out much more quickly, especially when you're reheating them. You don't want hard pieces of chicken. You want enough to keep the chicken moist, but you still want those crispy bits on top.
And I'll usually serve this with rocket and tomato, and then I'll dress it with some lemon and olive oil. It feels like a much lighter dinner that way.
Ingredients
Method
- Heat oven to 375°F; oil a 9×13-inch dish with 1 teaspoon oil. Season chicken with salt and pepper.
- Heat remaining tablespoon oil in a large skillet over medium-high heat. Cook chicken, in two batches if needed, 6–8 minutes, turning, until browned and largest pieces reach 165°F. Do not partially cook chicken for storage.
- Toss cooked chicken with marinara; spread in dish. Top with mozzarella and 1/4 cup Parmesan. Mix panko, melted butter, remaining Parmesan, garlic powder and Italian seasoning; scatter evenly over top.
- Bake 20–25 minutes, until topping is golden and casserole’s center reaches 165°F. Rest 10 minutes.
Notes
19) Spinach and Ricotta Stuffed Shells

These look like you've put in quite a lot of effort, but they're actually much easier than they look. I like making a big batch of these because they're perfect for putting straight into the freezer for one of those evenings when you want something homemade and delicious, but absolutely cannot be bothered starting from scratch.
The most important thing with the filling is squeezing your spinach really well. If you're using frozen spinach, really, really squeeze it. There is a surprising amount of water in there. And I have made this before with too much moisture, and it just makes your ricotta filling really watery and everything just becomes a mess.
I also don't boil the shells until they're completely soft. They only need to be flexible enough to fill. Rather undercooked than overcooked, guys. They'll finish cooking in the oven.
And I like adding lemon zest, parmesan, black pepper, and just a little bit of nutmeg in the ricotta. It gives the filling much more flavor without making it complicated. I freeze these before baking and then cover them generously with tomato sauce so the pasta doesn't dry out.
When I'm ready to cook them, I add a little bit of extra parmesan and fresh basil from my garden.
Ingredients
Method
- Heat oven to 375°F; oil a 9×13-inch baking dish. Boil shells in a large pot 2 minutes less than package time; drain and separate on a tray until cool enough to handle.
- Squeeze thawed spinach firmly in a clean towel until no liquid drips. Mix with ricotta, egg, 1/4 cup Parmesan, lemon zest, nutmeg, pepper and salt.
- Mix marinara with water; spread 1 cup in dish. Fill each shell with about 2 tablespoons filling; arrange in one layer. Cover all exposed pasta with remaining sauce; top with mozzarella and remaining Parmesan.
- Cover with foil; bake 30 minutes. Uncover; bake 10–15 minutes, until sauce bubbles and center reaches 165°F. Rest 10 minutes; add basil if using.