

🍕 Pizza Roll-Ups 🌯

📋 Ingredients:
Don't lose this article. Enter your email below, and I'll send it to you right now. Plus a little encouragement and inspiration from me, straight to your inbox.
- 4 large flour tortillas 🌯
- 1/2 cup pizza sauce 🍅
- 1 cup shredded mozzarella cheese 🧀
- 20 slices of pepperoni 🍕
- Optional: Italian seasoning 🌿
📝 Instructions:
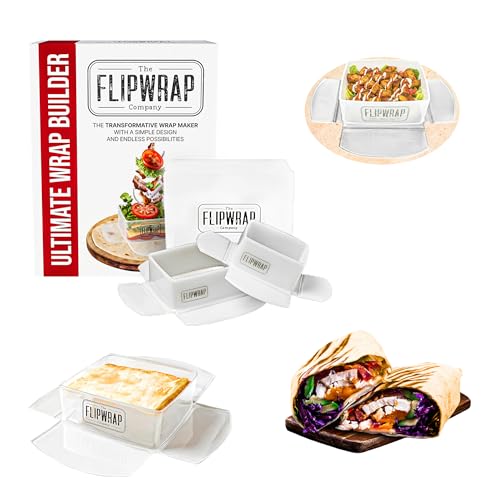
The Flipwrap Company Tortilla Wrap Maker Kit
Check Price1️⃣ Lay out a tortilla on a flat surface.
2️⃣ Spread about 2 tablespoons of pizza sauce evenly over the tortilla.
3️⃣ Sprinkle a generous handful of shredded mozzarella cheese on top of the sauce.
4️⃣ Place 5 slices of pepperoni evenly over the cheese.
5️⃣ Optional: Sprinkle a pinch of Italian seasoning over the top for added flavor.
6️⃣ Roll up the tortilla tightly, starting from one edge, and secure it with a toothpick if needed.
7️⃣ Repeat the process for the remaining tortillas.
8️⃣ Slice each rolled tortilla into 1-inch pinwheels.
9️⃣ Pack in a lunchbox with a side of fruit 🍎 and veggies 🥕.
📝 Notes: ◻️ You can customize these with your kids’ favorite pizza toppings like olives, bell peppers, or mushrooms. ◻️ These Pizza Roll-Ups are perfect for a quick, no-fuss school lunch that kids will love. ◻️ Store in an airtight container in the fridge if making them the night before.
🥗 Chicken Caesar Salad Wraps 🌯

📋 Ingredients:
- 2 cups grilled chicken breasts, sliced or shredded 🍗
- 4 large flour tortillas 🌯
- 2 cups chopped romaine lettuce 🥬
- 1/2 cup grated parmesan cheese 🧀
- 1/3 cup Caesar dressing 🥣
- Optional: Croutons for extra crunch 🥖
📝 Instructions:
1️⃣ Lay out a tortilla on a flat surface.
2️⃣ Spread about 1 tablespoon of Caesar dressing evenly over the center of the tortilla.
3️⃣ Add a handful of chopped romaine lettuce on top of the dressing.
4️⃣ Place a portion of the grilled chicken on the lettuce.
5️⃣ Sprinkle grated parmesan cheese over the chicken and lettuce.
6️⃣ Optional: Add a handful of croutons for some extra crunch.
7️⃣ Drizzle a little more Caesar dressing over all the ingredients.
8️⃣ Roll up the tortilla tightly, folding in the sides as you go to keep the filling inside.
9️⃣ Repeat the process for the remaining tortillas.
🔟 Slice each wrap in half and pack in a lunchbox with a side of fruit 🍇 and a small treat 🍪.
📝 Notes: ◻️ You can use store-bought grilled chicken to save time, or grill your own seasoned with salt, pepper, and garlic powder. ◻️ These wraps are perfect for a fresh and tasty lunch that doesn’t take long to prepare. ◻️ Keep the wraps chilled in the fridge until you’re ready to pack them.
🥒 Veggie Sushi Rolls 🥑

📋 Ingredients:
- 4 sheets of nori (seaweed) 🌿
- 2 cups cooked sushi rice 🍚
- 1 cucumber, julienned 🥒
- 1 avocado, sliced 🥑
- 1 carrot, julienned 🥕
- Soy sauce for dipping 🥢
- Optional: Sesame seeds for garnish 🌱
📝 Instructions:
1️⃣ Lay a sheet of nori on a bamboo sushi mat, shiny side down.
2️⃣ Spread a thin, even layer of sushi rice over the nori, leaving about an inch at the top free of rice.
3️⃣ Arrange cucumber, avocado, and carrot strips in a line across the center of the rice.
4️⃣ Optional: Sprinkle sesame seeds over the vegetables.
5️⃣ Using the bamboo mat, carefully roll the nori tightly, tucking in the filling as you go.
6️⃣ Moisten the free edge of the nori with a little water to seal the roll.
7️⃣ Repeat the process with the remaining nori sheets and ingredients.
8️⃣ Slice each roll into bite-sized pieces using a sharp knife.
9️⃣ Pack in a lunchbox with a small container of soy sauce for dipping.
📝 Notes: ◻️ Use a sharp knife to cut the rolls cleanly and prevent squishing the ingredients. ◻️ These veggie sushi rolls are a fun and healthy lunch option that kids will enjoy. ◻️ Keep the rolls chilled in the fridge until you’re ready to pack them.
🧀 Cheese and Crackers Bento Box 🍎

📋 Ingredients:
- Variety of cheeses (cheddar, mozzarella, gouda, etc.) 🧀
- Whole grain crackers 🍪
- Seedless grapes 🍇 or apple slices 🍏
- Optional: Nuts 🥜 or a small sweet treat 🍫
📝 Instructions: 1️⃣ Cheese Preparation:
- Slice your chosen variety of cheeses into small, bite-sized cubes or thin slices.
2️⃣ Cracker Selection:
- Choose your favorite whole grain crackers and portion out a handful for each bento box.
3️⃣ Fruit Preparation:
- Wash and dry the seedless grapes.
- If using apples, slice them into thin wedges and optionally squeeze a bit of lemon juice over them to prevent browning.
4️⃣ Assemble the Bento Box:
- In one section of the bento box, place the cheese slices or cubes.
- In another section, arrange the whole grain crackers.
- Fill another section with seedless grapes or apple slices.
- Optional: Add a small handful of nuts or a tiny sweet treat in a separate compartment.
5️⃣ Pack and Go:
- Close the bento box securely and keep it in the fridge until you’re ready to pack it in the lunchbox.
📝 Notes: ◻️ Mix and match different types of cheeses and fruits to keep things interesting for your kids. ◻️ This bento box is a fun and balanced lunch that is quick to assemble and offers a variety of flavors and textures. ◻️ Use silicone muffin liners in the bento box to help separate different items and keep them fresh.
🥕 Hummus and Veggie Dippers 🥒

📋 Ingredients:
- 1 cup hummus 🥣
- 1 red bell pepper, sliced 🌶️
- 1 yellow bell pepper, sliced 🌶️
- 1 cucumber, cut into sticks 🥒
- 1 cup cherry tomatoes 🍅
- Optional: Pita chips or whole grain crackers 🍪
📝 Instructions:
1️⃣ Prep the Veggies:
- Wash and slice the red and yellow bell peppers into strips.
- Wash and cut the cucumber into sticks.
- Wash the cherry tomatoes and leave them whole for easy snacking.
2️⃣ Assemble the Bento Box:
- Place a portion of hummus in a small container or a compartment of the bento box.
- Arrange the bell pepper slices, cucumber sticks, and cherry tomatoes around the hummus.
3️⃣ Optional Add-Ons:
- Add a handful of pita chips or whole grain crackers in a separate compartment for extra crunch.
4️⃣ Pack and Go:
- Close the bento box securely and keep it in the fridge until you’re ready to pack it in the lunchbox.
📝 Notes: ◻️ You can use store-bought hummus or make your own if you have time. ◻️ These veggie dippers are a colorful and healthy lunch option that kids will love. ◻️ Mix and match different veggies like carrot sticks, celery, or snap peas to keep it fun and interesting.
🦃 Turkey and Cheese Roll-Ups 🧀

📋 Ingredients:
- 8 slices of deli turkey 🦃
- 8 slices of cheese (cheddar, Swiss, or your favorite) 🧀
- Toothpicks
📝 Instructions:
1️⃣ Prep the Ingredients:
- Lay out a slice of deli turkey on a flat surface.
- Place a slice of cheese on top of the turkey.
2️⃣ Roll It Up:
- Starting from one edge, roll the turkey and cheese together tightly.
- Secure the roll-up with a toothpick to keep it from unrolling.
3️⃣ Repeat and Pack:
- Repeat the process with the remaining slices of turkey and cheese.
- Pack the roll-ups in a lunchbox with a side of fruits 🍇 and veggies 🥕.
📝 Notes: ◻️ You can switch up the cheese for different flavors and experiment with adding a slice of ham or some lettuce. ◻️ These Turkey and Cheese Roll-Ups are a quick, protein-packed lunch option that kids will love. ◻️ Keep them chilled in the fridge until you’re ready to pack them.
🥣 Greek Yogurt Parfait 🍓

📋 Ingredients:
- 2 cups Greek yogurt 🥣
- 1 cup granola 🥄
- 1 cup fresh berries (strawberries, blueberries, raspberries) 🍓
📝 Instructions:
1️⃣ Prepare the Ingredients:
- Wash and dry the fresh berries.
- Slice the strawberries if they’re too large.
2️⃣ Layer the Parfait:
- In a small mason jar or portable container, add a layer of Greek yogurt (about 1/2 cup).
3️⃣ Add Granola:
- Sprinkle a layer of granola (about 1/4 cup) over the yogurt.
4️⃣ Add Berries:
- Add a handful of fresh berries on top of the granola.
5️⃣ Repeat Layers:
- Repeat the layers until the container is full, finishing with a layer of berries on top.
6️⃣ Pack and Go:
- Secure the lid on the container and pack in a lunchbox with an ice pack to keep it cool.
📝 Notes: ◻️ You can customize this parfait with your kids’ favorite fruits or add a drizzle of honey for extra sweetness. ◻️ This Greek Yogurt Parfait is a delicious and healthy lunch option that’s quick to assemble. ◻️ Keep the granola separate if you prefer to add it just before eating to maintain its crunchiness.
🌮 Taco Salad Cups 🥗

📋 Ingredients:
- 2 cups shredded lettuce 🥬
- 1 cup black beans, rinsed and drained
- 1 cup corn kernels 🌽
- 1 cup shredded cheese (cheddar or Mexican blend) 🧀
- 1 cup salsa 🍅
- Optional: Sour cream, guacamole, or tortilla chips
📝 Instructions:
1️⃣ Prep the Ingredients:
- Wash and shred the lettuce.
- Rinse and drain the black beans.
- Drain the corn kernels if using canned corn.
2️⃣ Assemble the Taco Salad Cups:
- In individual containers, layer the shredded lettuce at the bottom.
3️⃣ Add the Veggies:
- Add a spoonful of black beans and corn on top of the lettuce.
4️⃣ Top with Cheese:
- Sprinkle shredded cheese over the beans and corn.
5️⃣ Add Salsa:
- Spoon salsa on top of the cheese layer.
6️⃣ Optional Add-Ons:
- Add a dollop of sour cream or guacamole if desired.
- Include a small baggie of tortilla chips on the side for some extra crunch.
7️⃣ Pack and Go:
- Close the containers securely and keep them in the fridge until you’re ready to pack them in the lunchbox.
📝 Notes: ◻️ You can prep all the ingredients the night before for a quick and easy assembly in the morning. ◻️ These Taco Salad Cups are a fun and nutritious lunch option that kids will enjoy. ◻️ Customize the salad cups with your kids’ favorite taco toppings like olives, jalapeños, or diced tomatoes.
🥚 Mini Quiche Muffins 🧀

📋 Ingredients:
- 6 large eggs 🥚
- 1/2 cup milk 🥛
- 1 cup diced ham 🍖
- 1 cup chopped fresh spinach 🌿
- 1 cup shredded cheese (cheddar or your favorite) 🧀
- Salt and pepper to taste 🧂
- Non-stick cooking spray
📝 Instructions:
1️⃣ Preheat the Oven:
- Preheat your oven to 375°F (190°C). Spray a muffin tin with non-stick cooking spray.
2️⃣ Prepare the Egg Mixture:
- In a large bowl, whisk together the eggs and milk.
3️⃣ Add the Fillings:
- Stir in the diced ham, chopped spinach, and shredded cheese into the egg mixture.
- Season with salt and pepper to taste.
4️⃣ Fill the Muffin Tin:
- Pour the egg mixture evenly into the muffin tin cups, filling each about 3/4 full.
5️⃣ Bake:
- Bake in the preheated oven for 20-25 minutes, or until the quiches are set and slightly golden on top.
6️⃣ Cool and Pack:
- Let the quiche muffins cool in the tin for a few minutes before removing them.
- Pack in a lunchbox with a side of fruit 🍎 and some veggies 🥕.
📝 Notes: ◻️ These Mini Quiche Muffins can be made ahead of time and stored in the fridge for up to 3 days. ◻️ Feel free to customize with different fillings like bell peppers, mushrooms, or bacon. ◻️ They are perfect for a protein-packed lunch that kids will love.
🍝 Pasta Salad 🍅🧀

📋 Ingredients:
- 2 cups cooked pasta (rotini or bow-tie) 🍝
- 1 cup cherry tomatoes, halved 🍅
- 1 cup mozzarella balls (bocconcini) 🧀
- 1/4 cup Italian dressing 🥗
- Optional: Fresh basil leaves for garnish 🌿
📝 Instructions:
1️⃣ Cook the Pasta:
- Cook pasta according to package instructions. Drain and rinse under cold water to cool.
2️⃣ Prep the Ingredients:
- Halve the cherry tomatoes.
- Drain the mozzarella balls if needed.
3️⃣ Combine in a Bowl:
- In a large mixing bowl, combine the cooked pasta, halved cherry tomatoes, and mozzarella balls.
4️⃣ Add Dressing:
Don't lose this article. Enter your email below, and I'll send it to you right now. Plus a little encouragement and inspiration from me, straight to your inbox.
- Pour the Italian dressing over the pasta mixture and toss until everything is evenly coated.
5️⃣ Garnish:
- Optional: Add fresh basil leaves for a burst of flavor and color.
6️⃣ Pack and Go:
- Portion the pasta salad into individual containers for a quick and easy school lunch.
📝 Notes: ◻️ You can customize this pasta salad with additional veggies like diced bell peppers, cucumbers, or olives. ◻️ This Pasta Salad is a fresh and easy-to-make lunch option that kids will enjoy. ◻️ Keep the pasta salad chilled in the fridge until you’re ready to pack it.
🍇 Fruit and Nut Mix 🥜

📋 Ingredients:
- 1 cup raisins 🍇
- 1 cup dried cranberries 🍒
- 1 cup mixed nuts (almonds, cashews, peanuts) 🥜
- 1 cup mini pretzels 🥨
📝 Instructions:
1️⃣ Measure the Ingredients:
- Measure out the raisins, dried cranberries, mixed nuts, and mini pretzels.
2️⃣ Combine in a Bowl:
- In a large mixing bowl, combine all the ingredients.
3️⃣ Mix Well:
- Gently stir with a spoon until all the ingredients are evenly distributed.
4️⃣ Portion into Bags:
- Divide the mix into small, snack-sized zip-lock bags or containers for easy packing.
5️⃣ Pack and Go:
- Store the bags in an airtight container until you’re ready to pack them in the lunchbox.
📝 Notes: ◻️ You can customize this mix with your kids’ favorite dried fruits or nuts. ◻️ This Fruit and Nut Mix is a healthy and convenient snack that’s perfect for school lunches. ◻️ Keep a few extra bags on hand for quick snacks on the go.
🥗 Chicken Salad Lettuce Wraps 🍇🥬

📋 Ingredients:
- 2 cups cooked chicken, shredded or diced 🍗
- 1/2 cup halved grapes 🍇
- 1/4 cup chopped walnuts 🥜
- 1/4 cup mayonnaise 🥄
- 1 tablespoon Dijon mustard 🥢
- Salt and pepper to taste 🧂
- 8 large romaine lettuce leaves 🥬
📝 Instructions:
1️⃣ Prepare the Chicken Salad:
- In a large mixing bowl, combine the shredded or diced chicken, halved grapes, and chopped walnuts.
2️⃣ Mix the Dressing:
- Add the mayonnaise and Dijon mustard to the bowl and mix well until all ingredients are evenly coated. Season with salt and pepper to taste.
3️⃣ Assemble the Lettuce Wraps:
- Lay out the romaine lettuce leaves on a flat surface.
- Spoon a generous portion of the chicken salad mixture onto the center of each lettuce leaf.
4️⃣ Wrap and Secure:
- Fold the sides of the lettuce leaves over the chicken salad and roll them up. Secure with a toothpick if needed.
5️⃣ Pack and Go:
- Place the wrapped lettuce leaves in a lunchbox and keep them chilled in the fridge until you’re ready to pack them.
📝 Notes: ◻️ You can customize the chicken salad with additional ingredients like diced apples, celery, or cranberries. ◻️ These Chicken Salad Lettuce Wraps are a healthy and refreshing lunch option that kids will love. ◻️ Keep the wraps chilled in the fridge until you’re ready to pack them for school.
🥒 Antipasto Skewers 🍅🧀🌿

📋 Ingredients:
- Cherry tomatoes 🍅
- Mozzarella balls (bocconcini) 🧀
- Green or black olives
- Thin slices of salami 🥓
- Fresh basil leaves 🌿 (optional)
- Wooden skewers
📝 Instructions:
1️⃣ Prepare the ingredients: Rinse the cherry tomatoes 🍅 and basil leaves 🌿 (if using). Drain the mozzarella balls 🧀 and olives.
2️⃣ Assemble the skewers:
- Start with a cherry tomato 🍅.
- Follow with a mozzarella ball 🧀.
- Add an olive.
- Fold a slice of salami 🥓 and add it next.
- Repeat the pattern if your skewer is long enough, or finish with a basil leaf 🌿 for a fresh touch.
3️⃣ Secure the ingredients: Make sure all the ingredients are tightly packed but not squishing each other.
4️⃣ Store and serve: Place the skewers in an airtight container and refrigerate until ready to pack in your child’s lunchbox.
📝 Notes: ◻️ You can customize these skewers by adding other favorite ingredients like roasted red peppers, artichoke hearts, or cucumbers 🥒. ◻️ For a vegetarian option, simply omit the salami 🥓. ◻️ These make a great snack or party appetizer too!
🥗 Cold Noodle Salad 🍜🥕

📋 Ingredients:
- 8 oz soba noodles 🍜
- 1 cup shelled edamame 🥢
- 1 cup shredded carrots 🥕
- 2 green onions, thinly sliced 🧅
- 1/4 cup soy sauce 🥡
- 2 tablespoons rice vinegar 🍚
- 1 tablespoon sesame oil 🪔
- 1 tablespoon grated ginger 🌿
- 1 tablespoon sesame seeds 🌾
- Optional: 1 teaspoon honey 🍯
📝 Instructions:
1️⃣ Cook the soba noodles: Boil soba noodles 🍜 according to the package instructions. Drain and rinse with cold water to stop the cooking process. Set aside.
2️⃣ Prepare the vegetables: Shell the edamame 🥢 if needed and shred the carrots 🥕. Thinly slice the green onions 🧅.
3️⃣ Make the dressing: In a small bowl, whisk together the soy sauce 🥡, rice vinegar 🍚, sesame oil 🪔, grated ginger 🌿, and honey 🍯 (if using).
4️⃣ Combine ingredients: In a large bowl, toss together the soba noodles 🍜, edamame 🥢, shredded carrots 🥕, and green onions 🧅.
5️⃣ Add the dressing: Pour the sesame ginger dressing over the noodle mixture and toss until everything is well-coated.
6️⃣ Garnish: Sprinkle sesame seeds 🌾 over the top.
7️⃣ Store and serve: Pack the cold noodle salad in an airtight container and keep refrigerated until ready to include in your child’s lunchbox.
📝 Notes: ◻️ You can customize this recipe by adding other favorite veggies like cucumber slices 🥒 or bell peppers 🌶️. ◻️ For a nut-free version, ensure the dressing and ingredients are free from cross-contamination with nuts. ◻️ This salad is also great for a quick family dinner or summer picnic!
🥚 Egg and Veggie Muffins 🥕🌽🧀

📋 Ingredients:
- 6 large eggs 🥚
- 1/2 cup diced bell peppers 🌶️
- 1/2 cup finely chopped spinach 🌿
- 1/4 cup shredded carrots 🥕
- 1/4 cup corn kernels 🌽
- 1/2 cup shredded cheese 🧀 (cheddar or your child’s favorite)
- Salt and pepper to taste 🧂
- Non-stick cooking spray or muffin liners
📝 Instructions:
1️⃣ Preheat the oven: Set your oven to 375°F (190°C). Grease a muffin tin with non-stick cooking spray or line with muffin liners.
2️⃣ Prepare the vegetables: Dice the bell peppers 🌶️, finely chop the spinach 🌿, and shred the carrots 🥕.
3️⃣ Mix the eggs: In a large bowl, crack the eggs 🥚 and whisk until combined. Add a pinch of salt and pepper 🧂.
4️⃣ Combine ingredients: Add the diced bell peppers 🌶️, chopped spinach 🌿, shredded carrots 🥕, and corn kernels 🌽 to the eggs. Mix well.
5️⃣ Fill the muffin tin: Pour the egg and veggie mixture into the prepared muffin tin, filling each cup about 3/4 full.
6️⃣ Add cheese: Sprinkle shredded cheese 🧀 on top of each muffin cup.
7️⃣ Bake: Place the muffin tin in the preheated oven and bake for 15-18 minutes, or until the eggs are set and the tops are golden brown.
8️⃣ Cool and serve: Let the muffins cool for a few minutes before removing them from the tin. Pack them in an airtight container for your child’s lunchbox.
📝 Notes: ◻️ You can customize these muffins by adding other favorite veggies like tomatoes 🍅 or mushrooms 🍄. ◻️ These muffins can be stored in the refrigerator for up to 3 days or frozen for longer storage. Just reheat before packing in the lunchbox. ◻️ Great for breakfast on-the-go or as a quick after-school snack!
🥒 Rice Paper Veggie Rolls 🌿🌈

📋 Ingredients:
- Rice paper wrappers 🥠
- 1 head of lettuce, leaves separated 🥬
- 1 cucumber, julienned 🥒
- 1 large carrot, julienned 🥕
- 1/4 cup fresh mint leaves 🌿 (optional)
- 1/4 cup fresh cilantro 🌱 (optional)
Peanut Dipping Sauce:
- 1/4 cup peanut butter 🥜
- 2 tablespoons soy sauce 🥡
- 1 tablespoon hoisin sauce
- 1 tablespoon lime juice 🍋
- 1 teaspoon honey 🍯
- Water to thin, as needed
📝 Instructions:
1️⃣ Prep the veggies: Wash and separate the lettuce leaves 🥬. Peel and julienne the cucumber 🥒 and carrot 🥕. Set aside mint leaves 🌿 and cilantro 🌱, if using.
2️⃣ Make the peanut sauce: In a small bowl, whisk together peanut butter 🥜, soy sauce 🥡, hoisin sauce, lime juice 🍋, and honey 🍯. Add water to thin the sauce to your desired consistency. Set aside.
3️⃣ Soften the rice paper: Fill a large shallow dish with warm water. Dip one rice paper wrapper 🥠 into the water for about 10-15 seconds until it’s soft and pliable. Lay it flat on a clean surface.
4️⃣ Assemble the rolls: Place a piece of lettuce 🥬 on the bottom third of the rice paper. Add a small handful of julienned cucumber 🥒, carrot 🥕, and a few mint leaves 🌿 and cilantro 🌱, if using.
5️⃣ Roll it up: Fold the sides of the rice paper over the filling, then roll tightly from the bottom to the top, tucking in the filling as you go. Repeat with the remaining wrappers and ingredients.
6️⃣ Serve: Pack the veggie rolls in an airtight container with a small container of peanut dipping sauce on the side.
📝 Notes: ◻️ Feel free to add other favorite veggies like bell peppers 🌶️ or avocado 🥑. ◻️ These rolls are great for a light lunch or a refreshing snack. ◻️ Experiment with different dipping sauces like sweet chili or soy sauce for variety.
🍱 DIY Lunchables: Turkey, Cheese, Crackers, and a Sweet Treat 🦃🧀🍫

📋 Ingredients:
- Slices of turkey 🦃 (deli meat)
- Slices of cheddar or your child’s favorite cheese 🧀
- Whole grain crackers 🍪
- A small sweet treat like dark chocolate squares 🍫
- Optional: apple slices 🍏 or grapes 🍇 for added freshness
📝 Instructions:
1️⃣ Prepare the turkey and cheese: Slice the turkey 🦃 and cheese 🧀 into bite-sized pieces or fun shapes using small cookie cutters.
2️⃣ Pack the crackers: Choose your child’s favorite whole grain crackers 🍪 and place them in a small container.
3️⃣ Add a sweet treat: Include a couple of dark chocolate squares 🍫 or another small sweet treat.
4️⃣ Optional fruit: Add some apple slices 🍏 or grapes 🍇 for a fresh and healthy addition.
5️⃣ Assemble the lunchbox: Use a compartmentalized container to keep the ingredients separate or pack each ingredient in its own small container to avoid mixing.
📝 Notes: ◻️ You can customize this DIY Lunchable by adding veggies like cucumber slices 🥒 or cherry tomatoes 🍅. ◻️ Consider using different types of cheese 🧀 or deli meats 🦃 to keep things interesting for your child. ◻️ This lunch is super easy to prepare and can be made the night before for a stress-free morning.
🍢 Sweet and Savory Skewers 🍏🧀🦃

📋 Ingredients:
- 1 apple, sliced into cubes 🍏
- 1/2 cup cheddar cheese, cut into cubes 🧀
- 6-8 slices of turkey, cut into bite-sized pieces 🦃
- Small wooden skewers or toothpicks
📝 Instructions:
1️⃣ Prepare the ingredients: Wash and slice the apple 🍏 into cubes. Cut the cheddar cheese 🧀 and turkey slices 🦃 into bite-sized pieces.
2️⃣ Assemble the skewers:
- Start with an apple cube 🍏.
- Follow with a cube of cheddar cheese 🧀.
- Add a piece of turkey 🦃.
- Repeat the pattern if your skewer is long enough.
3️⃣ Secure the ingredients: Make sure all the ingredients are tightly packed but not squishing each other.
4️⃣ Store and serve: Place the skewers in an airtight container and refrigerate until ready to pack in your child’s lunchbox.
📝 Notes: ◻️ You can customize these skewers by adding other favorite ingredients like grapes 🍇 or cherry tomatoes 🍅. ◻️ For a vegetarian option, simply replace the turkey 🦃 with more fruits and veggies. ◻️ These skewers make a fun snack or party appetizer too!
🥬 Spinach and Feta Stuffed Phyllo Rolls 🍴🧀🌿

📋 Ingredients:
- 1 package phyllo dough 🥠
- 10 oz fresh spinach, chopped 🥬
- 1 cup crumbled feta cheese 🧀
- 1 small onion, finely chopped 🧅
- 2 cloves garlic, minced 🧄
- 1/4 cup fresh dill, chopped 🌿 (optional)
- 2 tablespoons olive oil
- Salt and pepper to taste 🧂
- Melted butter or additional olive oil for brushing 🧈
📝 Instructions:
1️⃣ Preheat the oven: Set your oven to 375°F (190°C). Line a baking sheet with parchment paper.
2️⃣ Prepare the filling: In a large skillet, heat the olive oil over medium heat. Sauté the chopped onion 🧅 and minced garlic 🧄 until softened, about 3-4 minutes. Add the chopped spinach 🥬 and cook until wilted. Remove from heat and let cool slightly.
3️⃣ Mix the filling: In a bowl, combine the cooked spinach mixture, crumbled feta cheese 🧀, and chopped dill 🌿 (if using). Add salt and pepper 🧂 to taste.
4️⃣ Prepare the phyllo dough: Carefully unroll the phyllo dough 🥠 on a clean surface. Cover with a damp towel to prevent drying out. Take one sheet of phyllo dough and brush it lightly with melted butter or olive oil 🧈. Place another sheet on top and brush again. Repeat until you have 4 layers.
5️⃣ Add the filling: Cut the layered phyllo sheets into 3-inch wide strips. Place a heaping tablespoon of the spinach and feta filling at one end of each strip. Fold the phyllo over the filling and continue to roll, folding in the sides to create a small packet.
6️⃣ Bake: Place the phyllo rolls on the prepared baking sheet and brush the tops with more melted butter or olive oil 🧈. Bake in the preheated oven for 15-20 minutes, or until golden brown and crispy.
7️⃣ Cool and serve: Let the phyllo rolls cool before packing them in an airtight container for your child’s lunchbox.
📝 Notes: ◻️ These phyllo rolls can be made ahead and stored in the refrigerator for up to 3 days or frozen for longer storage. ◻️ Feel free to add other herbs or spices to the filling to suit your child’s taste. ◻️ These rolls make a great snack or appetizer for parties too!
🍅 Caprese Salad 🍃🧀

📋 Ingredients:
- 1 cup cherry tomatoes 🍅
- 1 cup mini mozzarella balls (bocconcini) 🧀
- Fresh basil leaves 🌿
- 2 tablespoons balsamic glaze 🍇
- 1 tablespoon extra virgin olive oil
- Salt and pepper to taste 🧂
📝 Instructions:
1️⃣ Prepare the ingredients: Rinse the cherry tomatoes 🍅 and basil leaves 🌿. Drain the mini mozzarella balls 🧀.
2️⃣ Assemble the salad: In a large bowl, combine the cherry tomatoes 🍅, mini mozzarella balls 🧀, and fresh basil leaves 🌿. Tear the basil leaves into smaller pieces if they are large.
3️⃣ Drizzle with balsamic and oil: Pour the balsamic glaze 🍇 and extra virgin olive oil 🫒 over the salad.
4️⃣ Season: Add salt and pepper 🧂 to taste. Toss gently to combine everything.
5️⃣ Store and serve: Pack the Caprese salad in an airtight container. Refrigerate until ready to include in your child’s lunchbox.
📝 Notes: ◻️ You can customize this salad by adding other favorite ingredients like sliced avocado 🥑 or cucumber 🥒. ◻️ For a fun twist, use colored cherry tomatoes for a more vibrant salad. ◻️ This Caprese salad also makes a great side dish for dinner!