

Sliders hold a special place in American food culture, and this YouTube cooking video shows exactly why these little burgers have won our hearts for generations. The chef walks us through the authentic way to make traditional sliders, sharing the key steps that separate real sliders from just mini burgers. What makes this recipe so popular is its focus on classic techniques like smashing the beef right into a bed of golden onions.
Don't lose this article. Enter your email below, and I'll send it to you right now. Plus a little encouragement and inspiration from me, straight to your inbox.
This recap breaks down all the essential steps so busy families can follow along easily at home. The video covers everything from choosing the right beef to mastering the griddle technique that gives sliders their signature flavor. Whether you’re planning a family gathering or just want to try something fun for dinner, these tips will help you create sliders that taste just like the ones from old-fashioned diners.
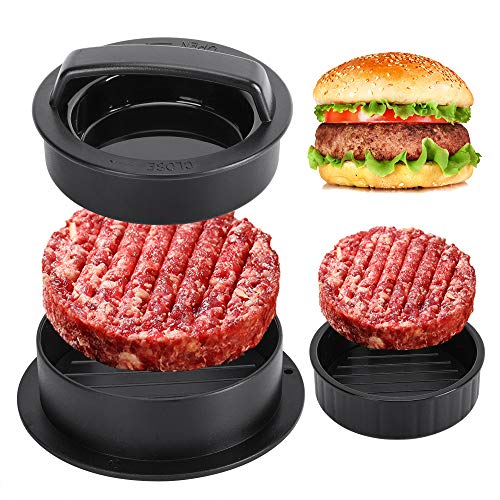
GPYG 3-in-1 Non-Stick Burger Press
Check PriceKey Takeaways
- Traditional sliders use 80% lean ground chuck formed into loose balls and smashed directly onto a bed of cooked onions
- Hawaiian rolls work perfectly because you can build all the sliders at once before cutting them into individual portions
- The secret is cooking the beef and onions together on the griddle so they become one delicious, messy masterpiece
A Slice Of Americana: The Slider Story
There’s something magical about sliders that takes us back to those classic diners where families gathered for simple, satisfying meals. These little gems represent the heart of American comfort food, and making them the traditional way transforms an ordinary mini burger into something truly special.
The foundation of any great slider starts with quality beef. He recommends using 80% lean ground chuck, which provides just the right fat content for juicy, flavorful patties. The key is dividing the meat into twelve small portions, about two ounces each – perfect for little hands and big appetites alike.
Here’s what makes the magic happen:
- Form loose balls of beef (don’t pack them tight)
- Keep portions between 1.5-2 ounces per patty
- Use a kitchen scale for consistency
- Chill the beef while prepping other ingredients
Preparing the vegetables is where busy moms can get creative. He suggests a medium dice for the onions – not too small to burn, not too large to stay raw. For lettuce, iceberg works beautifully because it stays crispy and doesn’t wilt under all those delicious juices.
Quick mom tip: Pre-shred the lettuce earlier in the day and store it in the fridge for easy assembly later.
The bun choice makes all the difference. Soft Hawaiian rolls work perfectly because they can be sliced as one connected sheet, making assembly much faster when you’re feeding a crowd. He butters the cut sides and toasts them on the griddle until golden.
Building the base layer saves time:
- Mayo acts as a moisture barrier
- Yellow mustard adds tangy zip
- Dill pickles provide that classic crunch
- Shredded lettuce tops it off
The cooking technique is where tradition really shines. First, the onions go down on the preheated griddle with a little oil. They cook until golden and tender, creating a flavorful foundation. Then comes the signature move – smashing those beef balls directly into the onions.
This smashing technique isn’t just for show. It creates maximum contact with the griddle, developing that crispy crust while the onions steam the meat from below. He uses two spatulas for better leverage and easier handling.
Pro cooking tips:
- Season with coarse salt and cracked pepper after smashing
- Rotate patties if your griddle has hot spots
- Flip when juices pool on top and edges brown
- Add cheese immediately after flipping
The cheese melts perfectly from all that steam rising from the beef and onions. One slice covers two burgers easily, making efficient use of ingredients – something every family cook appreciates.
Assembly happens quickly while everything’s hot. He scoops up those patties with plenty of onions clinging to them, placing them snugly on the prepared bun sheet. Even if they overlap slightly, that just adds to the homestyle charm.
Grandma’s wisdom: Don’t worry about perfection – the best family meals are often a little messy.
The final step involves cutting through the completed slider sheet with a serrated knife. This keeps the buns from tearing and prevents toppings from sliding off – a real win when serving kids or party guests.
These traditional sliders embrace the beautiful mess of American comfort food. They’re juicy, cheesy, and wonderfully sloppy in the best possible way. The combination of crispy-edged beef, sweet caramelized onions, and tangy pickles creates flavors that remind us why some classics never go out of style.
For busy families, this method makes feeding a crowd much simpler than assembling individual burgers. Everything cooks together, builds together, and cuts apart neatly – perfect for game day, family gatherings, or those nights when everyone needs comfort food.
Selecting Premium Beef For Traditional Sliders
The Importance of Premium Angus Beef
When it comes to making sliders that truly shine, the beef makes all the difference. He swears by Certified Angus Beef with 80% lean ground chuck for these little beauties. The marbling in this quality beef renders beautifully on the griddle, creating those mouth-watering juices that cook the onions to perfection.
Why this beef works so well:
- The fat content keeps patties juicy and flavorful
- Quality marbling creates natural basting while cooking
- Chuck provides the perfect texture for smashing
Mom tip: If Certified Angus Beef isn’t in your budget, look for ground chuck with similar fat content at your local butcher. They often have great deals on quality beef!
Preparing and Shaping Your Patties
The secret to authentic sliders lies in the portioning. He divides the ground beef into 12 portions, about two ounces each. This size falls perfectly within the traditional slider range of one and a half to two ounces per patty.
Step-by-step patty prep:
- Weigh for consistency – Use a kitchen scale to ensure each portion is exactly the same size
- Form loose balls – Gently shape the beef without packing it tight
- Keep them cold – Refrigerate the formed balls while prepping other ingredients
The loose formation is key here. Tightly packed beef becomes difficult to smash properly on the griddle. Those beautifully marbled beef balls will transform into perfect thin patties when smashed with the onions.
Grandma’s wisdom: Cold beef holds together better when you’re ready to smash it. Plus, it gives you time to get everything else ready without rushing.
Quick reference for portioning:
- Total beef needed: 1.5 pounds ground chuck
- Portions: 12 balls
- Weight per ball: 2 ounces
- Storage: Refrigerate until ready to cook
Getting Your Slider Ingredients Ready
Cutting Onions For Maximum Taste
He starts by tackling the onion prep, which can make or break these little beauties. A medium dice works best here – not too tiny where they’ll burn up in a flash, but not so chunky that they stay raw and crunchy.
The goal is to get them tender with just a bit of texture left. Think of how your favorite diner serves them – soft and golden, but still there to add that savory punch. If you’re one of those moms who tears up something fierce when chopping onions, try chilling them in the fridge for about 15 minutes first. It really helps!
Cutting Lettuce For That Perfect Crunch
Next comes the lettuce prep, and he swears by good old iceberg lettuce. Sure, it might not be the fanciest green in the produce aisle, but it’s absolutely perfect for sliders.
He removes the core and slices it super thin into shreds. This makes it so much easier to divide between all those little burgers instead of wrestling with big lettuce leaves. Plus, iceberg holds up like a champ – it won’t wilt when it meets those hot, juicy patties.
Why iceberg works best:
- Stays crispy longer
- Doesn’t get soggy easily
- Adds the perfect crunch
- Easy to portion out
Finding The Right Buns For Your Sliders
The bun choice is where things get really smart. He reaches for Hawaiian rolls because you can prep all the sliders at once instead of fussing with 12 individual buns. What a time-saver!
He uses a sharp serrated knife to cut across all the buns horizontally while keeping them connected. Then he butters the cut sides and toasts them on the griddle until they’re golden. This little step prevents the buns from getting soggy from all those delicious burger juices.
| Bun Prep Steps | Why It Matters |
|---|---|
| Cut while connected | Saves time and keeps them aligned |
| Butter the cut sides | Creates a barrier against moisture |
| Toast until golden | Adds flavor and structure |
The toasted buns become like little boats that can handle all the good stuff you’re about to pile on top. It’s one of those simple tricks that makes all the difference between a slider that holds together and one that falls apart in your hands.
Creating Your Flavor Foundation
Warming Those Buns Just Right
There’s something magical about a perfectly toasted bun that cradles your slider like a warm embrace. The chef starts with soft Hawaiian rolls, which are honestly a game-changer for busy moms since you can prep all twelve sliders at once instead of fussing with individual buns.
He slices through the entire sheet of connected rolls horizontally with a sharp serrated knife, keeping them all attached. A generous spread of butter goes on the cut sides before they hit the preheated griddle over medium heat.
Why this step matters:
- Creates a barrier against soggy bottoms
- Adds golden, toasty flavor
- Helps buns hold up under all those juicy toppings
Mom tip: If you don’t have Hawaiian rolls, any soft white dinner rolls work beautifully. Just buy the kind that come connected in a pack.
Adding the Perfect Spread
Building that bottom layer is where the magic begins, and it’s all about creating the right foundation for those juicy patties. The chef believes in a two-condiment approach that actually serves a purpose beyond just flavor.
The layering strategy:
- Mayo first – Acts like a creamy waterproof shield
- Yellow mustard next – Brings that tangy zip
He’s pretty firm about skipping the ketchup here, and honestly, after trying it his way, you’ll understand why. The mayo and mustard combo just hits different on a slider.
Grandma’s wisdom: That mayo barrier trick works on any sandwich where you’re worried about soggy bread. Remember that for school lunch prep!
Pickles With Serious Attitude
Those little dill pickle slices might seem like a small detail, but they’re doing big work in the flavor department. The chef uses pickles that are just the right size so each slider gets exactly one slice.
He lays them right over the mustard, making sure they’ll distribute evenly when the sliders get cut apart later. If your pickles are on the smaller side, don’t worry – just overlap them a bit.
What makes them special:
- Cuts through the richness of beef and cheese
- Adds that essential crunch factor
- Brings bright, tangy notes that wake up your taste buds
Mom hack: Keep a jar of good dill pickles in the fridge at all times. They rescue so many weeknight dinners when you need that extra pop of flavor.
Getting Your Greens Game Right
The final layer before those gorgeous patties arrive is shredded iceberg lettuce, and before you roll your eyes at iceberg, hear him out. He removes the core and slices it super thin, creating perfect shreds that distribute easily across all the sliders.
Why iceberg wins for sliders:
- Doesn’t wilt under heat like fancy greens
- Packs serious crunch that holds up
- Shreds distribute better than torn leaf pieces
- Kids actually eat it without complaining
The thin shreds nestle perfectly over the pickles, creating a fresh, crisp layer that balances all that rich, meaty goodness coming next. It’s not trying to be the star – just doing its job beautifully.
Family-friendly note: This is one vegetable even picky eaters tend to accept on burgers, so don’t overthink it with fancy lettuce varieties.
Mastering the Griddle: Creating Perfect Sliders
Making Sweet Golden Onions
The secret to amazing sliders starts with getting those onions just right. Heat up your griddle to medium and add a splash of canola oil. Spread the diced onions in an even layer about the same size as your bun sheet.
Cook them until they turn that beautiful golden color and start getting soft. This takes a few minutes, but it’s worth the wait. These onions become the flavor foundation for everything else.
The steam from cooking onions adds so much taste to the meat. Think of them as your burger’s best friend.
Pressing Patties for Perfect Texture
Here comes the fun part that makes sliders special. Take those loose beef balls and place them right on top of the cooked onions. Then comes the magic – smash them down into thin patties using your spatula.
Two spatulas work best for this job. They give you better leverage and make flipping easier later. Keep the patties close together and about the same size as your bun sheet.
Don't lose this article. Enter your email below, and I'll send it to you right now. Plus a little encouragement and inspiration from me, straight to your inbox.
Remember that meat shrinks while cooking. So don’t worry if they look a little big at first.
The smashing technique is what separates real sliders from mini burgers. It creates that classic thin, crispy-edged patty that people love.
Adding Flavor with Care
Right after smashing those patties, it’s time to season them. Sprinkle coarse salt and cracked black pepper over the top while they’re sizzling hot.
Essential seasonings:
- Coarse salt
- Fresh cracked pepper
The timing matters here. Season right after smashing so the flavors stick to the meat. You’ll see steam rising from the patties as they cook with the onions underneath.
This is where the onions and beef become one delicious combination. The meat juices mix with the onions to create amazing flavor.
Managing Heat for Even Results
Not all griddles cook the same way. Many have hot spots that cook faster in some areas than others. Keep an eye on how your patties are browning.
If your griddle cooks unevenly, rotate the patties during cooking. Use a long spatula to move the center row to the outside and slide the outside rows to the center.
Heat management tips:
| Problem | Solution |
|---|---|
| Hot spots in center | Rotate patties halfway through |
| Uneven browning | Move slower-cooking ones to hot spots |
| Too fast cooking | Lower heat slightly |
Watch for juices pooling on top and brown edges forming. That’s when it’s time to flip. Work quickly so all patties finish at the same time.
Once flipped, add the cheese right away. One slice covers two patties perfectly. The steam from the meat and onions will melt it beautifully without any extra work needed.
Final Steps for Perfect Bite-Sized Burgers
Turning and Adding Cheese at the Perfect Moment
Those little patties need just the right timing to turn out perfect. Watch for burger juices starting to pool on top and golden edges forming around the sides – that’s your signal to flip them over.
Using a long spatula makes this job so much easier. You can flip three sliders at once instead of wrestling with each tiny patty. If you don’t have a long spatula, work as quickly as possible to keep everything cooking evenly.
The cheese timing is crucial. As soon as all those patties are flipped, it’s time to add the cheese. One slice covers two burgers perfectly, so lay down a couple rows of cheese and let the magic happen.
The steam from all those burger juices and onions will melt that cheese beautifully. Just let them sit there and do their thing – no need to fuss with them.
Smart Spatula Techniques for Easy Pickup
Getting those sliders off the griddle takes a little finesse. The key is bringing all those caramelized onions along with each patty – that’s where so much of the flavor lives.
Use your spatula to scoop up generous portions of onions with each group of sliders. Don’t worry if they overlap slightly when you place them on the buns. It’s better to keep everything together than lose those precious onions.
Pro tip for moms: If your griddle has hot spots like many do, rotate those patties halfway through cooking. The center usually runs hotter than the edges, so moving them around ensures everything cooks evenly.
Building Sliders for Easy Family Serving
The beauty of using connected Hawaiian rolls shows here. You can build all twelve sliders at once instead of fussing with individual buns – a real time-saver when you’re feeding a crowd.
It’s perfectly fine if the sliders need to overlap a bit when you lay them down. Just make sure each patty has its own bun and everything fits snugly together.
Here’s the final step: Place that top bun layer over everything and use a sharp serrated knife to cut through into individual sliders. This keeps the buns from tearing and prevents all your toppings from sliding off.
| Assembly Order | Why It Matters |
|---|---|
| Bottom bun first | Creates stable base |
| Add hot patties | Melts cheese completely |
| Top bun last | Keeps everything together |
| Cut with serrated knife | Prevents tearing |
The result? Twelve perfectly messy, absolutely delicious sliders that’ll have your family asking for seconds. Don’t fight the mess – just grab some napkins and enjoy every juicy bite.
Sharing and Enjoying Your Perfect Sliders
Making Clean Cuts for Easy Serving
Once those beautiful sliders are built and ready, it’s time to separate them properly. He grabs a sharp serrated knife to cut through the connected buns. This step makes all the difference between neat, presentable sliders and a torn-up mess.
The key is using that serrated blade to slice down between each slider. This prevents the soft buns from tearing when you pull them apart. It also keeps all those tasty toppings from sliding off onto the counter.
Here’s what makes the cutting work so well:
- Sharp serrated knife cuts cleanly through soft bread
- Straight downward motion prevents dragging and tearing
- Individual portions come apart easily without mess
If ingredients overlap between sliders, the clean cut keeps everything in place. No more losing pickles or having cheese stick to the wrong burger. Each slider stays neat and ready to serve.
Pro tip: If you don’t have a serrated knife, a regular sharp knife works too. Just use a gentle sawing motion instead of pressing down hard.
Getting Comfortable with the Delicious Chaos
These sliders are meant to be messy, and that’s perfectly okay. He takes his first bite and immediately acknowledges the glorious mess that happens. The juices drip, the toppings shift, and it’s all part of the authentic slider experience.
Just embrace the mess. That’s his advice, and it’s good wisdom for any home cook serving these beauties.
The messiness comes from all the right places:
| Messy Element | Why It Happens | Why It’s Good |
|---|---|---|
| Burger juices | Steam and rendered fat | Keeps everything moist |
| Melted cheese | Heat from hot patties | Creates gooey goodness |
| Grilled onions | Cooked until soft | Adds sweet, savory flavor |
Don’t worry about perfect presentation. These sliders taste incredible, and the mess is proof you did everything right. Keep plenty of napkins handy and maybe serve them over plates.
The beauty of these sliders lies in their authentic, no-fuss nature. They’re sloppy, delicious, and absolutely worth every drip and drop that ends up on your fingers.
Tips, Tricks, And A Little Slider Wisdom
Making real sliders at home doesn’t have to feel scary. The chef shows us that these little beauties are all about technique, and once you get the hang of it, your family will be asking for them every weekend.
Getting Your Beef Ready
The secret starts with good ground beef – 80% lean ground chuck works perfectly. He divides his meat into 12 small balls, about two ounces each. Here’s a mom tip: if you don’t have a kitchen scale, think about the size of a ping pong ball.
Keep those beef balls loose when you form them. Pack them too tight and they won’t smash properly on the griddle. Pop them in the fridge while you prep everything else – cold beef holds together better.
Prepping Like a Pro
The onion gets diced medium-sized. Too small and they burn, too big and they stay raw. Nobody wants crunchy onions in their slider!
For the lettuce, he swears by iceberg because it stays crispy and doesn’t get soggy. Shred it thin so it’s easy to divide between all those little buns.
The Bun Game
Hawaiian rolls are perfect for this job. You can build everything at once, then cut them apart at the end. Smart, right? He slices the whole sheet of rolls in half, butters them, and toasts them golden. This step keeps the buns from turning into mush when all those burger juices hit them.
Building Your Base
Before the beef even hits the griddle, he builds the bottom layer:
- Mayo first – acts like a waterproof barrier
- Yellow mustard – adds that classic tang
- Dill pickles – one per slider does the trick
- Shredded lettuce – for that perfect crunch
Having everything ready makes the final assembly so much easier when those hot burgers come off the griddle.
The Magic Happens
Here’s where it gets fun. He starts the onions in a little canola oil, cooking them in a rectangle about the size of the bun sheet. When they start turning golden and soft, it’s beef time.
The traditional slider technique is all about the smash. He places those beef balls right on top of the onions and smashes them flat with two spatulas. The steam from the onions cooks the beef while the beef fat flavors the onions. It’s a beautiful thing.
Hot Spots and Flipping
Most griddles have hot spots, so he rotates the patties halfway through cooking. When you see juices pooling on top and the edges getting color, it’s time to flip.
Cheese goes on immediately after flipping – one slice covers two patties perfectly. The steam melts everything together like magic.
Finishing Strong
When scooping up the finished sliders, he makes sure to grab plenty of those flavor-packed onions. The sliders might overlap a bit on the buns, and that’s totally fine.
Once the top buns are on, a sharp serrated knife cuts through everything cleanly. No torn buns, no ingredients falling everywhere.
The chef reminds us that these sliders are meant to be messy. Sometimes the best food requires a few extra napkins, and that’s perfectly okay. Your family will be too busy enjoying every bite to worry about neat eating anyway.