If you’re looking for a simple, fun project that you and your kids can do on a sunny summer day, why not try rock painting? Painted rocks look great as décor for your garden or decking, or you can bring them indoors and use them to brighten up your home.
You can make this project as challenging or as easy as you want. Just follow the instructions in our emoji rock painting tutorial to create an impressive array of decorative artwork that’s guaranteed to impress your friends and family and delight your kids!
We’ve divided our tutorial into five separate projects, starting with the easiest. Just pick your favorites or work through them in order of difficulty.
Our Emoji Rock Painting Tutorial is based on this YouTube video by Sarah Johnson of Pugdemonium.
Table of Contents
What you’ll need
- Smooth rocks
- Acrylic paint (various colors)
- Paint brushes of different sizes
- Soft pencil
- Clear glaze
You can find rocks anywhere from on the beach, in your backyard, or even by the side of the road. Each time you go for a walk with your kids, challenge them to find some smooth rocks that they can later use for this project. Alternatively, you can buy pebbles and cobbles in most garden centers.
Before you begin any of these projects, wash the rocks with warm, soapy water to get rid of any dirt, and then allow them to dry before you paint them.
Everything else you need for rock painting you’ll find in your local craft store or online at the links we’ve included for you above.
PROJECT 1 – EMOJIS
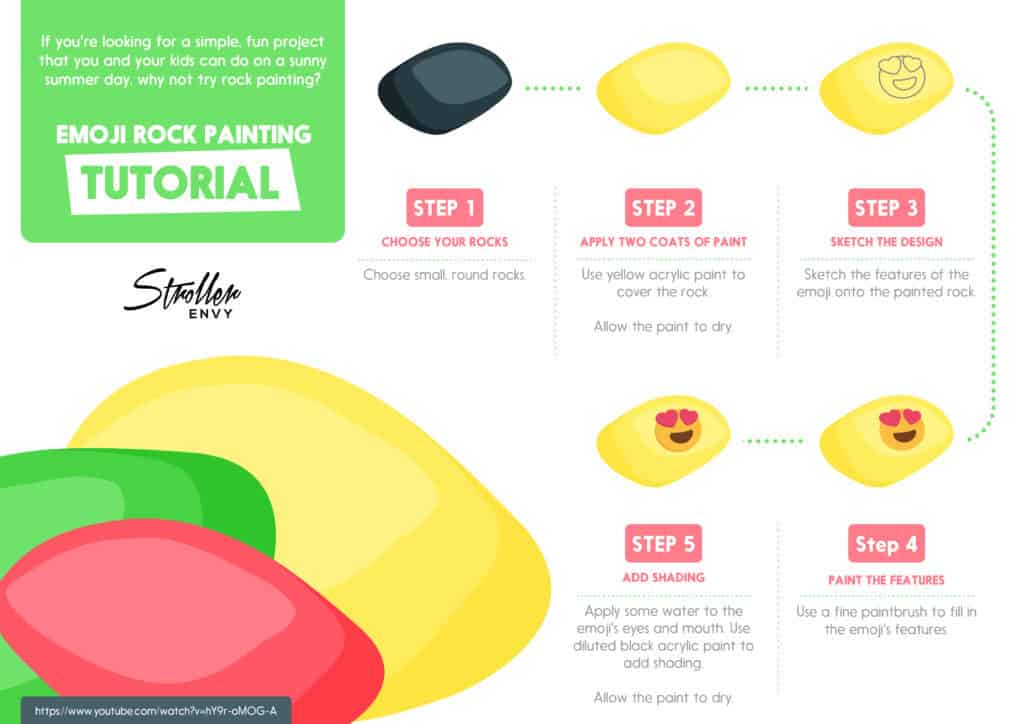
Step 1: Choose your rocks
For this project, you’ll need small, smooth round rocks that you’re going to make into emojis.
Step 2: Apply two coats of paint
Using yellow acrylic paint, apply two coats to cover the rock entirely.
Allow the paint to dry completely.
Step 3: Sketch the design
Using your pencil, sketch the features of the emoji onto the painted rock. In the video, Sarah has used heart-shaped eyes that look super-cute!
Step 4: Paint the features of the emoji
Now, take a fine paintbrush and fill-in the emoji’s features that you sketched onto the rock. If you chose hearts, use red paint.
Use brown paint to fill in the emoji’s smiley mouth.
Step 5: Add shading
Using a clean paintbrush, apply some water to the emoji’s eyes and mouth. Now, using black acrylic paint, add shading to the emoji’s features.
Allow the paint to dry.
If you want to, you could add more shading to the rest of the emoji rock by wetting the outer edges and using a darker yellow paint to add shading.
Here are details on the other fun rock painting ideas from the video:
PROJECT 2 – FLIP-FLOPS
Step 1: Choose your rocks
First of all, choose two rocks that are similar in size and shape. You’re making flip-flops, so be sure to select oval-shaped stones.
Step 2: Apply the first coat of paint
Now, take a broad brush and apply a coat of turquoise acrylic paint to the rock until it’s completely coated.
Allow the paint to dry.
Step 3: Sketch your design
Using a soft pencil, sketch the shape of the flip-flop straps onto the painted rock.
Step 4: Paint the flip-flop straps
Now, take some purple acrylic paint and fill in the flip-flop straps you sketched on the rocks. You might need to use two coats of paint so that the undercoat doesn’t show through.
Step 5: Add a shading effect
To make your flip-flop design more realistic, you’re now going to add some shading.
Take a paintbrush and apply some clean water to the area underneath the flip-flop straps and around the heel of the rock “foot.”
Using a little dark blue paint, gradually add shading to the wetted area on the rock.
If you want to, you can repeat the process around the top part of the rock to add more shading.
Allow the paint to dry, and you’re done!
PROJECT 3 – WATERMELON
Step 1: Choose your rock
For this project, you’ll need a triangular shaped rock that can be made to look like a slice of watermelon.
Step 2: Paint the background
Take a triangular-shaped rock, and paint it using dark pink acrylic paint. Paint all over the rock, except for the bottom edge.
Step 3: Add shading
While the pink paint is still wet, take some white paint and dab it around to add more color dimension to the rock. Repeat the process with some red paint.
A useful tip is to take a look at a slice of watermelon as you work so that you can see where the color shading needs to be.
Step 4: Paint the watermelon skin
Now, take some white paint and paint the area around the bottom of the rock that you left empty. Next, you need to blend the white paint edge carefully into the pink area so that it looks more natural.
Next, add some pale green paint to the bottom of the rock, being careful to blend it into the white. Add some dabs of dark green paint to the pale green.
Add some dark green paint to the lower edge of the rock. Now, add a little light green to the dark green in some areas and blend it in carefully to create the look of the watermelon’s skin.
Step 5: Finishing touches – add the seeds
Finally, add some seeds to the watermelon slice, using black paint. If you want to, you can sketch these first, using your pencil.
PROJECT 4 – HOTDOG
Step 1: Choose your rocks
For this project, you’ll need a hotdog-shaped rock!
Step 2: Paint the hotdog bun
Using a mix of white and yellow acrylic paint, cover the sides of the rock so that it looks like a hotdog bun. Keep adding paint until it turns opaque and the rock isn’t showing through.
Allow the paint to dry.
Step 3: Paint the hotdog
Now, take a paint that’s the same color as a hotdog, and use it to fill in the blank area between the bun edges.
Step 4: Finish painting the hotdog bun
Now take a little brown paint and mix it with water. Using the same technique as you did for painting the flip-flop rock, use the diluted brown paint and dab it over the hotdog bun.
Step 5: Add shading to the hotdog
Using dark pink paint and applying the same technique as you just did for the bun, add shading to the hotdog.
Allow the paint to dry.
Step 6: Add mustard and ketchup!
Take some yellow acrylic paint and add a line of mustard to the top of the hotdog.
Finally, use some red paint to create a line of ketchup underneath the mustard.
PROJECT 5 – BUTTERFLY
Step 1: Choose your rock
For this project, you can use smooth rocks of any shape you like, although oval-shaped works well.
Step 2: Sketch a butterfly
The idea of this artwork is to create a realistic-looking butterfly, sitting on a natural rock.
Begin by using a soft pencil and sketch a butterfly onto the rock.
Add a line of shadow around the edge of the butterfly so that it looks like it’s sitting on the rock.
Step 3: Add shading
Now, take some heavily-diluted black paint and fill in the sketched shadow areas. Ideally, you should be able to see some of the natural rock color showing through the paint.
Step 4: Paint the butterfly
Next, use some brown paint to fill-in the sketched butterfly.
Allow the paint to dry completely.
Step 5: Add more detail to the butterfly’s wings
Using white paint, add white spots and markings to the butterfly’s wings. It can be helpful to refer to a picture of a butterfly so that your creation looks more realistic.
Step 6: Finishing touches
Finally, take some black paint and a fine brush and add a body and antennae to the butterfly. You can also use black paint to add veins to the butterfly’s wings.
AND FINALLY …
To finish off your projects, add a coat of clear glaze to each rock. That will protect your handiwork from damage and is especially important if you’re going to put your painted rock artwork outside.
Now you have a display of hand-painted, novelty rocks to display in your garden or home! Great job!
We brought you this project courtesy of Sarah Johnson of Pugdemonium. If you’d like to watch Sarah’s instructional video, just click this link.


