

Creating art isn’t just for the professionals. With the innovative tissue paper painting technique, anyone can make stunning, colorful artwork easily. Dubbed bleeding tissue paper art or tissue paper transfer art, this method offers a dynamic and engaging way to experiment with colors and patterns. Inspired by a YouTube video from S&S Worldwide and enhanced by ideas from The Imagination Tree, this article will guide you through the mesmerizing world of tissue paper painting.
Don't lose this article. Enter your email below, and I'll send it to you right now. Plus a little encouragement and inspiration from me, straight to your inbox.
What You Need
Before we get into the nitty-gritty, here are the essential materials you’ll need for this activity:
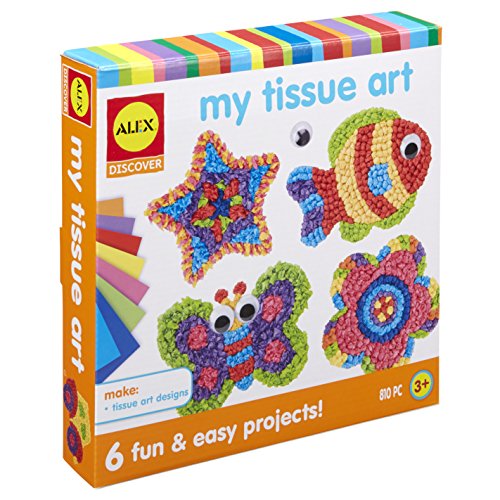
ALEX Toys Tissue Art Kids Craft Kit
Check Price- Tissue paper squares
- Watercolor panels
- Water
- Spray bottle or paintbrush
If you want to skip the hassle of gathering these supplies individually, S&S Worldwide has you covered with their Tissue Paper Painting Easy Pack. This convenient kit includes everything you need to create at least 36 pieces of art, making it perfect for classrooms, group activities, or family projects.
The S&S Worldwide Easy Pack Includes:
- 5” x 7” watercolor paper panels
- 2500 pre-cut bleeding art tissue squares in 25 assorted colors
- 3 spray bottles
- White crayons for creating resist patterns
- An idea guide
Step-by-Step Guide to Tissue Paper Painting
Let’s break down the process of creating your stunning tissue paper art:
1. Drawing with Crayon Resist
Start by drawing a design on your watercolor panel using a white crayon. You can doodle anything from patterns to inspirational words. “Because you are drawing white on white, your drawing won’t be visible until the final step,” mentions the S&S Worldwide video. This step adds an element of surprise to your artwork, revealing the hidden design once the tissue paper is removed.
2. Pre-Wet the Watercolor Panel
Use a spray bottle or a paintbrush to lightly wet the entire surface of the watercolor panel. This initial layer of water will help the tissue paper adhere better and start the color-bleeding process.
3. Apply the Tissue Paper Squares
Place the tissue paper squares randomly or in a planned arrangement on the pre-wet panel. Feel free to experiment with colors and patterns. “We recommend spraying or painting some more water over the squares to accelerate the color ‘bleeding’,” says the video tutorial from S&S Worldwide. Ensure the squares are fully saturated with water for the best results.
4. Let It Dry
Allow the watercolor panel to dry completely. This may take a few hours, so patience is key. As the water dries, the vibrant colors from the tissue paper will transfer onto the panel.
5. Reveal Your Artwork
Once the panel is thoroughly dry, carefully remove the tissue paper squares. The colors will have transferred to the watercolor panel, unveiling your hidden crayon design beneath. Voila! You have a beautiful, multi-colored masterpiece.
Important Note: The dye from the tissue paper can stain hands and surfaces, so it’s advisable to take protective measures.
Don't lose this article. Enter your email below, and I'll send it to you right now. Plus a little encouragement and inspiration from me, straight to your inbox.
DIY Tips and Additional Projects
The fun doesn’t stop with just one project. The pre-cut tissue painting squares can be used in various other creative ways. You can apply them to heavy paper, cardstock, or even canvas sheets. “Simply pre-wet your surface, then apply the paper squares and watch as the color bleeds through!” suggests Crafty Kate, the craft expert from S&S Worldwide.
Here are a few additional ideas to get your creative juices flowing:
Gold Resist Prints
Combine the tissue paper squares with gold resist prints, as demonstrated by Crafty Kate. The gold lettering remains visible, adding a touch of elegance to your colorful project.
Gift Cards and Shapes
Once the artwork is dry, cut it into different shapes like hearts, stars, or flowers. These pieces can be glued onto blank cards to create unique, handmade greeting cards that are perfect for any occasion.
Frame Your Art
Iron the finished artwork on a low heat setting with a tea towel or dish cloth over it, then frame it. This makes for a personal and vibrant piece of home decor or a thoughtful gift.
The Magic of Process-Focused Art
Tissue paper painting isn’t just about the final product; it’s an engaging activity that fosters creativity and fine motor skills. As The Imagination Tree points out, “It is easily achievable even for the littlest hands, creates beautiful process-focused artwork, and has many options for extension and progression.”
Engage your children in this activity, encouraging them to overlap colors and cover the entire sheet. Watch their faces light up in awe as the colors bleed and mix. It’s more than an art project; it’s a hands-on learning experience in color theory and creativity.
Final Thoughts
Tissue paper painting is an excellent way to dive into art without needing a lot of materials or advanced skills. With a few simple supplies and some creativity, you can create stunning, colorful artwork that will impress and inspire.
Ready to start your colorful adventure? Check out the S&S Worldwide Tissue Paper Painting Easy Pack and let your creativity flow!